
-
On the Principal SQL Server, open SMSS, right-click the database from the Object Explorer, select Tasks then select Backup Database Window appears. Now select appropriate database from the Source drop-down menu
-
Select Full from the Backup Type drop-down menu
-
Select the Backup File Path. Then Save with <file-name>.bak extension, click OK
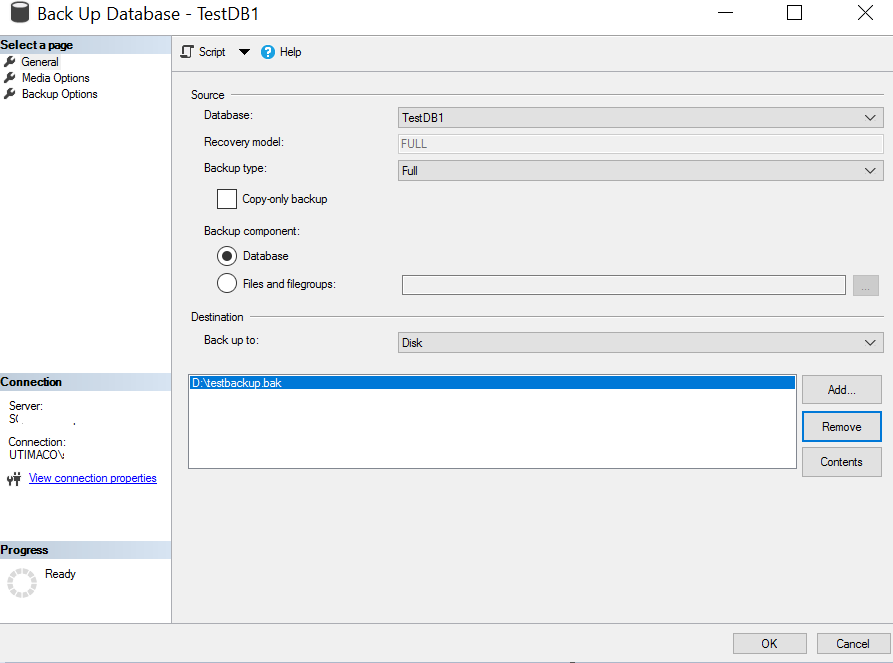
Figure 6: Back Up Database window
-
Similarly, select the same database. Right-Click and select Tasks and then select Restore Database
-
Select Transactional Log from the Backup Type drop-down menu
-
Select the Backup File Path then Save with <file-name>.trn extension , click OK
-
Now, copy the Backup files to the Mirror SQL Server. Restore the database on the Mirror SQL Server
-
On the Mirror SQL Server, open SMSS, Right-Click on the Database and select Restore Database
-
Select the Device radio button and select the new created Backup Files
-
Select the Options and select the RESTORE with NO RECOVERY from the Recovery State drop-down menu, click OK
This will restore the database from the Principal SQL Server to the Mirror SQL Server.
-
On the Principal SQL Server, select the same database. Right-Click and select Tasks and then select Mirror Database
-
Configure Database Mirroring Security wizard appears. Click Next for another two wizards
-
Select Witness Server checkbox
-
Now Click Next on the Principal SQL Server wizard
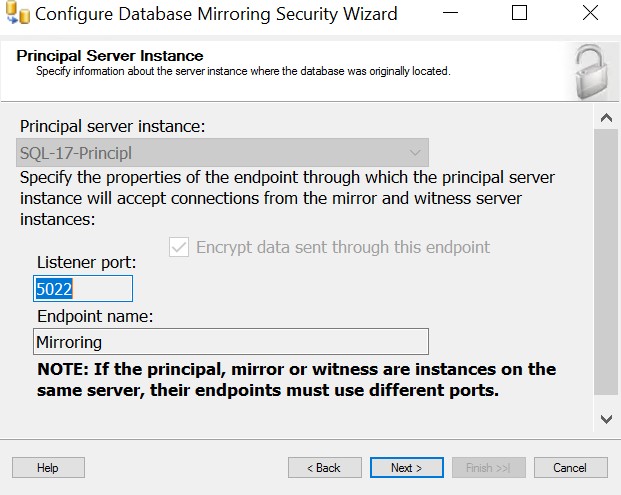
Figure 7: Configuring Database Mirroring Security Wizard
-
Select the Mirror server instance from the drop-down menu, click Connect and click Next
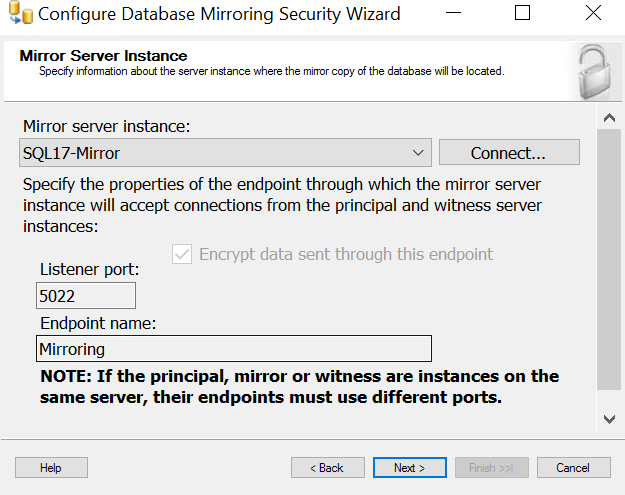
Figure 8: Configuring Database Mirroring Security Wizard
-
Select the Witness server instance from the drop-down menu, click Connect and click Next
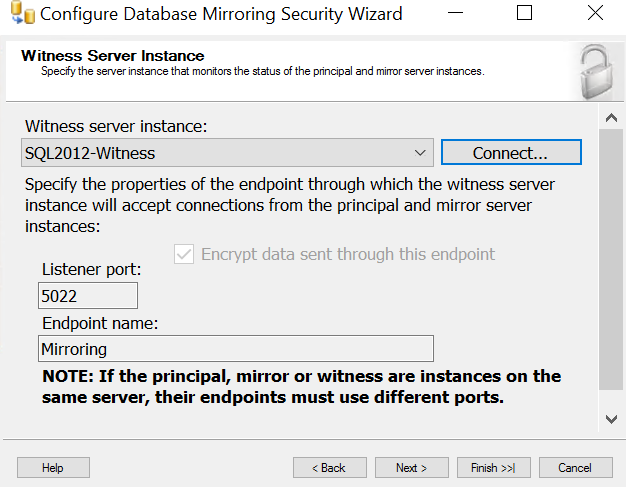
Figure 9: Configuring Database Mirroring Security Wizard
-
Enter the Domain Admin Account for Principal, Witness and Mirror Instance. Click Next
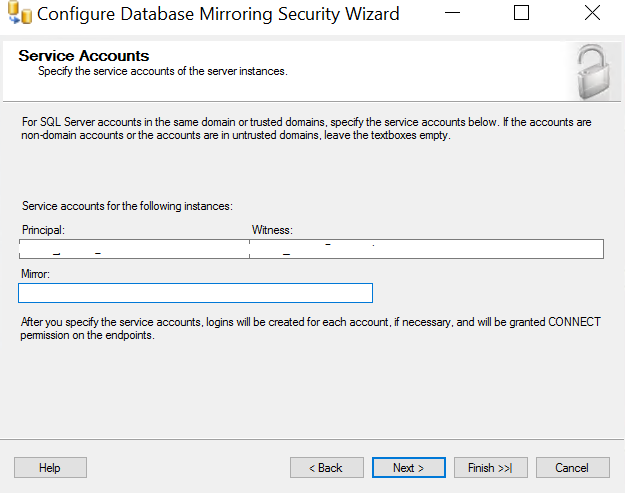
Figure 10: Configuring Database Mirroring Security Wizard
-
Verify the details, click Finish
-
Database Properties pop-up appears, select Start Mirroring
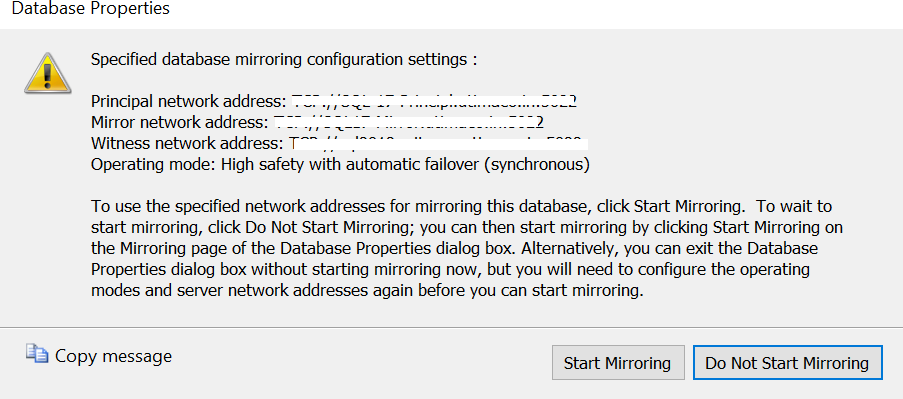
Figure 11: Database Properties Wizard
-
This might take few seconds, once done the below shown window is seen
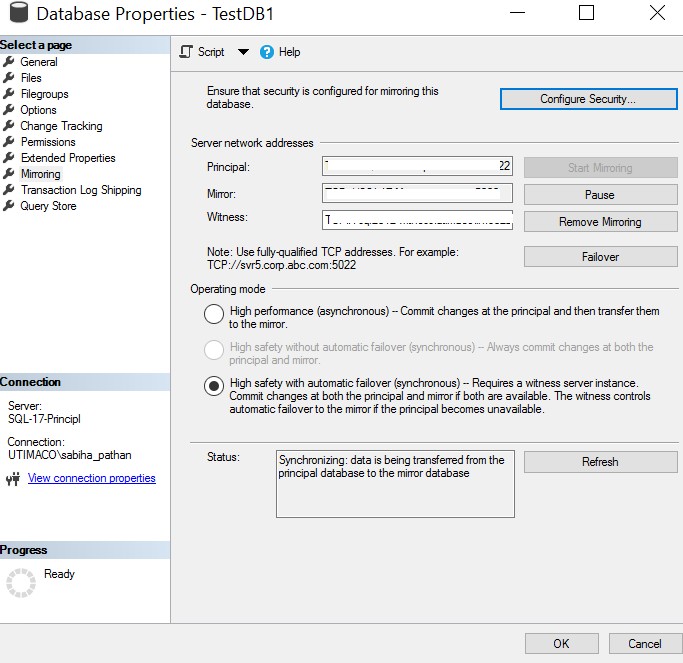
Figure 12: Database Properties Wizard
-
On the Principal SQL Server expand the Databases and Locate the appropriate database, which shows Principal, Synchronizing after its name
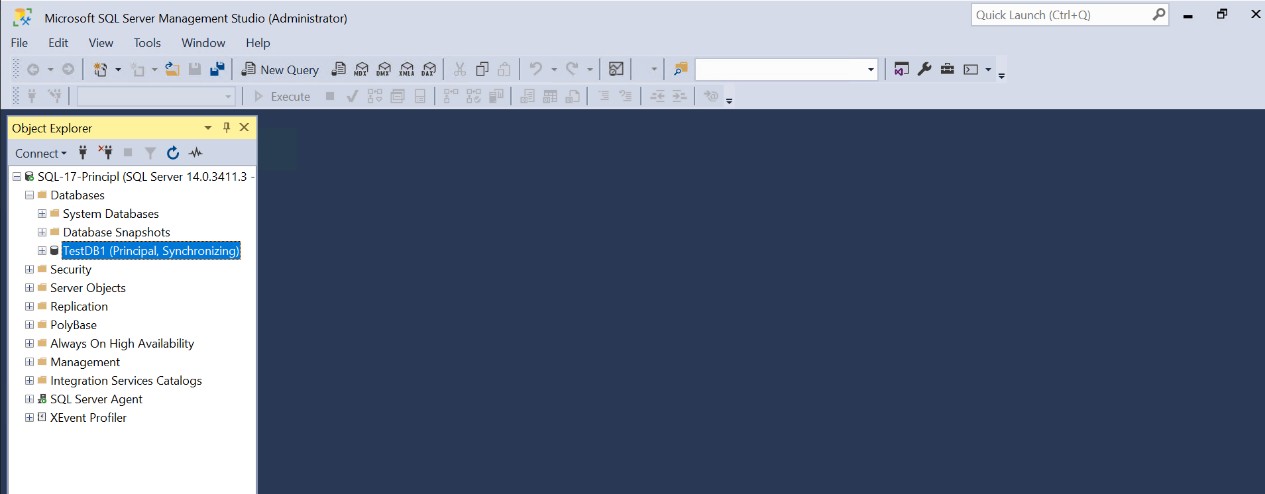
Figure 13: Database Properties Wizard
-
Similarly, on Mirror SQL Server expand the Databases and Locate the appropriate database, which shows Mirror, Synchronized/Restoring after its name
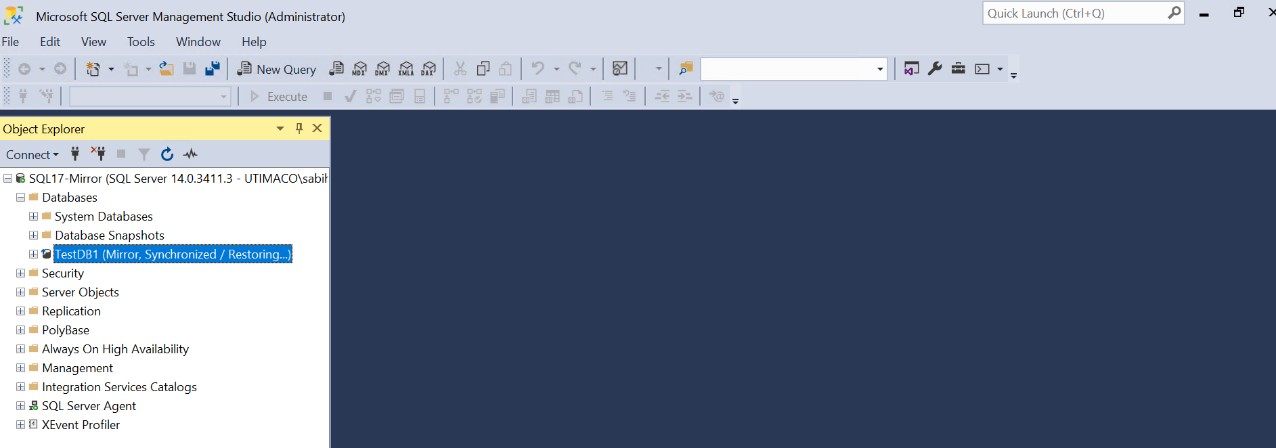
Figure 14: Database Properties Wizard