
The steps to create the HSM connector, are shown below
-
Open the Venafi Configuration Console, then click on Connectors from the left pane
-
Click on the Create HSM Connector in the Actions pane
-
Enter the administration credentials for Venafi Trust Protection Platform, click OK
-
Enter the Name for connector, Set the Cryptoki Dll Path as -
C:\Program Files\Utimaco\SecurityServer\Lib\cs_pkcs11_R3.dll, Select the Slot from dropdown list and, enter the User Type and Pin details from the Create new HSM Connector for Utimaco HSM, then Click Verify
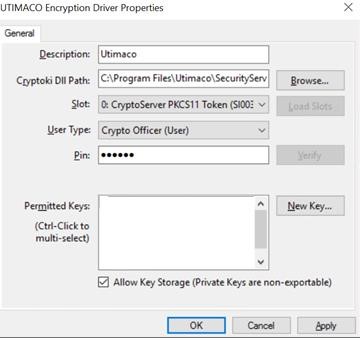
Figure 1: Create HSM Connector Window
-
Check the Allow Key Storage check box then click, Apply and OK
-
Now, under the Platform Connectors pane verify that the HSM connector appears