
-
Login to DD System Manager using the admin credentials.
-
Go to DD3300 > Protocols > CIFS and verify that the certificate folder is enabled.
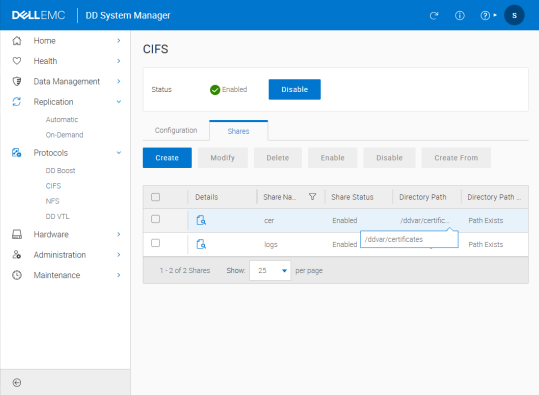
DD System Manager
-
After enabling CIFS setup, you can access the certificate folder from Windows using the configured CIFS credentials.
-
Path:
\\<ipaddress>\cer -
Username: sysadmin
-
Password: xxxxxxxxx
-
Log in to the DD3300 console using an SSH tool to create the certificate request file. The DD3300 (KMIP Client) will use this certificate later.
-
Generate a host certificate signing request (CSR) Format by using the below command.
adminaccess certificate cert-signing-request generate [key-strength {1024bit | 2048bit | 3072bit | 4096bit}] [country country-code] [state state] [city city] [orgname organization-name] [org-unit organization-unit] [common-name commonname] [subject-alt-name value]
-
After entering the command, the generated request file (.csr) can be found at the
\\<ipaddress>\cerpath. -
After obtaining the generated .csr file and having it signed by ESKM (refer to the Sign the host certificate using ESKM chapter and complete all related steps before performing this step), place the signed certificate file in PEM format into the DD3300 certificate directory. Once the file is placed, run the appropriate command in the DD3300 console to import and apply it as the DD3300 Host CA.
Import the host certificate & CA to the Data Domain System
The authentication method varies depending on the application type. When integrating with ESKM, select GKLM for the Import CA application type.
-
Run the
adminaccess certificate importcommand on the DD system to import the host certificate.
adminaccess certificate import host application gklm file signed.pem
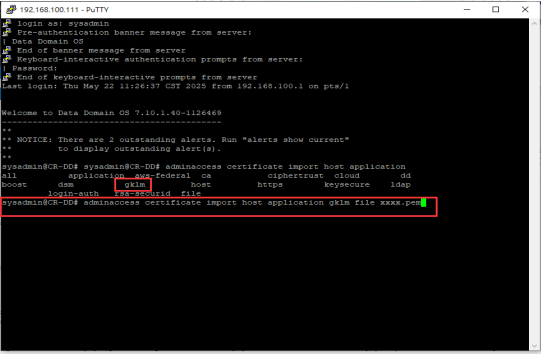
Import the host application GKLM file
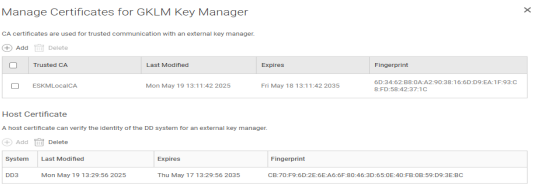
Manage Certificates
-
Go to Security > Local CAs, download the ESKM (KMIP Server) Local CA, and then import it into the DD3300 (KMIP Client) to establish trust.
-
Since DD3300 only accepts .pem format, the .crt certificate file downloaded from ESKM can be converted via OpenSSL.
-
After opening the command prompt, navigate to the file directory and run the following command:
openssl x509 -in DD3signed.crt -out DD3signed.pem -
Place the ESKM Local CA into the DD3300 certificate folder, then enter the command and complete the import of ESKM CA.
adminaccess certificate import ca application gklm file xxxx.pem -
Go to DD3300 Web GUI > Data Management > File System > DD Encryption.
-
Enable encryption and connect key management.

DD Encryption and Key Management
-
Go to Key Management > Settings. Input relevant information to complete the integration with ESKM (KMIP Server).

Change Key Manager
When integrating with ESKM, select GKLM as the application type.
-
After selecting the application type, click Manage Certificates to confirm whether the certificate previously imported in the Console command is successfully displayed.
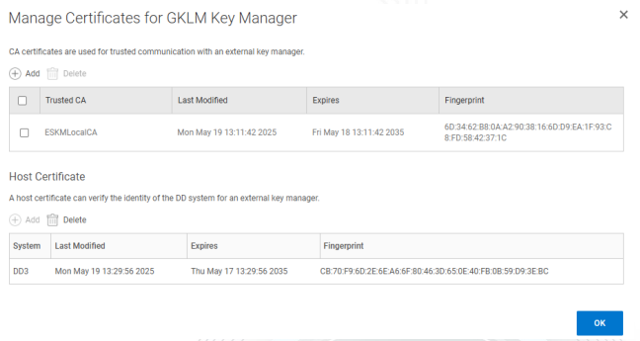
Manage Certificates for GKLM Key Manager
-
If DD3300 (KMIP Client) and ESKM (KMIP Server) are successfully integrated, the interface will display the key management (ESKM) information, and the KMIP key activation status will be visible.
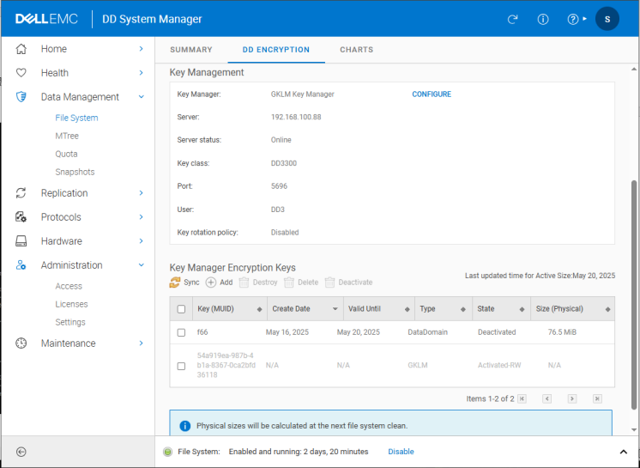
DD Encryption
-
Enter the relevant commands in the DD3300 console to verify again that the KMIP integration is successful and that the KMIP key is activated.
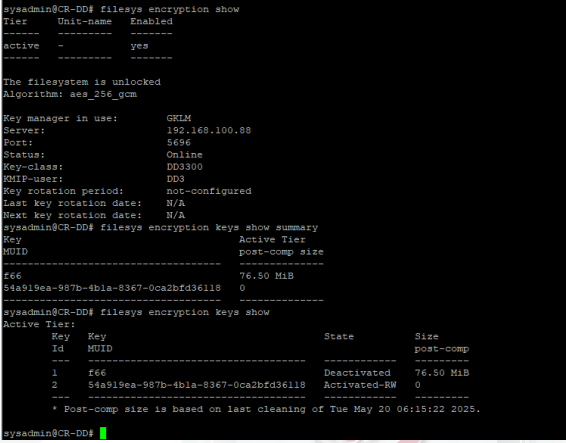
KMIP Key Activation Status