
-
Key creation
-
Create an AES 256 key using pykmip. The below steps are used for key creation.
$ cd ~/pykmip/
$ python3.9 ./kmip/demos/pie/create.py -a AES -l 256
Linux server: key creation command execution -
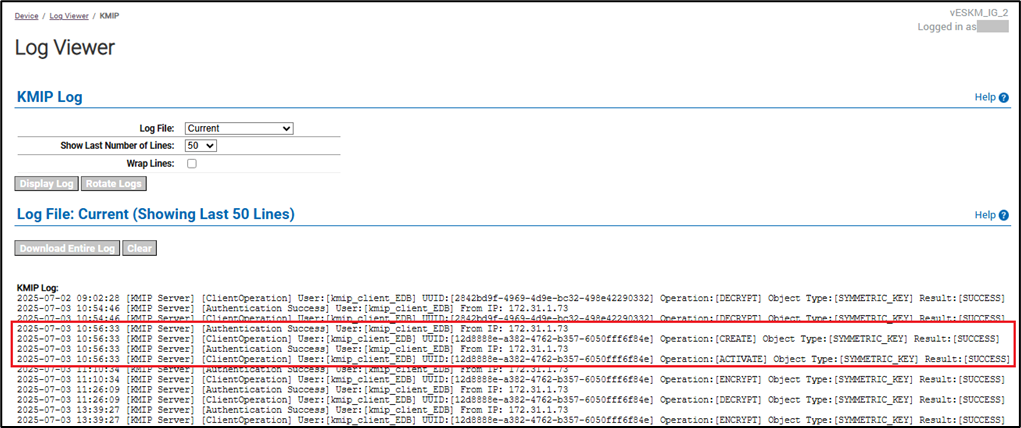
Verify the created logs in ESKM. For the steps to verify ESKM logs, see Log location and interpretation.
-
-
Verify encryption using the created key.
Encrypt the string utimaco using the created key and store the cipher in$HOME/test.bin.
printf utimaco | python3.9 /usr/edb/kmip/client/edb_tde_kmip_client.py \
encrypt \
--out-file=$HOME/test.bin \
--pykmip-config-file=/etc/pykmip/pykmip.conf \
--key-uid='12d8888e-a382-4762-b357-6050fff6f84e' \
--variant=pykmip -
Verify decryption with the same key.
Decrypt the cipher in$HOME/test.binusing the same key.
python3.9 /usr/edb/kmip/client/edb_tde_kmip_client.py decrypt \
--in-file=$HOME/test.bin \
--pykmip-config-file=/etc/pykmip/pykmip.conf \
--key-uid='12d8888e-a382-4762-b357-6050fff6f84e' \
--variant=pykmip
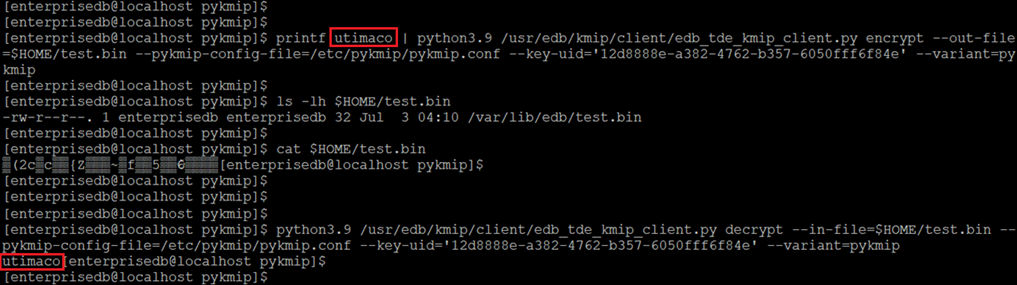
Linux server: verifying encryption and decryption of a string