To configure the vHSM, you need to set up vHSM first. Outside of development mode, vHSM servers are configured using a persistent storage method. For more information about the configuration parameters, see vHSM configuration.
Create a '/etc/vhsm/config' file and add the following contents:
# Configure Seal with Utimaco u.trust GP HSM

seal "pkcs11" {

  lib = "/opt/utimaco/lib/libcs_pkcs11_R3.so"

  slot = "<slot_no.>"

  pin = "<slot_PIN>"

  key_label = "hsm_demo"

  hmac_key_label = "demo"

  generate_key = "true"

  r3_config = "/opt/utimaco/cs_pkcs11_r3.cfg"

}

ui = true

disable_mlock = true

# Configure the storage backend

storage "file" {

  path = "/etc/vhsm/data"

}

listener "tcp" {

  address = "0.0.0.0:8200"

  tls_disable = true

}
Update <slot_no.> and <slot_PIN> according to your setup in section Create SO User and Initialize a Slot.
-
Start the enclave vHSM server to run with Utimaco u.trust GP HSM and mount the cs_pkcs11_r3.cfg file to the Docker container.
›_ Console
# docker run --cap-add=IPC_LOCK -p 8200:8200 \   -e ENCLAIVE_LICENCE=$ENCLAIVE_LICENCE \   -v /opt/utimaco/cs_pkcs11_r3.cfg:/opt/utimaco/cs_pkcs11_r3.cfg \   -v /path/to/your/local/config:/etc/vhsm/config \   harbor.enclaive.cloud/vhsm/vhsm-utimaco:latest \

  server -config /etc/vhsm/config
-
Set the environment variable.
›_ Console
# export VAULT_ADDR='0.0.0.0:8200'
-
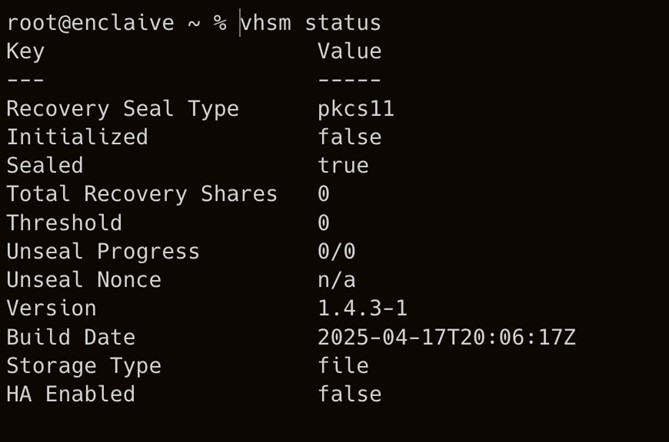
Check the status of vHSM server.
›_ Console
# vhsm status
-
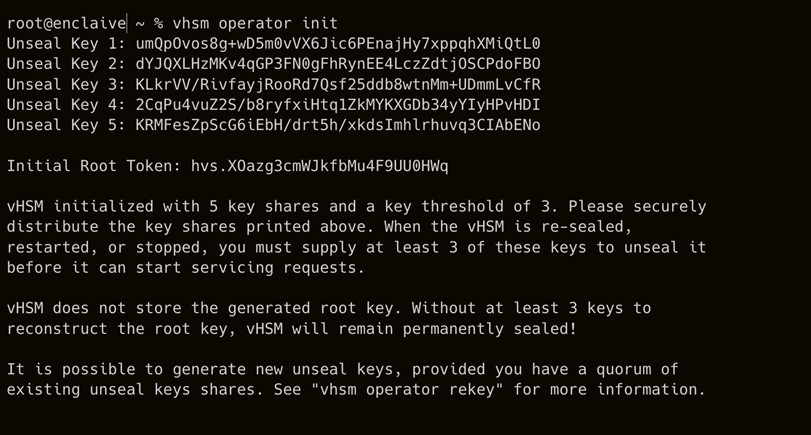
Initialize vHSM to use the HSM initial token value.
›_ Console
# vhsm operator init
-
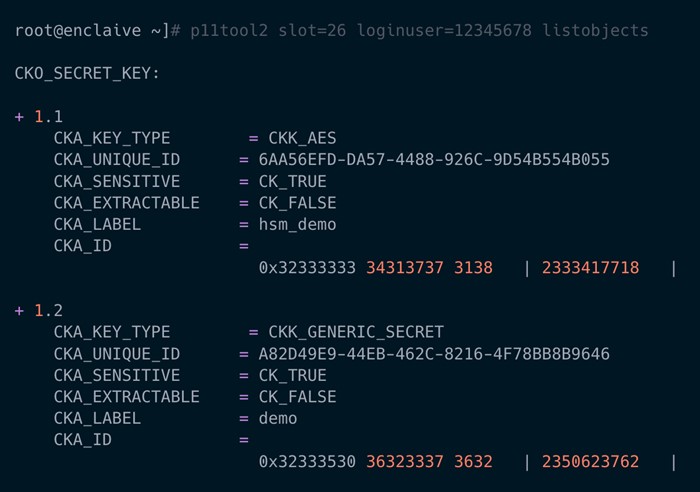
Verify that the keys got generated into the HSM.
›_ Console
# p11tool2 slot=<slot_no.> loginuser=<slot_PIN> listobjects
-
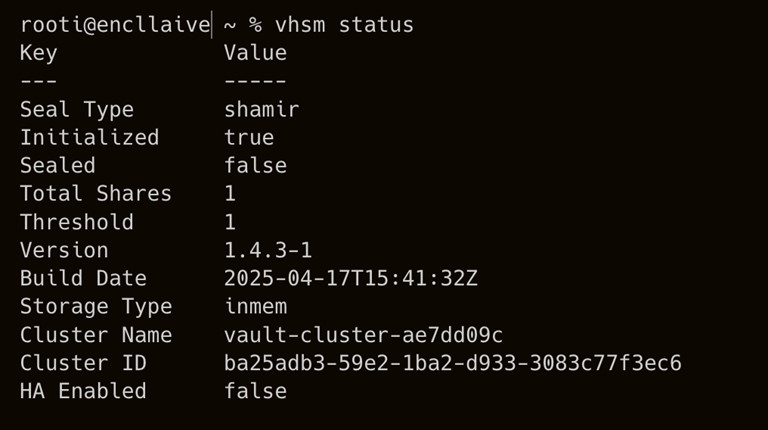
Check the status of vHSM again to verify that it is initialized and unsealed.
›_ Console
# vhsm status