

Configuration on ESKM
This section describes the configuration required on ESKM to establish communication with Azure Key Vault Managed HSM External Key Management (EKM). The configuration includes:
-
Import the Server Certificate.
-
Add the Client Certificate CA as Known CA.
-
Advanced REST Settings.
-
Create Cloud Instance.
-
Create Key.
Import the Server Certificate
This certificate serves as the server certificate for accessing the ESKM. The certificate must be a valid SSL server certificate.
Perform the following steps:
-
Go to ESKM Management Console.
-
Go to the Security tab and in the Certificates & CA, click Certificates.
-
In the Import Certificate section, select Upload from browser and Choose File.
-
Enter the Certificate Name and Private Key Password.
-
Click Import Certificate.
.png?cb=f364f330d690da49cc05e8838fec796b)
Make a note of the Certificate Authority (CA) certificate that issued the server SSL certificate. The CA certificate will be required later when configuring the Root CA Certificates in Azure Managed HSM External Key Management.
Add the Client Certificate CA as Known CA
-
Go to ESKM Management Console.
-
Go to the Security tab and in the Certificates & CA, click Known CAs.
-
In the Install CA Certificate section, enter Certificate Name and Certificate.
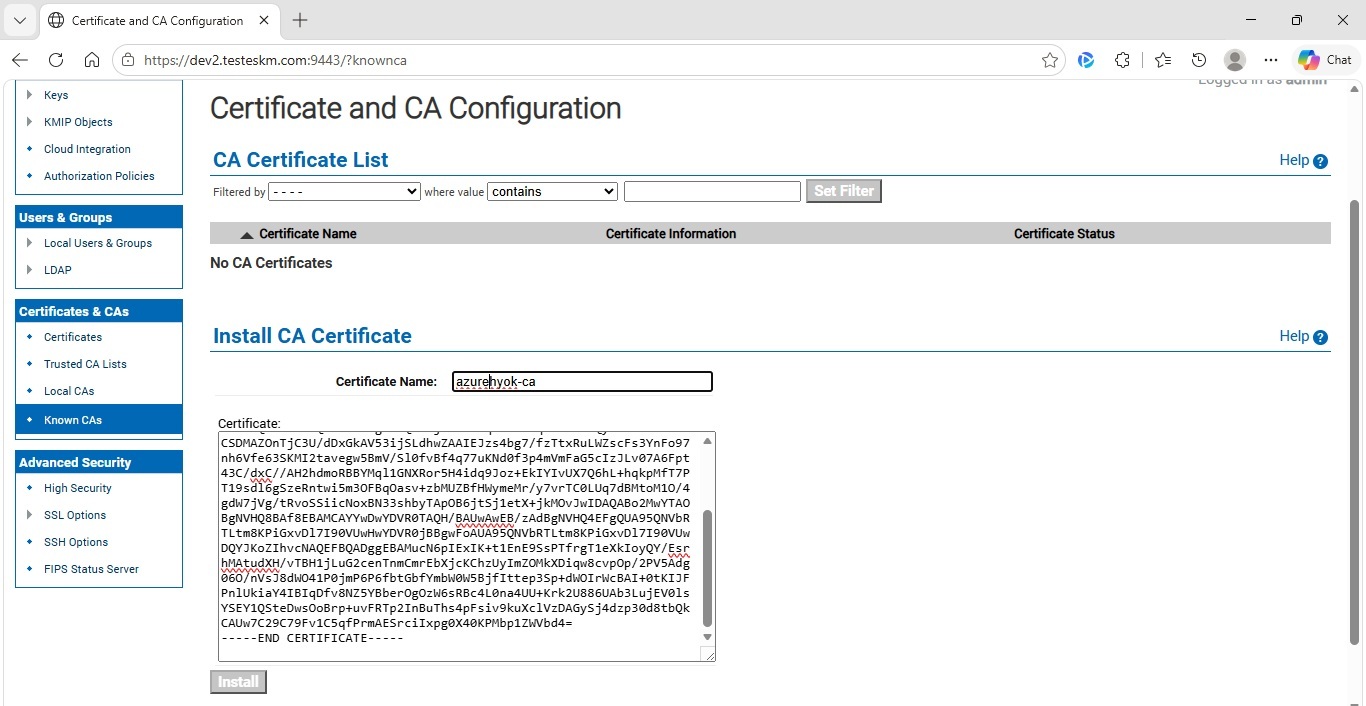
Install CA Certificate
-
Click Install. The CA Certificate is create under CA Certificate List.
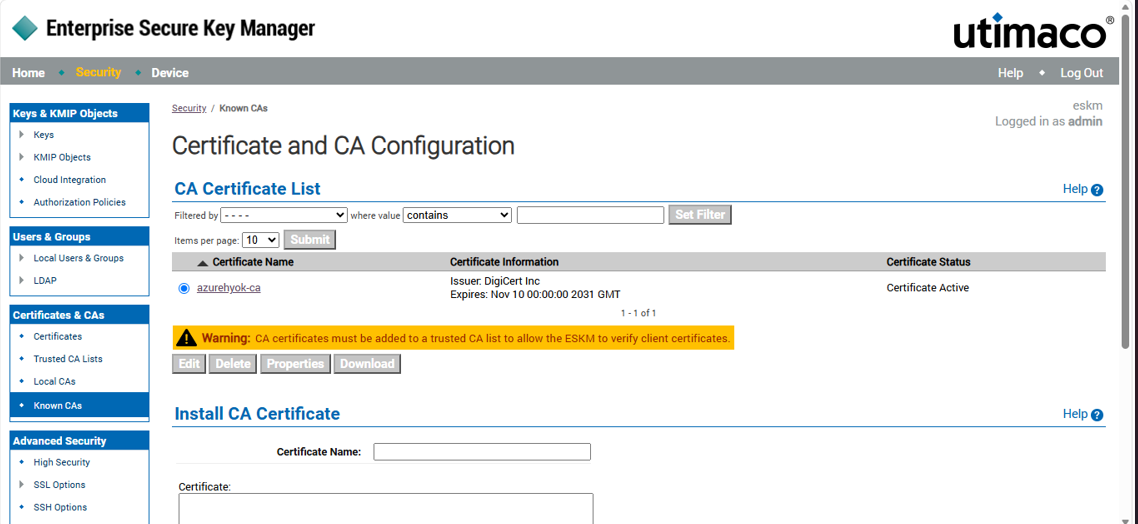
CA Certificate List
Advanced REST Settings
-
Go to Device > Rest Server > Advanced REST Settings. Click Edit.
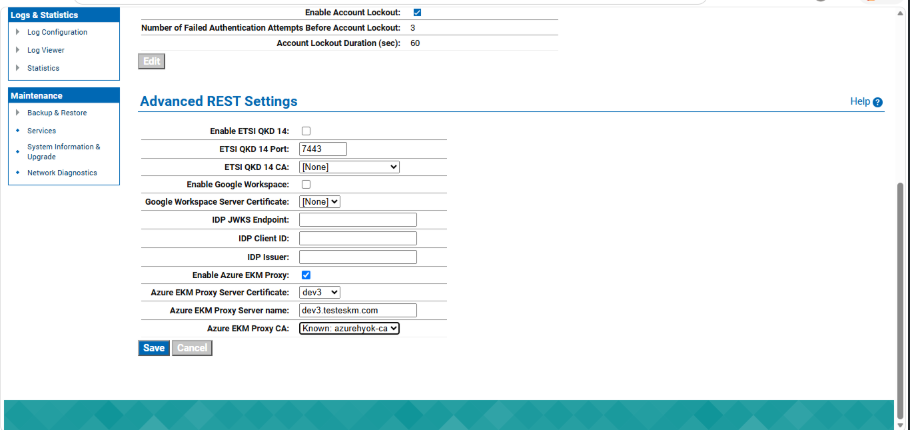
Advanced REST Settings
-
In the Advanced Rest Settings section, configure Enable Azure EKM Proxy, Azure EKM Proxy Server Certificate, Azure EKM Proxy Server name, Azure EKM Proxy CA.
-
Azure EKM Proxy Server Certificate: Select the Imported Server Certificate.
-
Azure EKM Proxy Server Name: Server Certificate Common Name.
-
Azure EKM Proxy CA: Select the created Local CA.
-
-
Click on Save.
|
Component |
Description |
|---|---|
|
Enable Azure EKM Proxy |
Indicates whether the Azure EKM Proxy Service is enabled or disabled. |
|
Azure EKM Proxy Server Certificate |
The server certificate to be used by the Azure EKM Proxy Service. |
|
Azure EKM Proxy Server name |
The host name used by clients to access the Azure EKM Proxy Service. |
|
Azure EKM Proxy CA |
The Certificate Authority (CA) used by the Azure EKM Proxy Service to validate client certificates presented to the server. |
Create Cloud Instance
-
Log in to the Cloud Integration Web Console using any one of the methods described in Accessing the Cloud Integration Web Console.
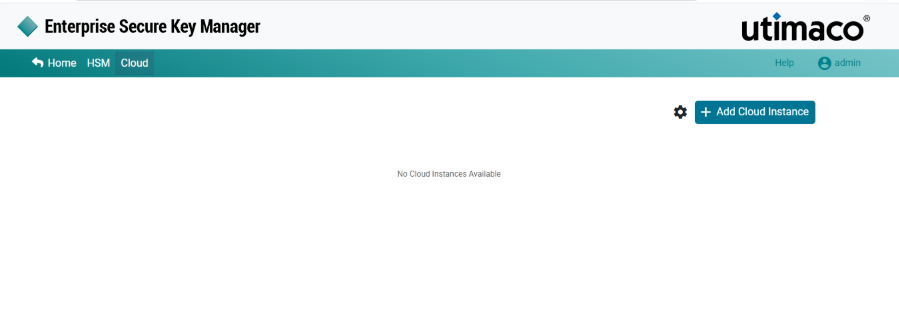
Add Cloud Instance
-
Click on the “+ Add Cloud Instance” icon at the top right corner of the page.
-
The Add Cloud Instance pop-up window will appear.
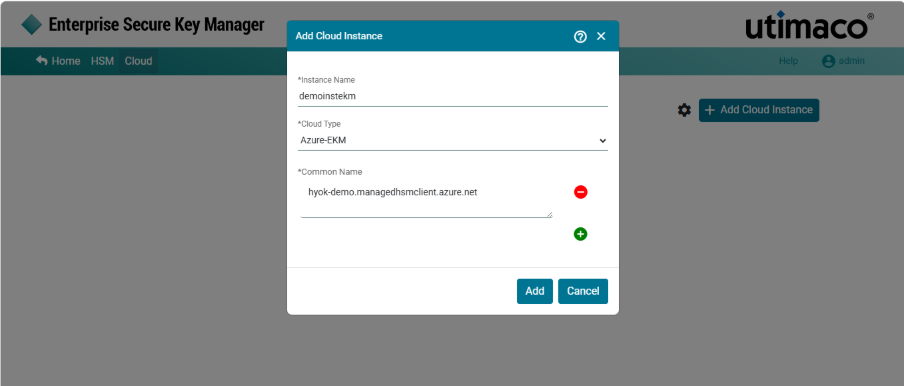
Add Cloud Instance pop-up
-
Enter Instance Name, Cloud Type and Common Name and click Add.
Ensure that the Common Name (CN) is the same as the Common Name defined in the client certificate.
Create Key
-
Click the Manage Keys icon to view keys list available in the cloud instance.
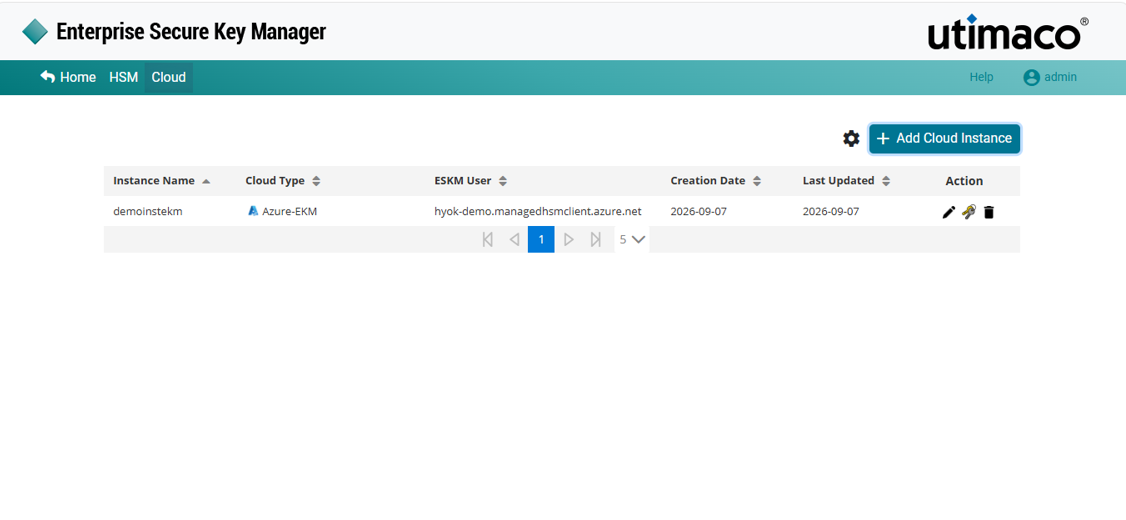
Manage Keys
-
The Keys List dashboard displays.
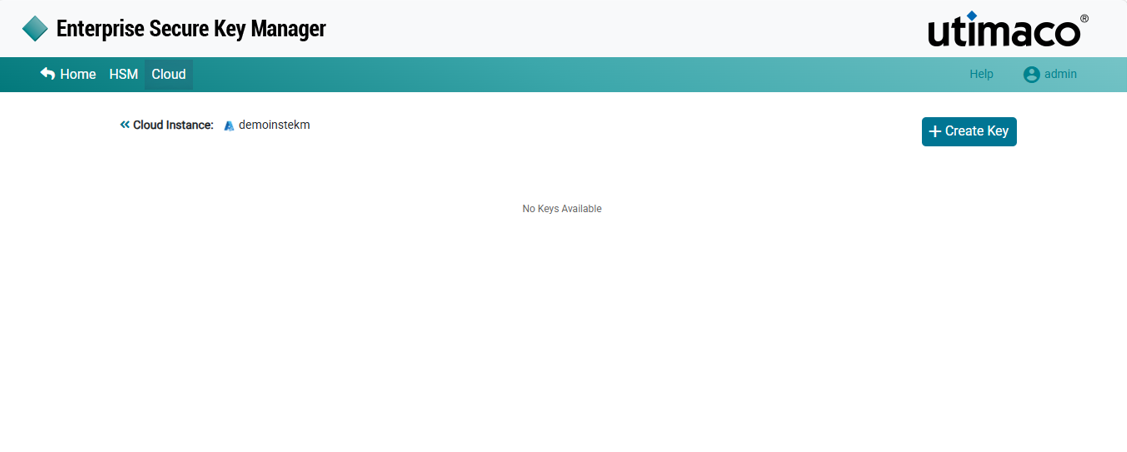
Key List
-
Click Create Key at the upper right corner of the page. In the Create Key window, enter ESKM Key Name, select Algorithm and select ESKM Key Owner.
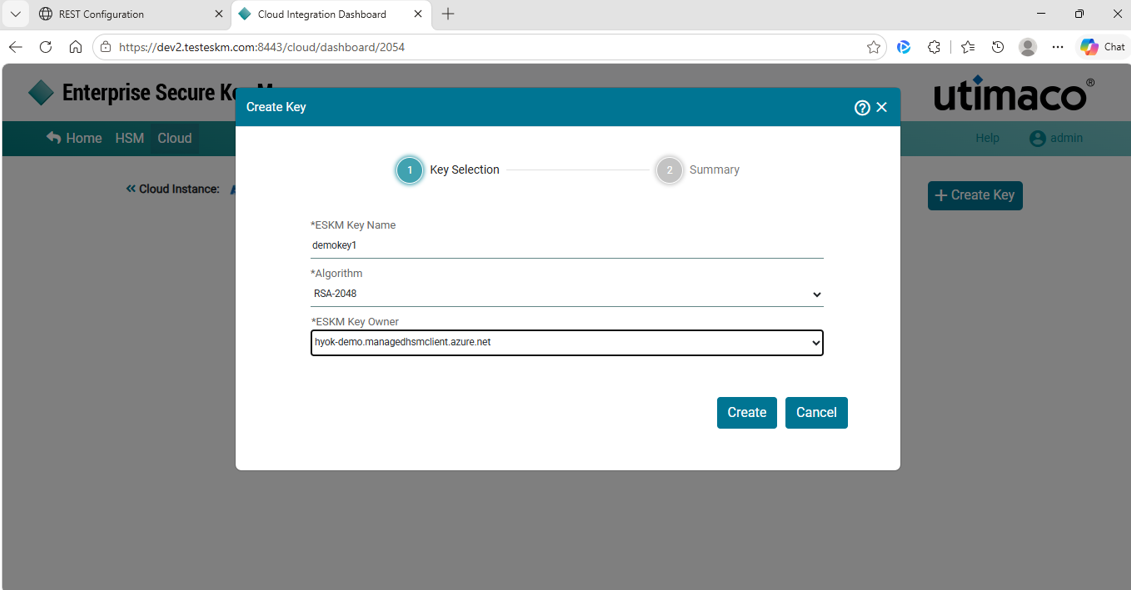
Create Key
-
The following window appears.
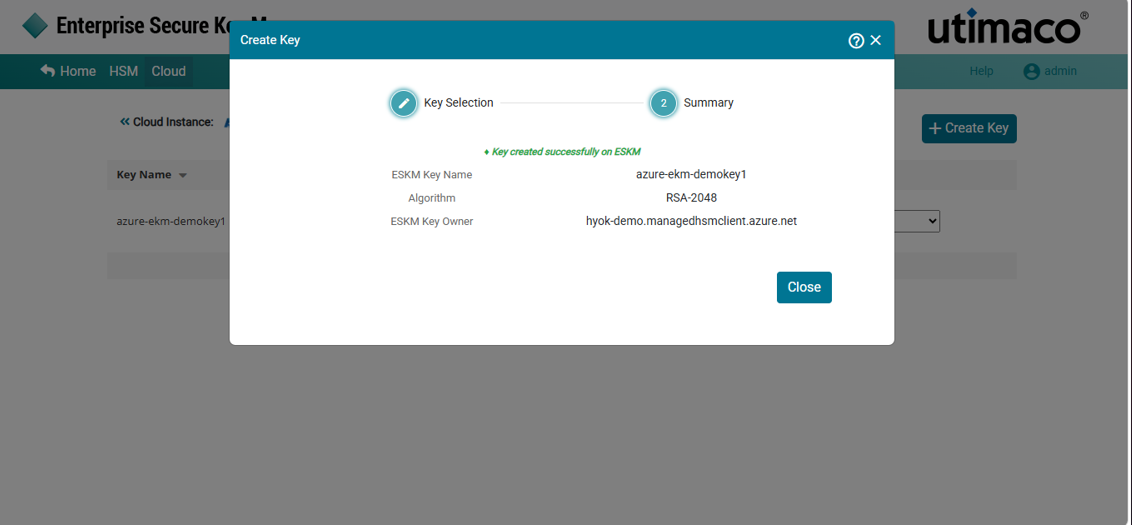
Summary
-
Click Close.
Configuration on Azure
-
Navigate to Azure Key Vault Managed HSM → External Key Management (Preview).
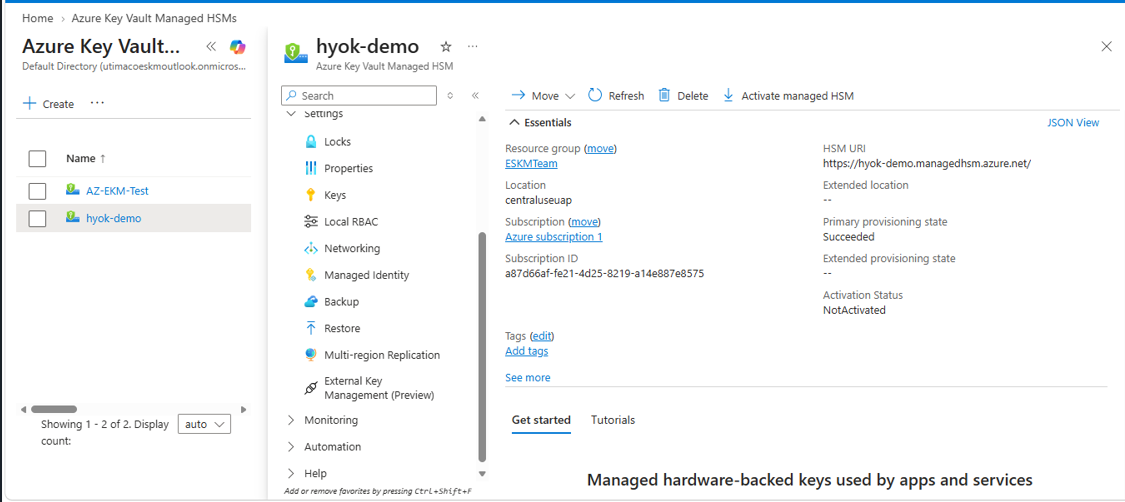
Azure Key Vault Managed HSM instance
-
In the Client Certificate section, note the Subject Common Name generated by Azure Managed HSM.
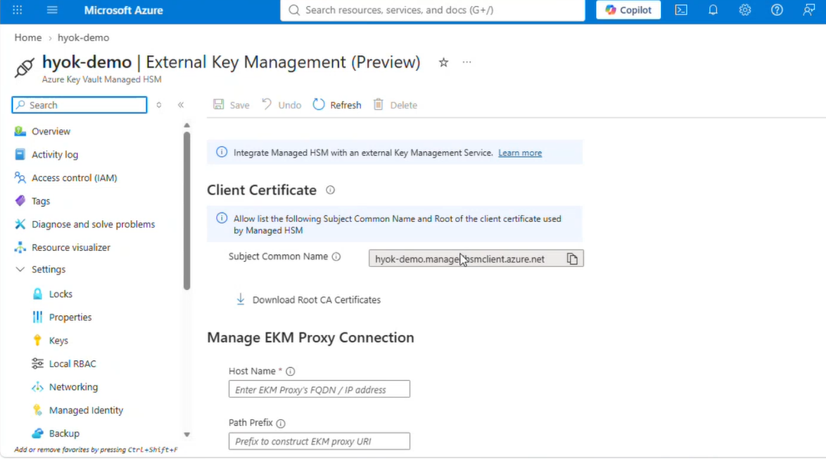
Azure Managed HSM External Key Management
-
Under Manage EKM Proxy Connection, specify the ESKM Host Name and path prefix.
-
Provide the Server Subject Common Name and upload the required Server Root CA certificate(s).
-
Click on Save to create the EKM connection.
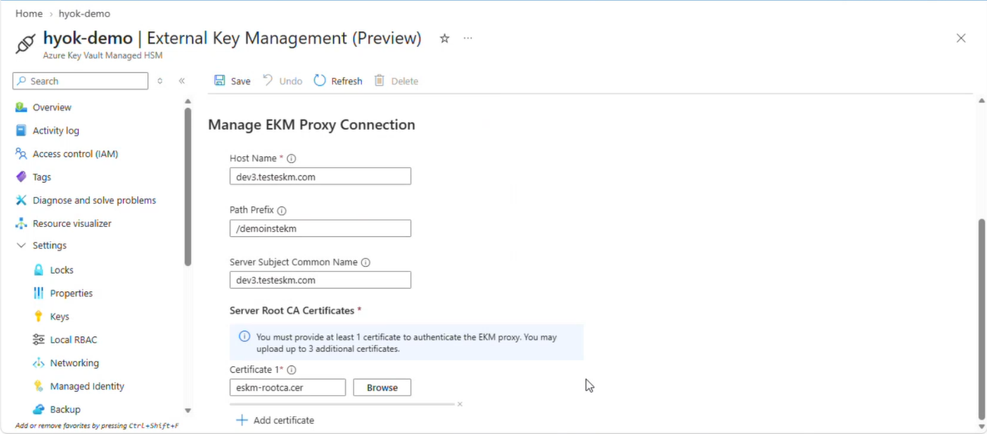
Configuring the Azure Managed HSM External Key Management connection
-
Verify that the Connection Status is displayed as successful.
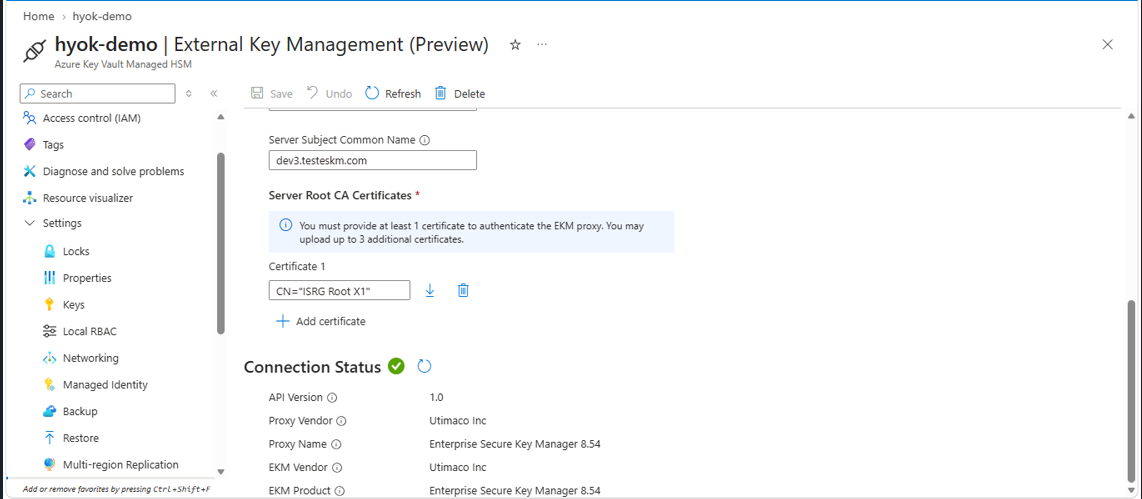
Azure Managed HSM EKM connection status
Adding Key in Azure
-
Navigate to Keys and click Generate/Import/Restore Backup.
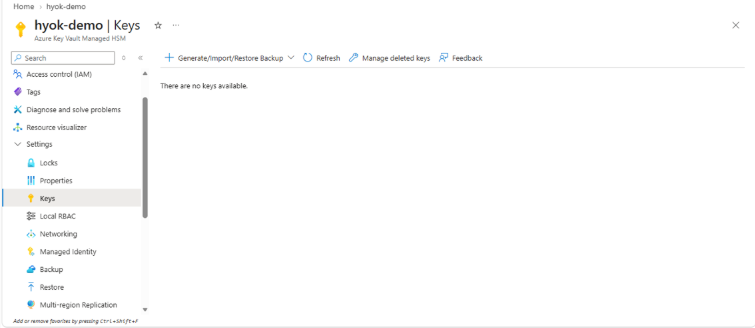
Azure Managed HSM Keys page
-
Select Generate external key from the Options drop-down list.
-
Enter a unique Name for the key.
-
Specify the External key identifier corresponding to the key configured in ESKM.
-
Optionally configure the activation and expiration dates.
-
Ensure that the key is Enabled.
-
Click Create.
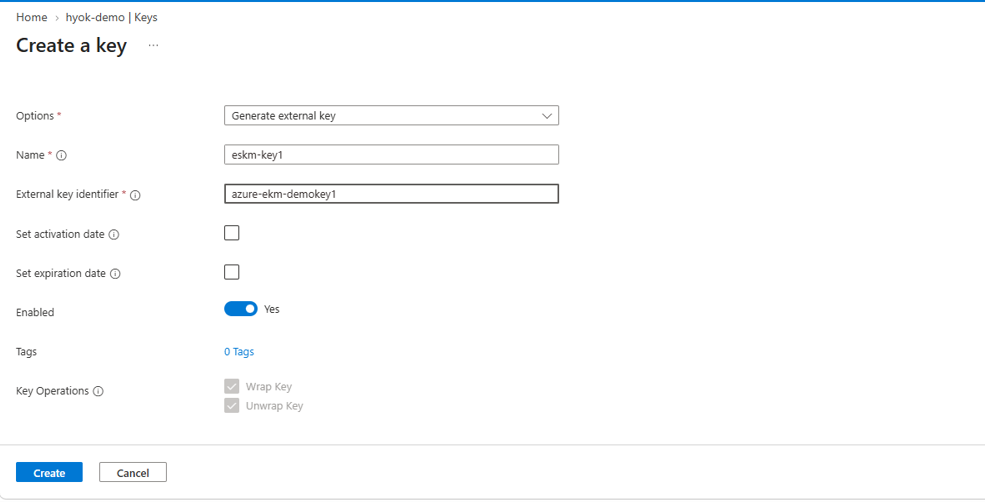
Creating an external key in Azure Managed HSM
Wrapping/Unwrapping in a Key
After creating the external key, verify that key wrap and unwrap operations are functioning. Refer to the Microsoft documentation,"Quickstart: Create your first external key in Azure Key Vault Managed HSM using the Azure CLI (Preview)" .
To confirm that the operations were successfully processed by ESKM, review the ESKM REST log by navigating to: Device > Logs & Statistics > Log Viewer > REST .
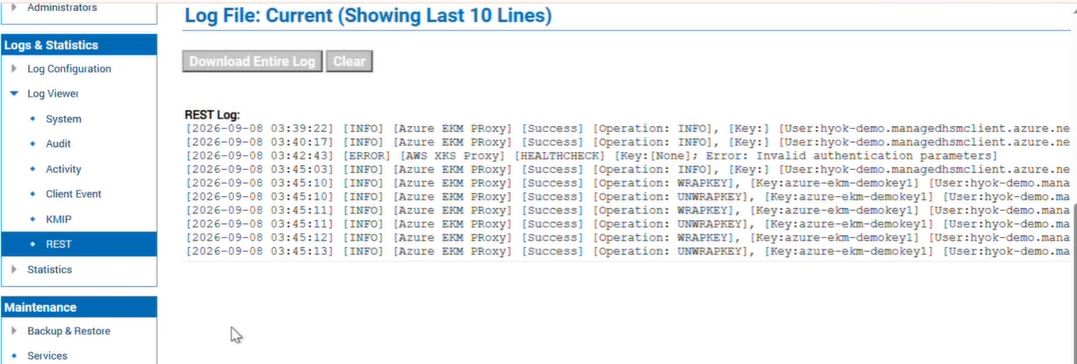
Successful WRAPKEY and UNWRAPKEY operations in the ESKM REST log