
Create the user — an individual (client) on the ESKM server, in this case, KMIP_client.
A client license is required for each user created on the ESKM server. Refer to the ESKM Installation and Replacement Guide for information about how to request and install the license pack.
-
Login to the Management Console, and navigate to Security > Local Users & Groups > Local Users.
-
At the bottom of the list, click Add. The Create Local User window appears.
-
Create a “username” and “password” for the KMIP user.
The “Username” must match with the “Common Name (CN)” provided during the client certificate creation.
-
Select “permissions” for this user.
-
Click the Enable KMIP option.
-
If required, from the drop-down lists, select the User and Object group to which the user belongs. In this case, Company-group_user and Company-group.
-
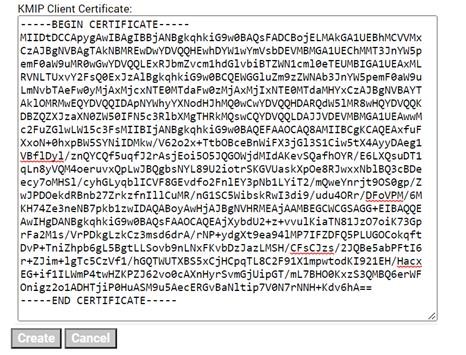
Paste the signed client certificate request, still on your clipboard from Step 8 above, into the KMIP Client Certificate field. (If it isn’t on your clipboard, open KMIP_client.pem and recopy it).
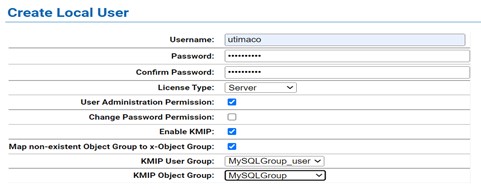
Create Local User window
-
Click Create.
The user KMIP_client now appears on the list of Local Users.
The configuration of the ESKM server is now complete.