
-
Open Adobe Acrobat Pro.
-
Go to Menu > Preferences > Signatures.
-
Under Identities & Trusted Certificates, click More.
-
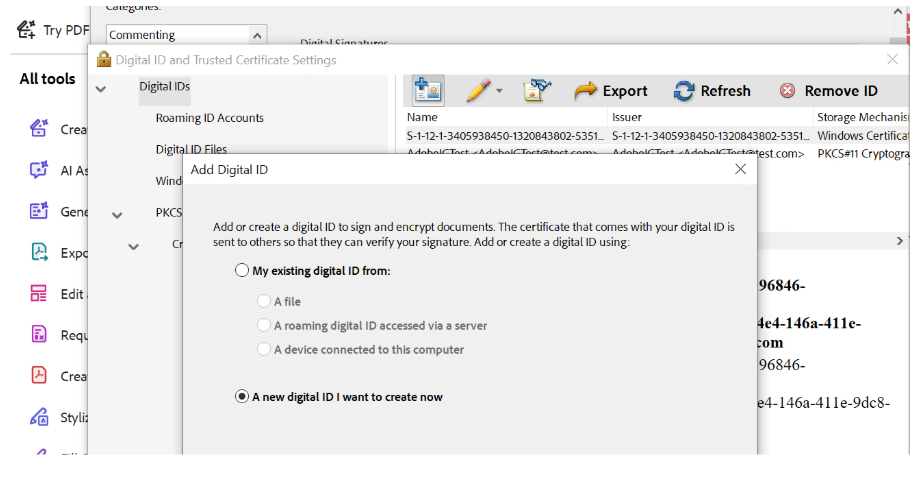
In the Digital IDs section, click Add ID.
-
Choose A new digital ID I want to create now, then click Next.
Select New Digital ID
-
Select New PKCS#12 Digital ID File and click Next.
-
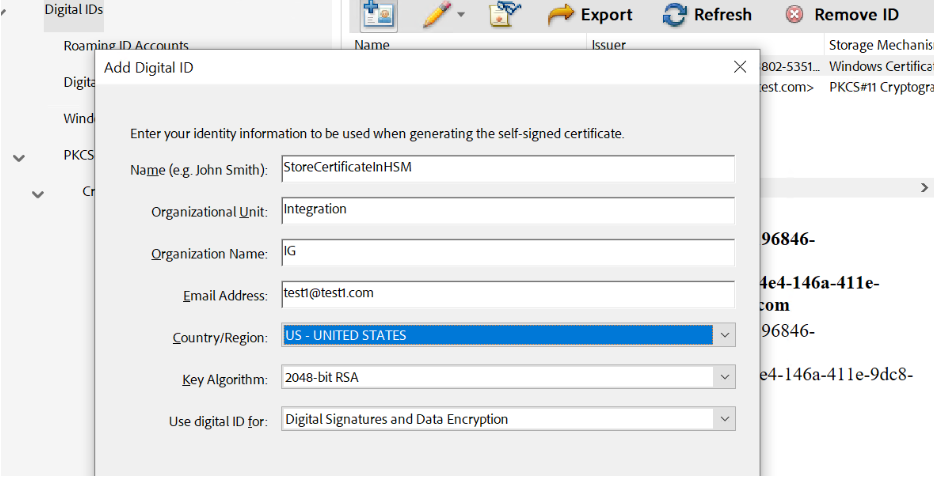
Fill in all identity details (Name, Email, etc.).
-
Choose 2048-bit RSA as the key algorithm.
Add Details
-
Set a password and choose a location to save the
.pfxor.p12file. -
Click Finish to create the Digital ID.
Digital ID Created
-
Open PKCS#11 CryptoServer Administration Tool (CAT).
-
Log in as Crypto User.
-
Go to the Object Management tab.
-
Click On Import.
-
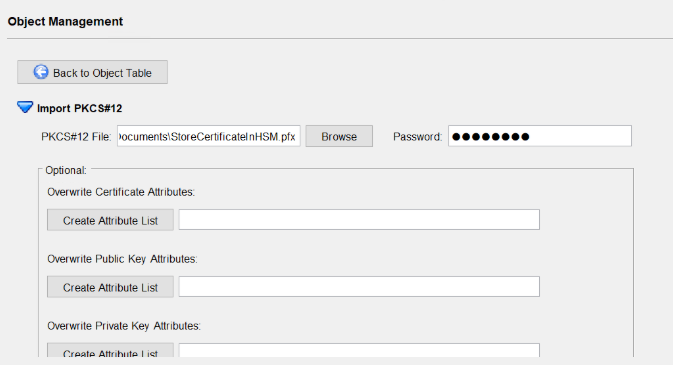
Select Import PKCS#12.
-
Upload the Digital ID file and enter the Password.
Import Digital ID file
-
Go to the Object Management tab.
-
Key details display in the Object Management screen.
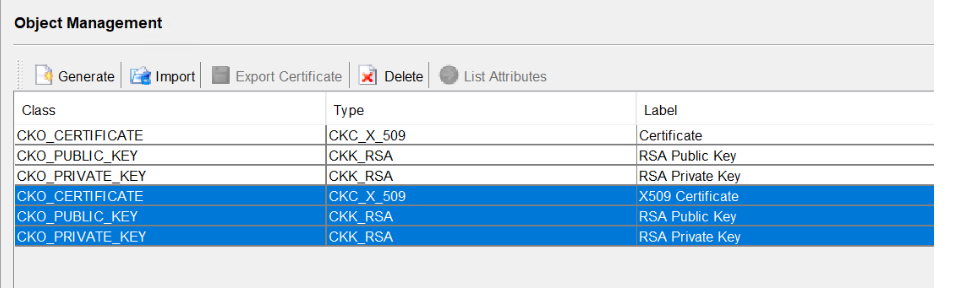
Imported Key Details
-
Open Acrobat Pro as Administrator.
-
Go to Edit > Preferences > Signatures.
-
Click More under Identities & Trusted Certificates.
-
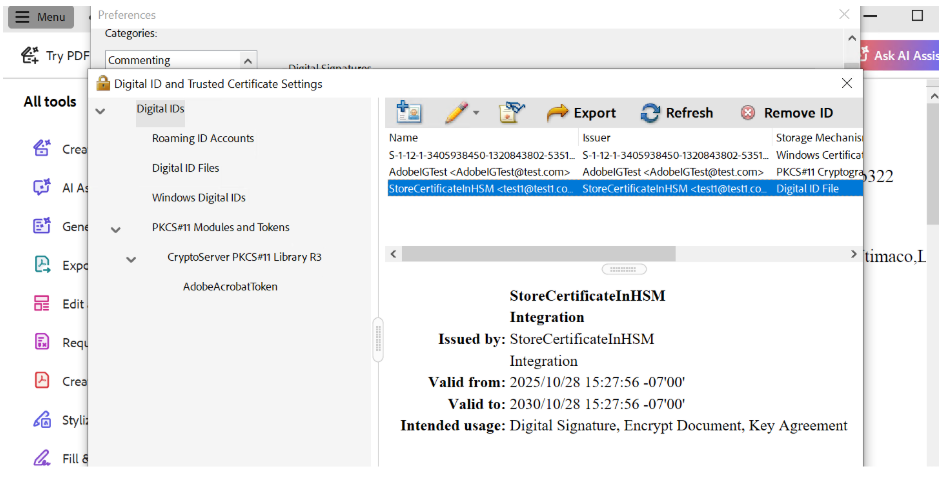
Navigate to PKCS#11 Modules and Tokens.
-
Click CryptoServer PKCS#11 Library R3 and log in to the token.
-
Select the token displayed below and click the Refresh button.
-
Acrobat will detect the token and list available digital IDs.
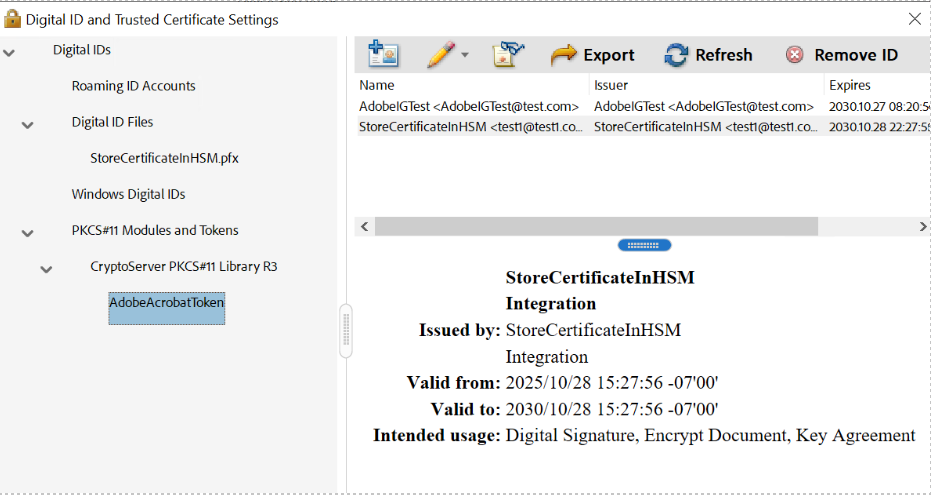
Digital ID Displayed in Acrobat Pro
-
Open a PDF in Acrobat Pro.
-
Go to All Tools> Use a certificate.
-
Click Digitally sign and select /drag an area to place the sign.
-
Select the digital ID stored in the HSM.
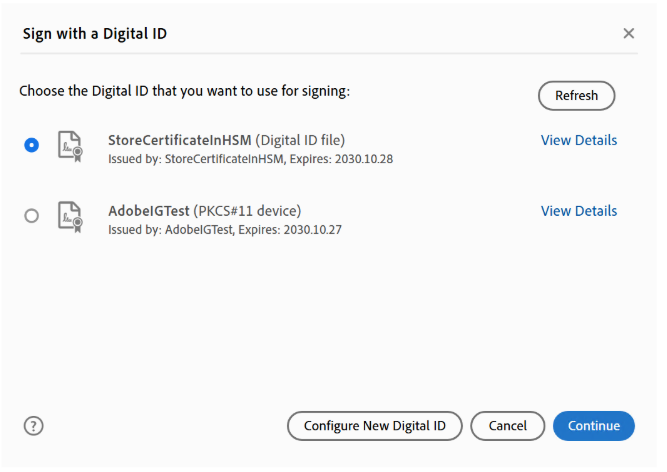
Digital ID's stored in the HSM.
-
Click Continue.
-
Enter the Password and click Sign.
-
Save the file.
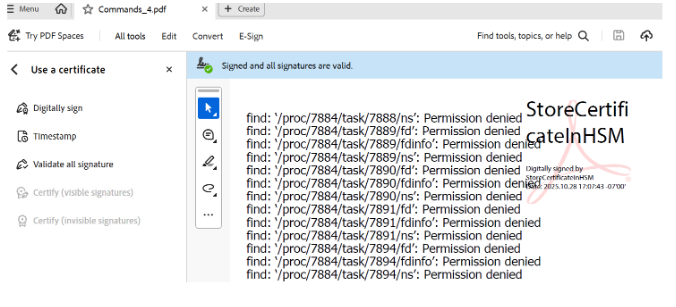
Digital Signed