
In the most secure CyberArk Vault setup, the Server key is directly generated in the secure environment of the HSM. After the initial vault configuration is complete, you can proceed and generate the Vault Server key on the HSM. Once this process is complete, the server key is stored as a non-exportable key on the HSM PKCS#11 slot and is used by the vault.
-
Stop the PrivateArk Server service.
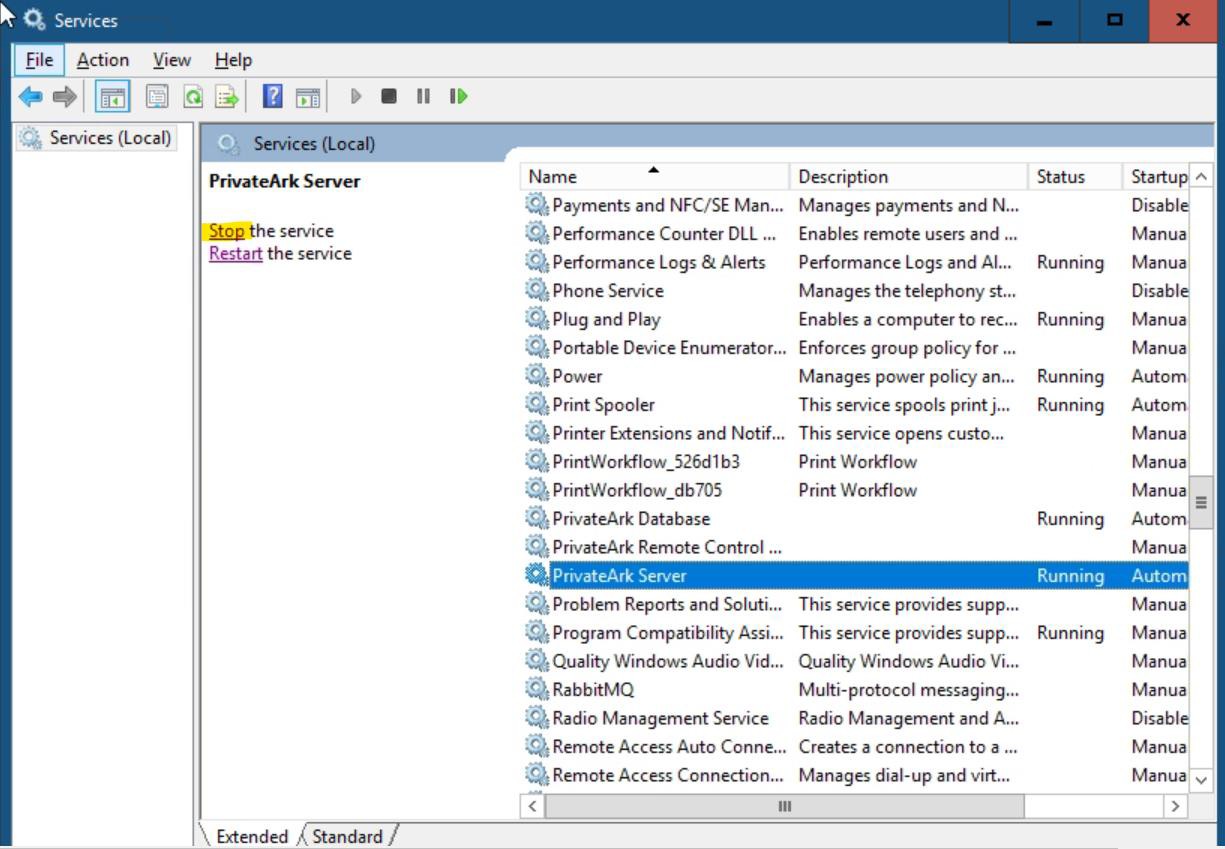
Stop the PrivateArk Server Service
-
Open
cmdas administrator. -
Run the
GenerateKeyOnHSMcommand to generate a new server key usingCAVaultManager. Make sure that the result confirms that the server key was successfully generated on the HSM. You should see the following response:
|
|

Generate server key on Utimaco HSM
The above command generates a new key for the Vault server, stores it in the previously initialized HSM PKCS#11 slot, and returns the keyID.
-
Note down the HSM key generation number returned in the
CAVLT187I log (KeyID=HSM#X). -
Verify that the key has been generated on the HSM with the
p11tool2command.
|
›_ Console |
|
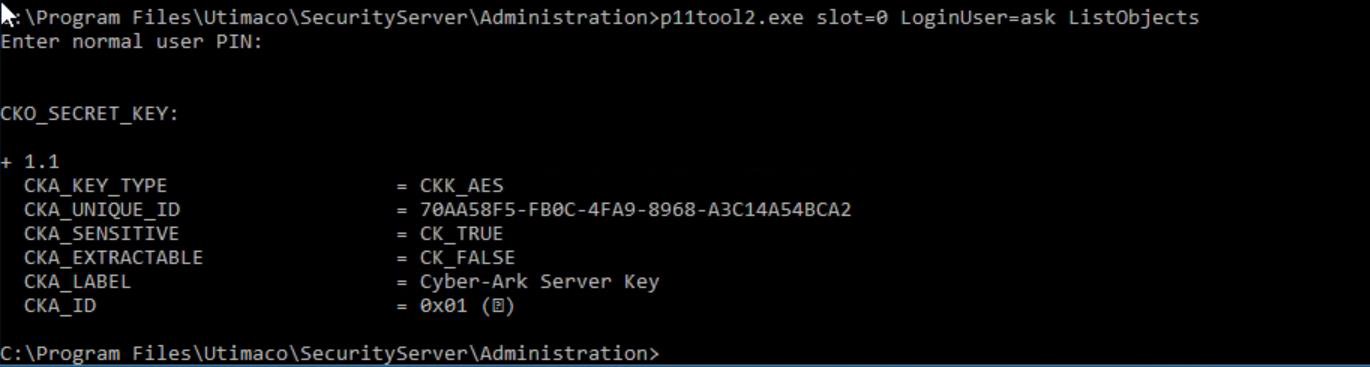
Key List
-
Mount the recovery private key (
recprv.key) to the Vault server. -
Open the
DBParm.inifile located atC:\Program Files (x86)\PrivateArk\Server\Conf\dbparam.ini. -
Set the RecoveryPrvKey parameter to the recovery private key path location and save the file.
|
|
|
|

-
Navigate to the
C:\Program Files (x86)\PrivateArk\Server folder, then opencmdas an administrator. -
Change the existing server key to use the newly generated one on the Utimaco HSM.
|
|
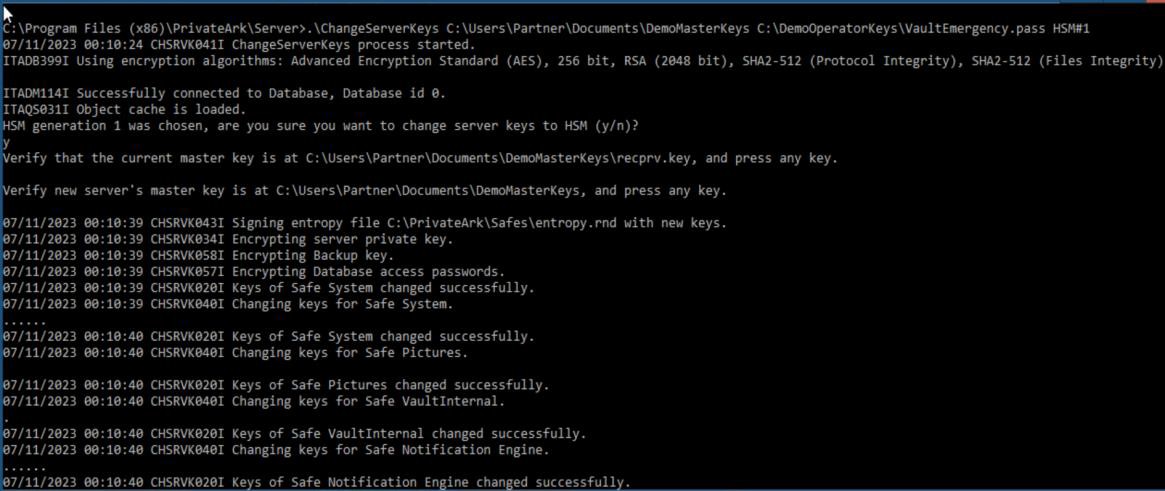
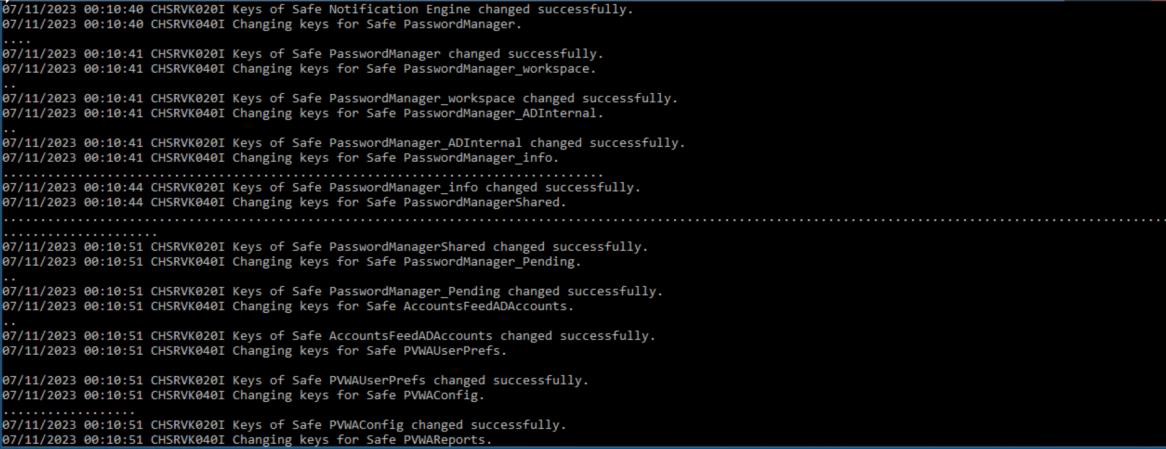
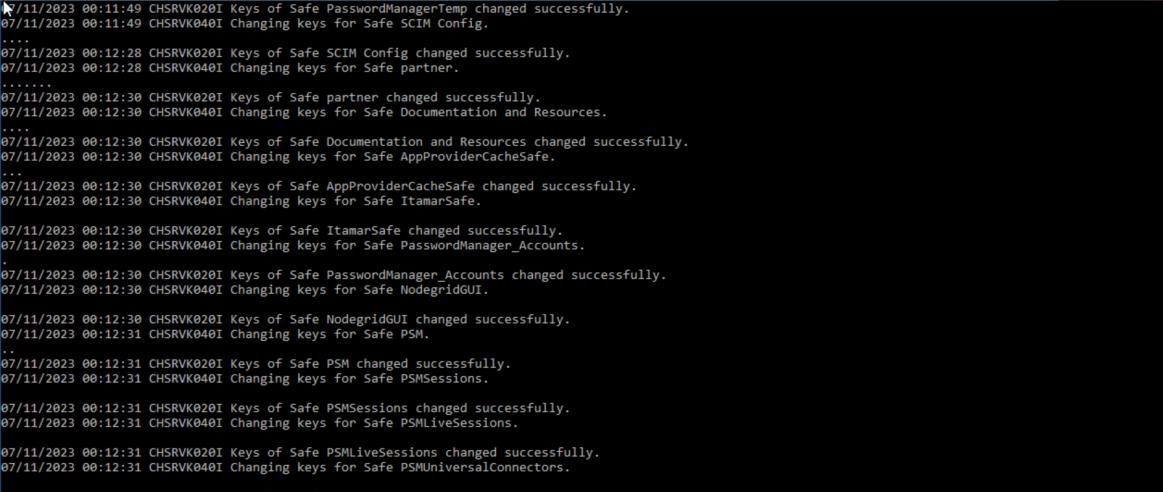
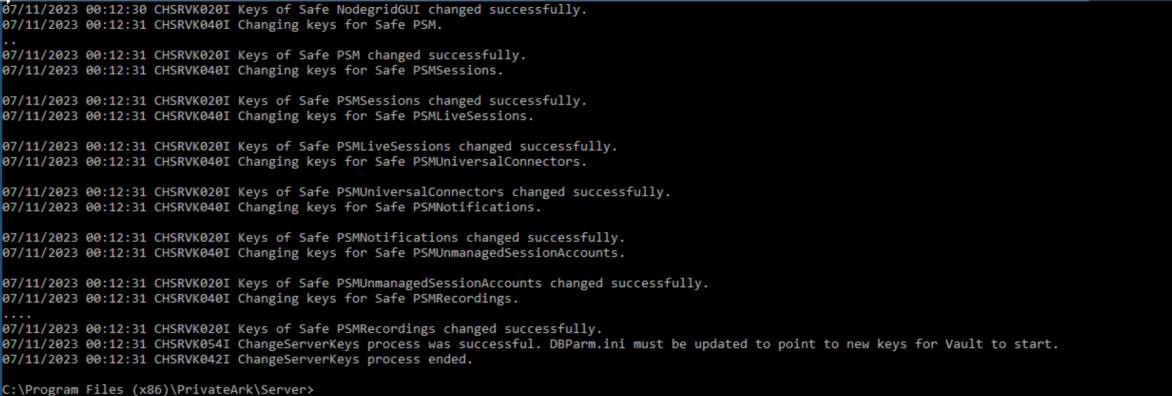
ChangeServerkey to HSM output
-
Make sure that the result confirms that the Change Server keys process was successful.
-
Open the
DBParm.iniand change theServerKey=HSM#Xparameter. Replace X with the HSM key generation number.
|
|
|
|

-
Save the file.
-
Start the PrivateArk Server service and ensure that no errors are printed to the console.
-
Verify that you can log on to the Vault using CyberArk authentication.
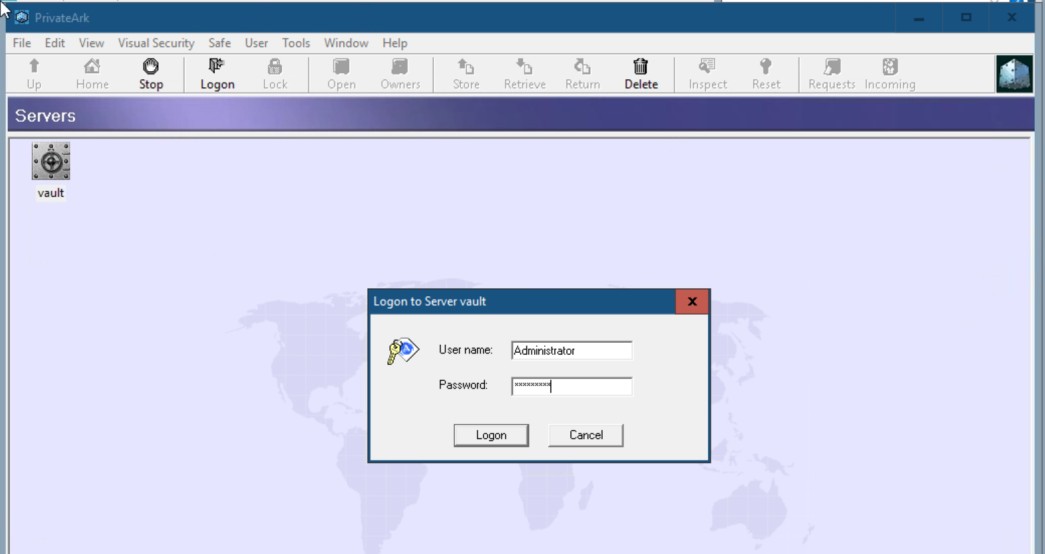
Logon to Vault using CyberArk authentication
-
Unmount the recovery private key from dbparm (revert to default value:
d:\recprv.key).