
To migrate the existing server key to Utimaco HSM:
-
Complete the steps given in 5.1 Configure CyberArk Vault to use Utimaco HSM.
-
Stop the PrivateArk Server service.
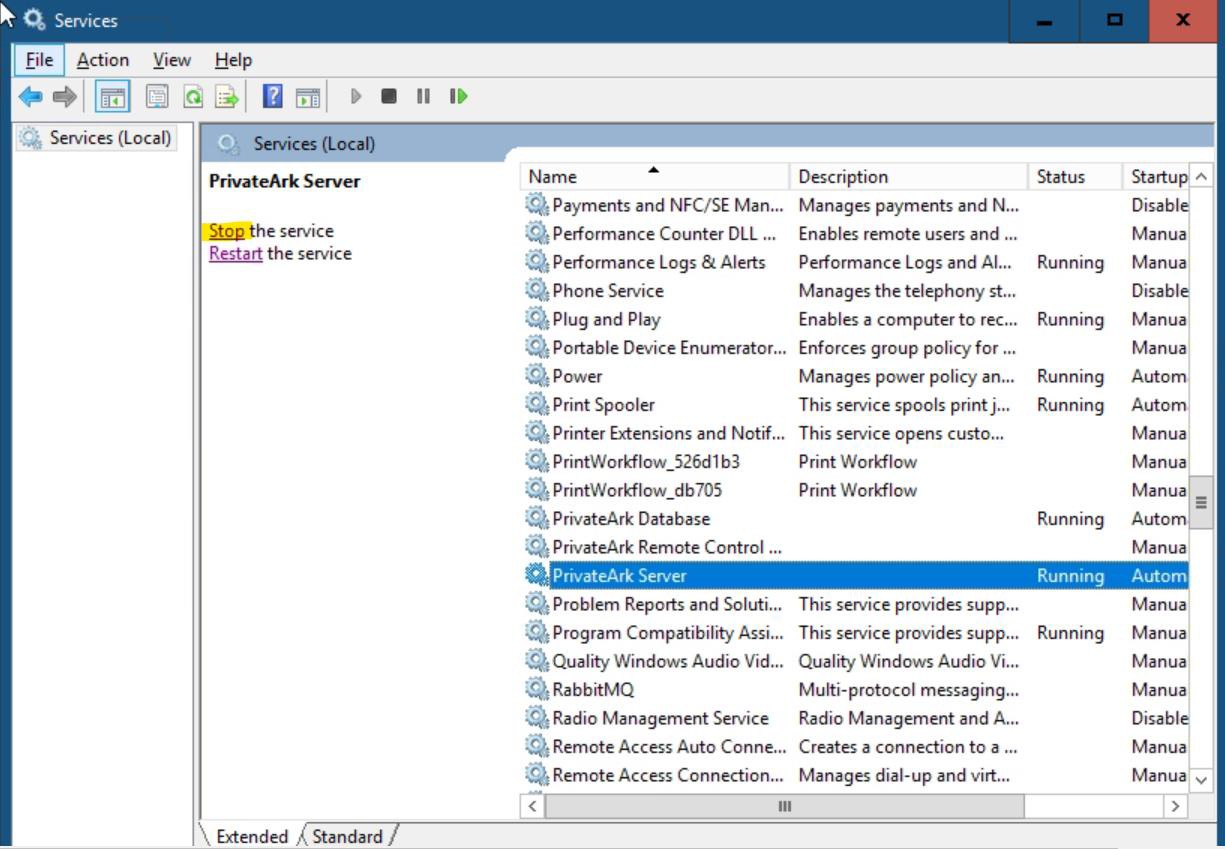
Stop services of PrivateArk Server
-
Navigate to the
C:\Program Files (x86)\PrivateArk\Serverfolder, then open cmd as administrator. -
Using
CAVaultManager, run theLoadServerKeyToHSMcommand to upload the server key to store in the Utimaco HSM.
|
|

Migrate Server Key to HSM
Ensure that the result confirms that the server key has been uploaded to the HSM:
-
Verify that the keys have been uploaded to Utimaco HSM using
p11tool2.
|
|
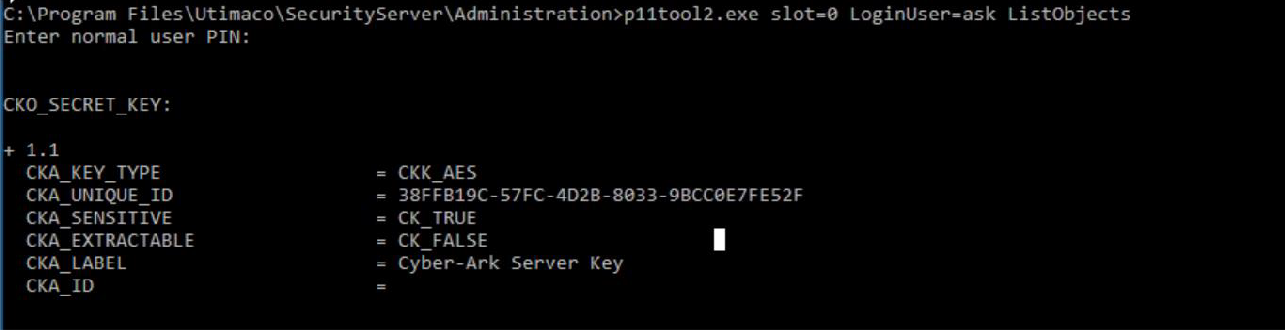
Key list
-
Open the
DBParm.inifile located atC:\Program Files (x86)\PrivateArk\Server\Conf. -
Set the
ServerKey=HSMparameter.
|
|
|
|

-
Save the file.
-
Start the PrivateArk Server service and verify that there are no errors in the console.
-
Verify that you can log on to the Vault using CyberArk authentication.
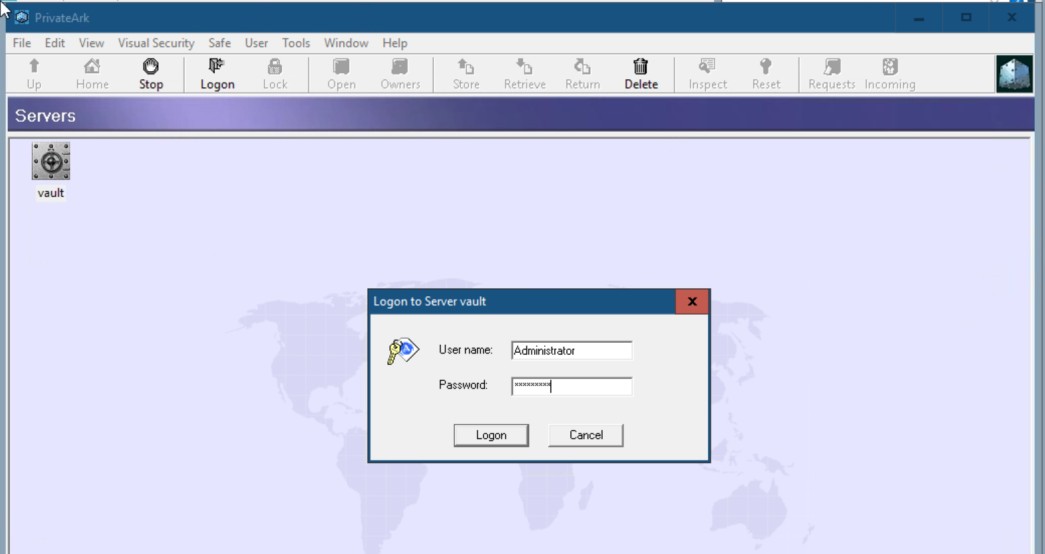
Logon to Vault using CyberArk authentication
This completes the integration for CyberArk Vault with Utimaco SecurityServer.