
You can migrate the existing Vault encrypted with the Shamir seal (the default software-based seal) to the Utimaco PKCS11 seal. For demonstration purposes, the end-to-end steps have been shown below, starting with initializing the Vault with a Shamir seal and then migrating it to the Utimaco PKCS11 seal.
-
Add the contents shown below to
/etc/vault/config.hcl. This config file will initialize the Vault with the Shamir seal.
# Configure the storage backend for Vault
storage "file" {
 path = "/opt/vault/data"
}
# Addresses and ports on which Vault will respond to requests
listener "tcp" {
 address = "0.0.0.0:8200"
 tls_disable = true
}
ui = true
license_path = "/etc/vault/license.hclic"
disable_mlock = true
-
Initialize the Vault to use the Shamir seal and note the unseal keys and Initial Root Token value.
# vault operator init
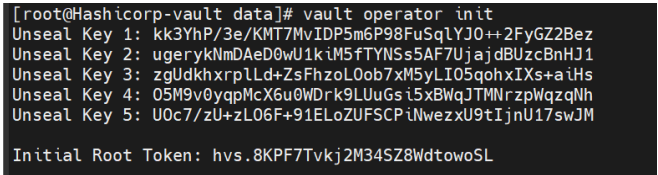
Vault Initialization
-
Check the Vault status.
# vault status
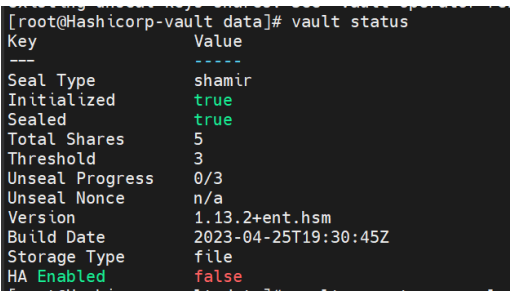
Vault Status
-
Execute the following command a number of threshold times (in this case, 3 times) to unseal the vault and provide a unique unseal key when prompted.
# vault operator unseal
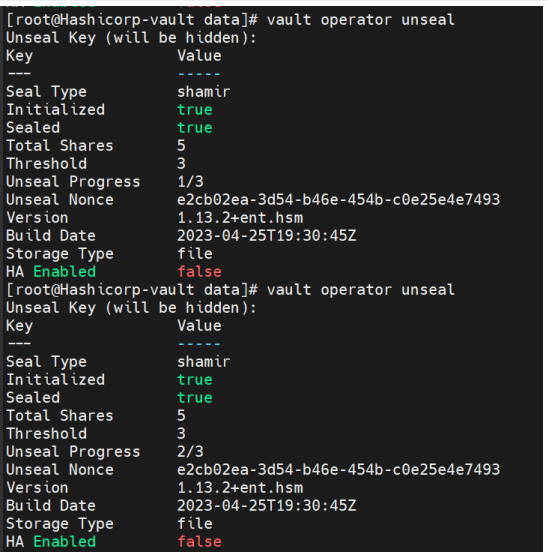
Vault Operator Unseal
-
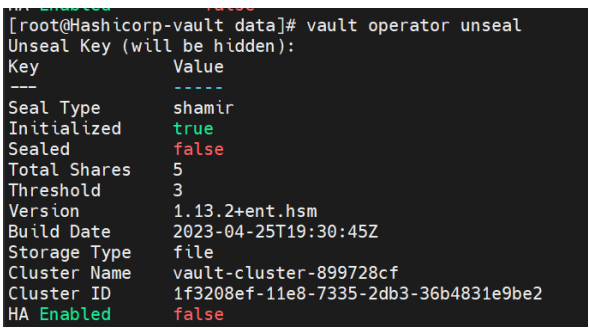
Check the Vault status again and verify that the Vault is unsealed now.
# vault status
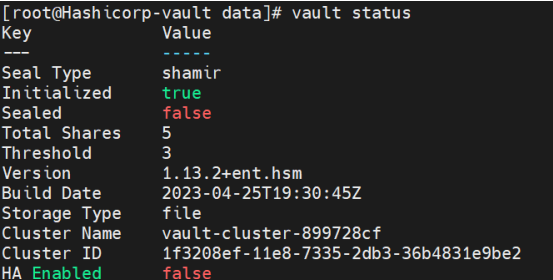
Vault Status
-
Log in to Vault using the Initial Root Token saved above.
# vault login <initial_root_token_vaule>
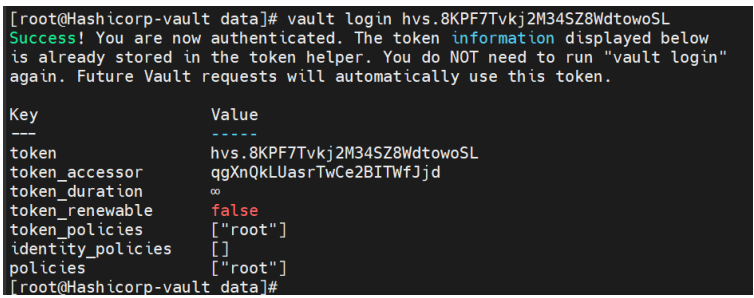
Vault Login
-
Enable the KV secret engine.
# vault secrets enable -version=1 kv

Enable KV Engine
-
List the enabled Secrets Engines with details.
# vault secrets list -detailed
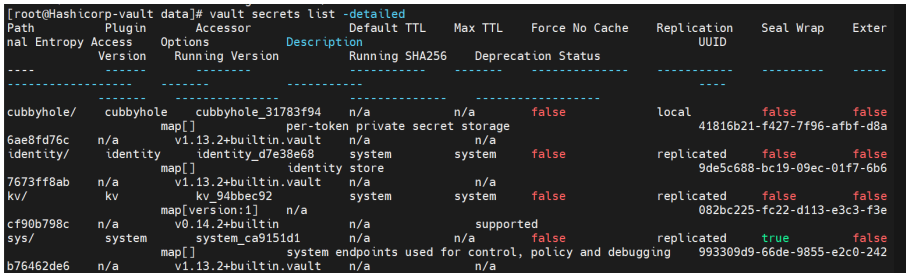
Vault List
-
To test the seal wrap feature, write some secret data. Add data to the key/value storage area of Vault.
# vault kv put kv/opt/vault/secret key=test_secret

Vault Seal Wrap
-
Retrieve the secret data.
# vault kv get kv/opt/vault/secret

Retrieve Data
-
Stop the Vault service and verify its status.
# systemctl stop vault
# systemctl status vault
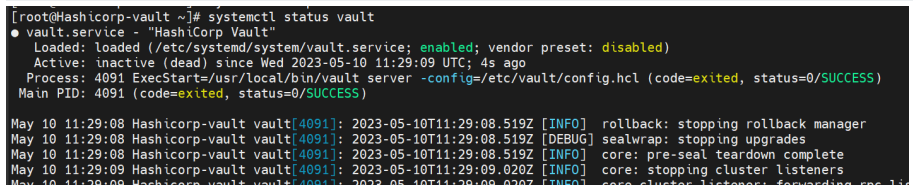
Vault Service Status
-
Now edit
/etc/vault/config.hcland add theseal PKCS11section as shown below with the Utimaco HSM information.
seal "pkcs11" {
 lib = "/opt/utimaco/lib/libcs_pkcs11_R3.so"
 slot = "<slot_no>"
 pin = "<slot_PIN>"
 key_label = "hsm_demo1"
 hmac_key_label = "demo1"
 generate_key = "true"
}
# Configure the storage backend for Vault
storage "file" {
 path = "/opt/vault/data"
}
# Addresses and ports on which Vault will respond to requests
listener "tcp" {
 address = "0.0.0.0:8200"
 tls_disable = true
}
ui = true
license_path = "/etc/vault/license.hclic"
disable_mlock = true
-
Start the Vault service.
# systemctl start vault
# systemctl status vault
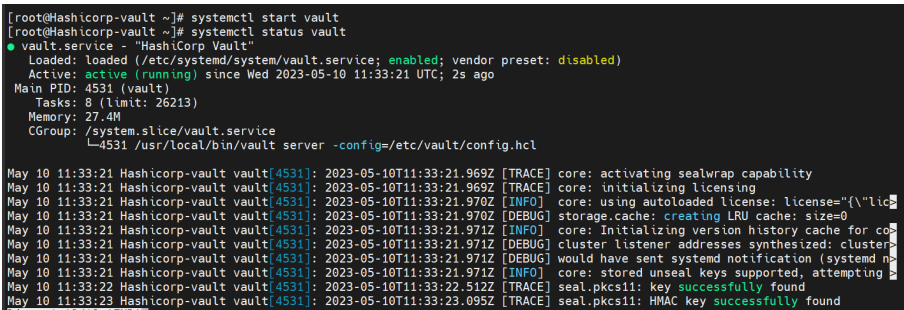
Vault Service Status
-
To migrate from the Shamir seal to the Utimaco PKCS11 seal, run the command below for the number of threshold times (in this case, 3 times). When prompted, provide the unseal key.
# vault operator unseal -migrate
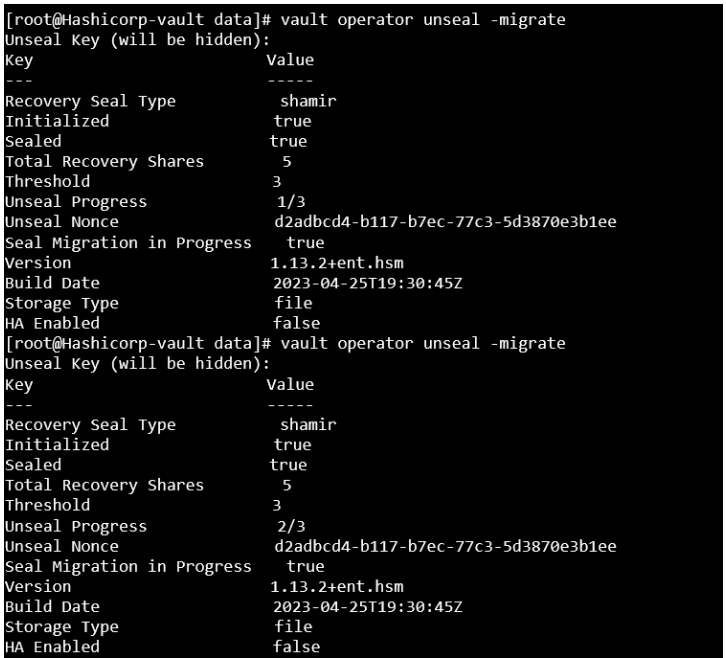
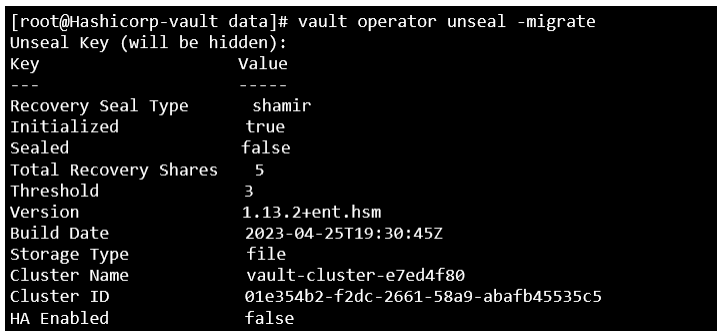
Vault Seal Migration
Once the required threshold of unseal keys is entered, unseal keys will be migrated to recovery keys.
-
Verify that the keys were generated in the HSM.
# p11tool2 slot=<slot_no.> LoginUser=<slot_PIN> ListObjects
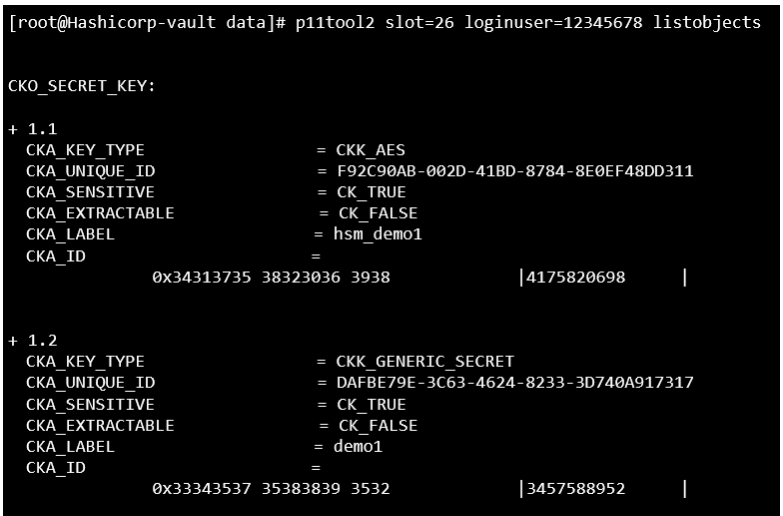
List Keys
-
Monitor the log and wait until the migration process is completed. To verify that it has, look for a seal re-wrap completed message in the Vault status.
# systemctl status vault

Vault Service Status
-
Now you can retrieve the earlier secret data.
# vault kv get kv/opt/vault/secret

Retrieve Data