

-
Generate key file for the new ZSK.
|
›_ Console |
|---|
|
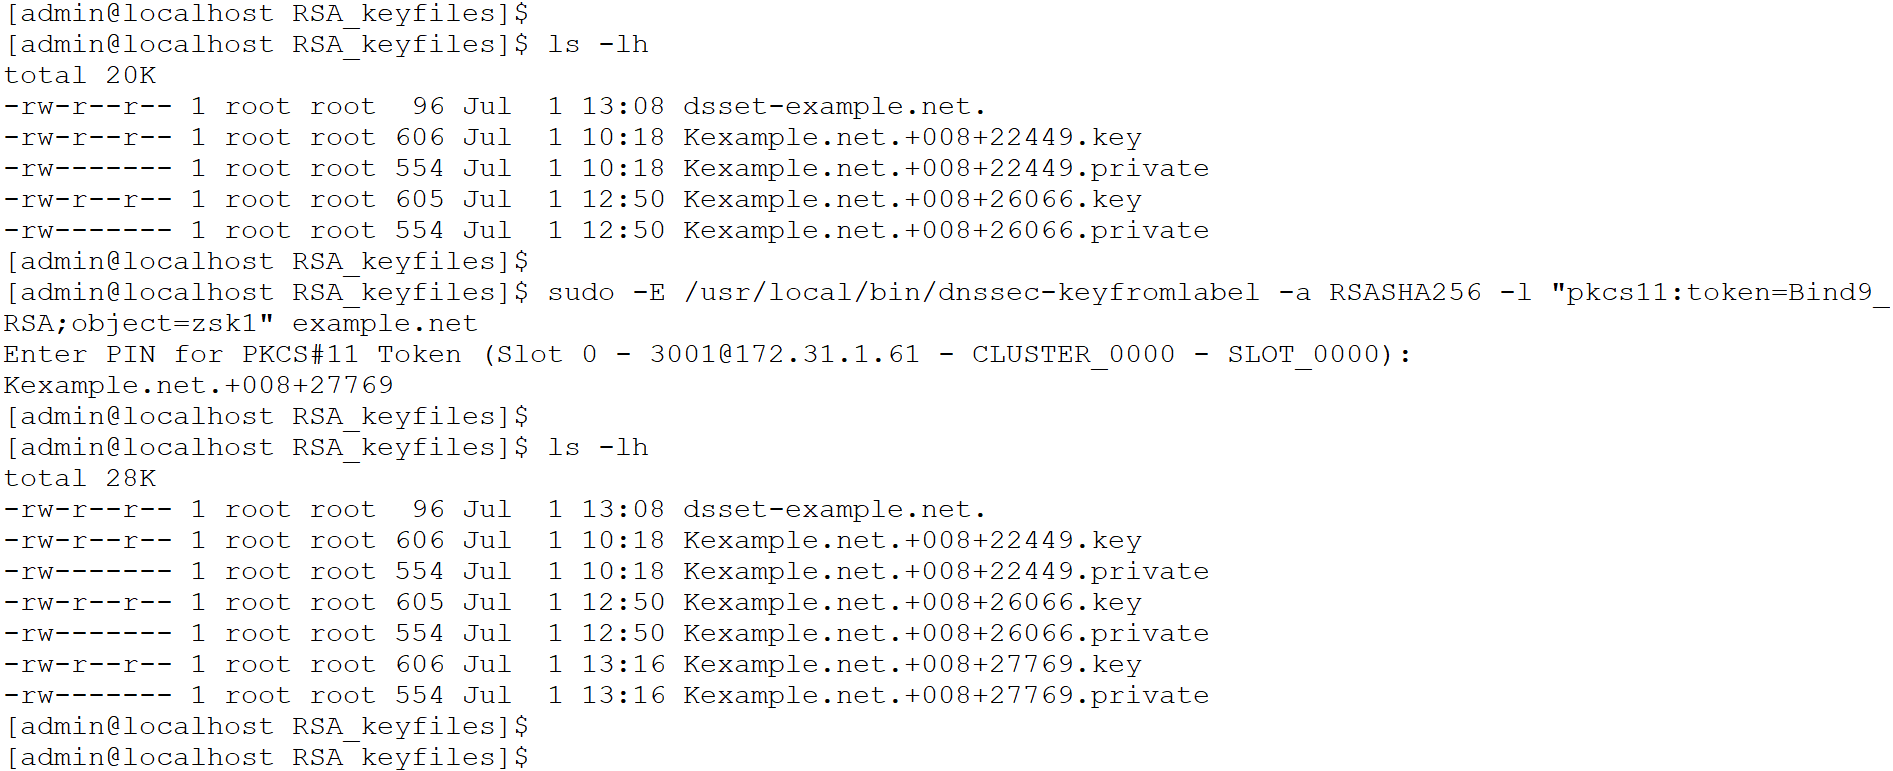
Key file for new ZSK
-
Sign the zone with the new and old ZSK.
|
›_ Console |
|---|
|
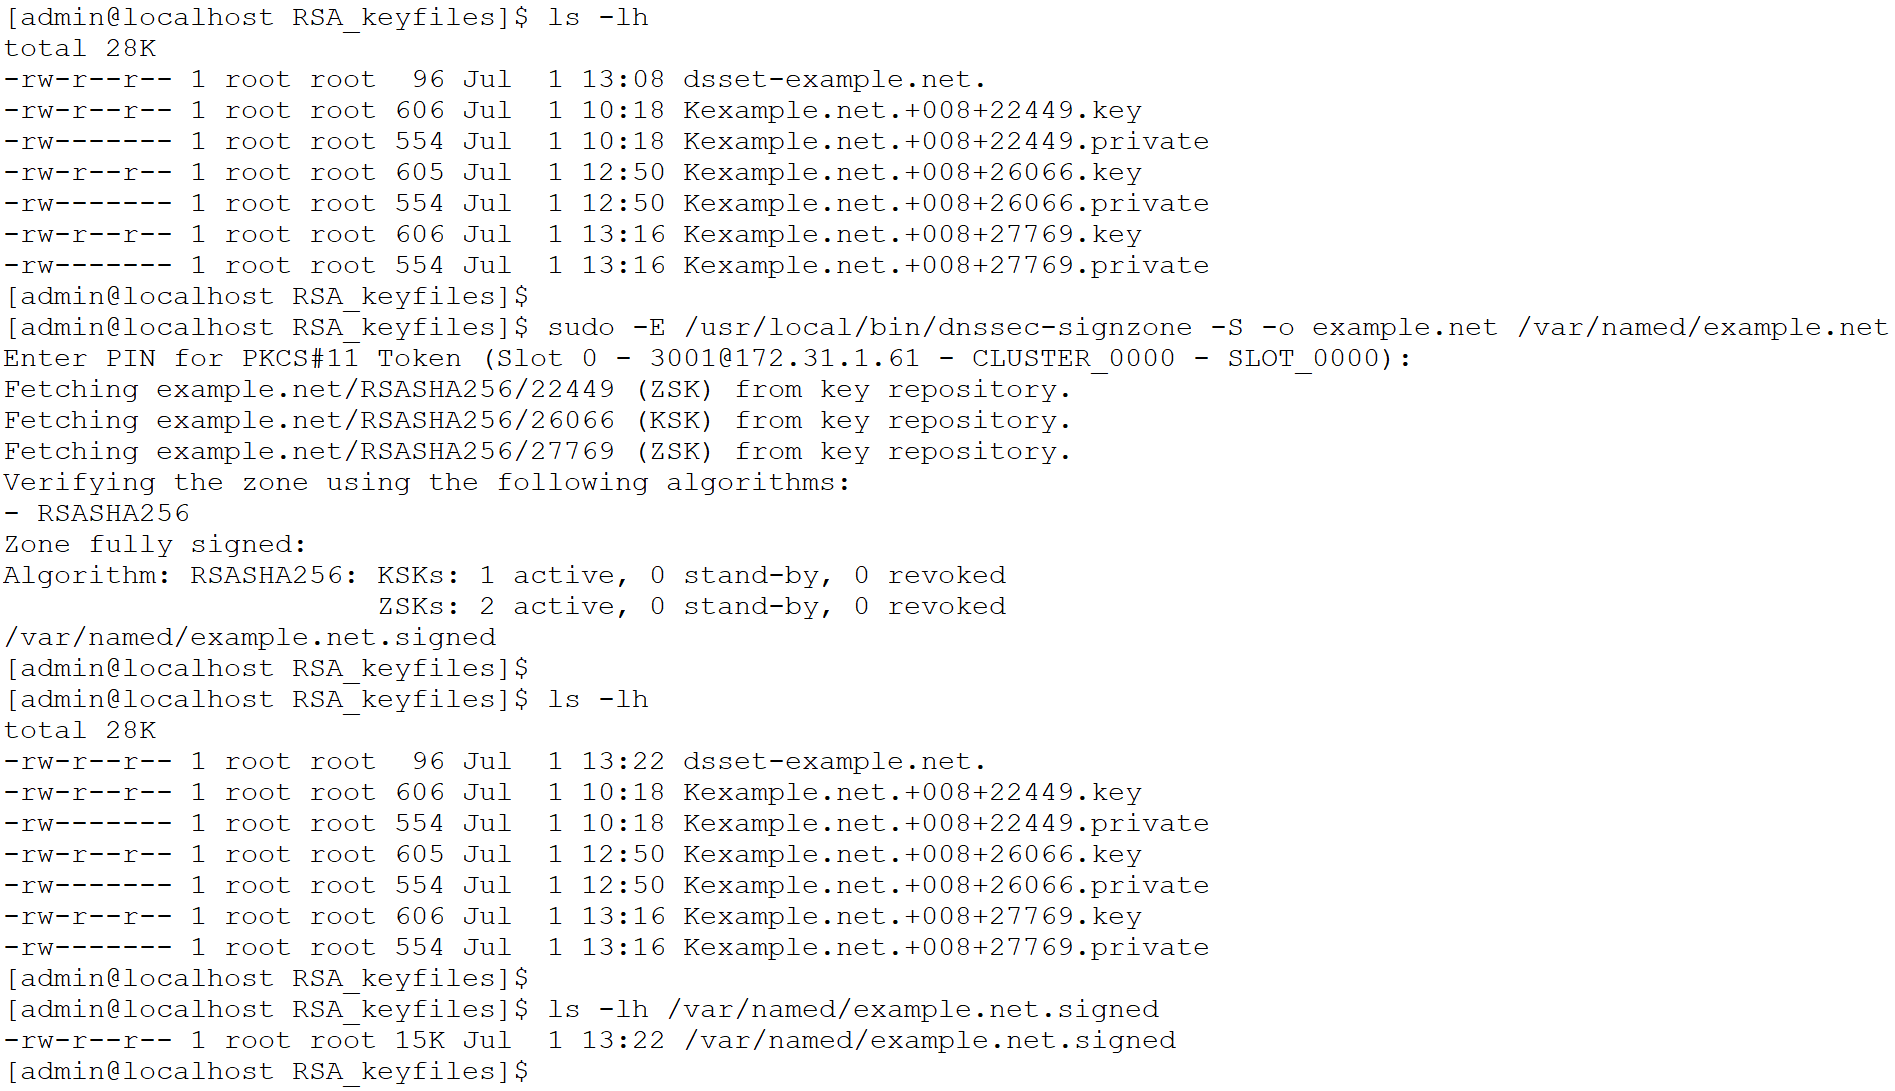
Signing zone with old and new ZSK
-
Wait for the zone transfer time and maximum TTL used in the zone.
-
Re-sign the zone with the new ZSK. Now we have only one ZSK in
example.netso it will automatically pick this new ZSK for signing zone.
|
›_ Console |
|---|
|
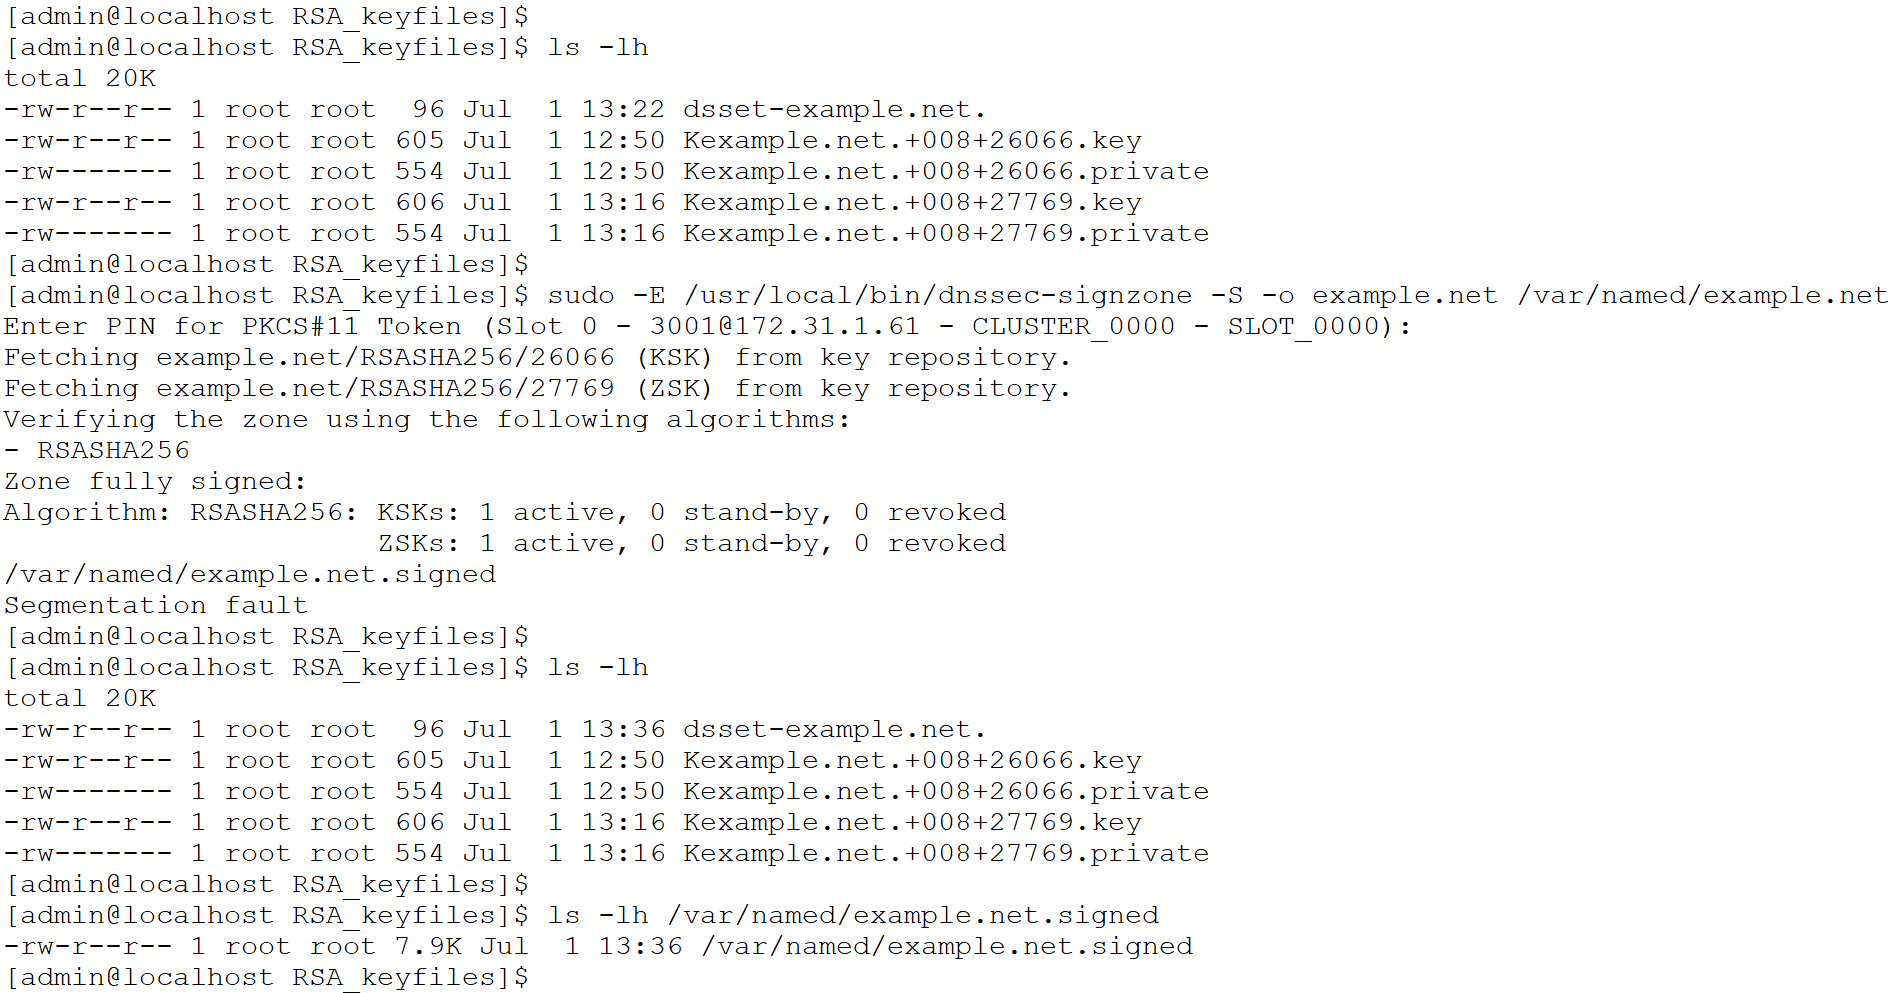
Signing the zone with new ZSK
-
Verify new signed zone.
/usr/local/bin/dnssec-verify -z -o example.net /var/named/example.net.signed

New signed zone
-
Restart the named service using below command.
|
›_ Console |
|---|
|
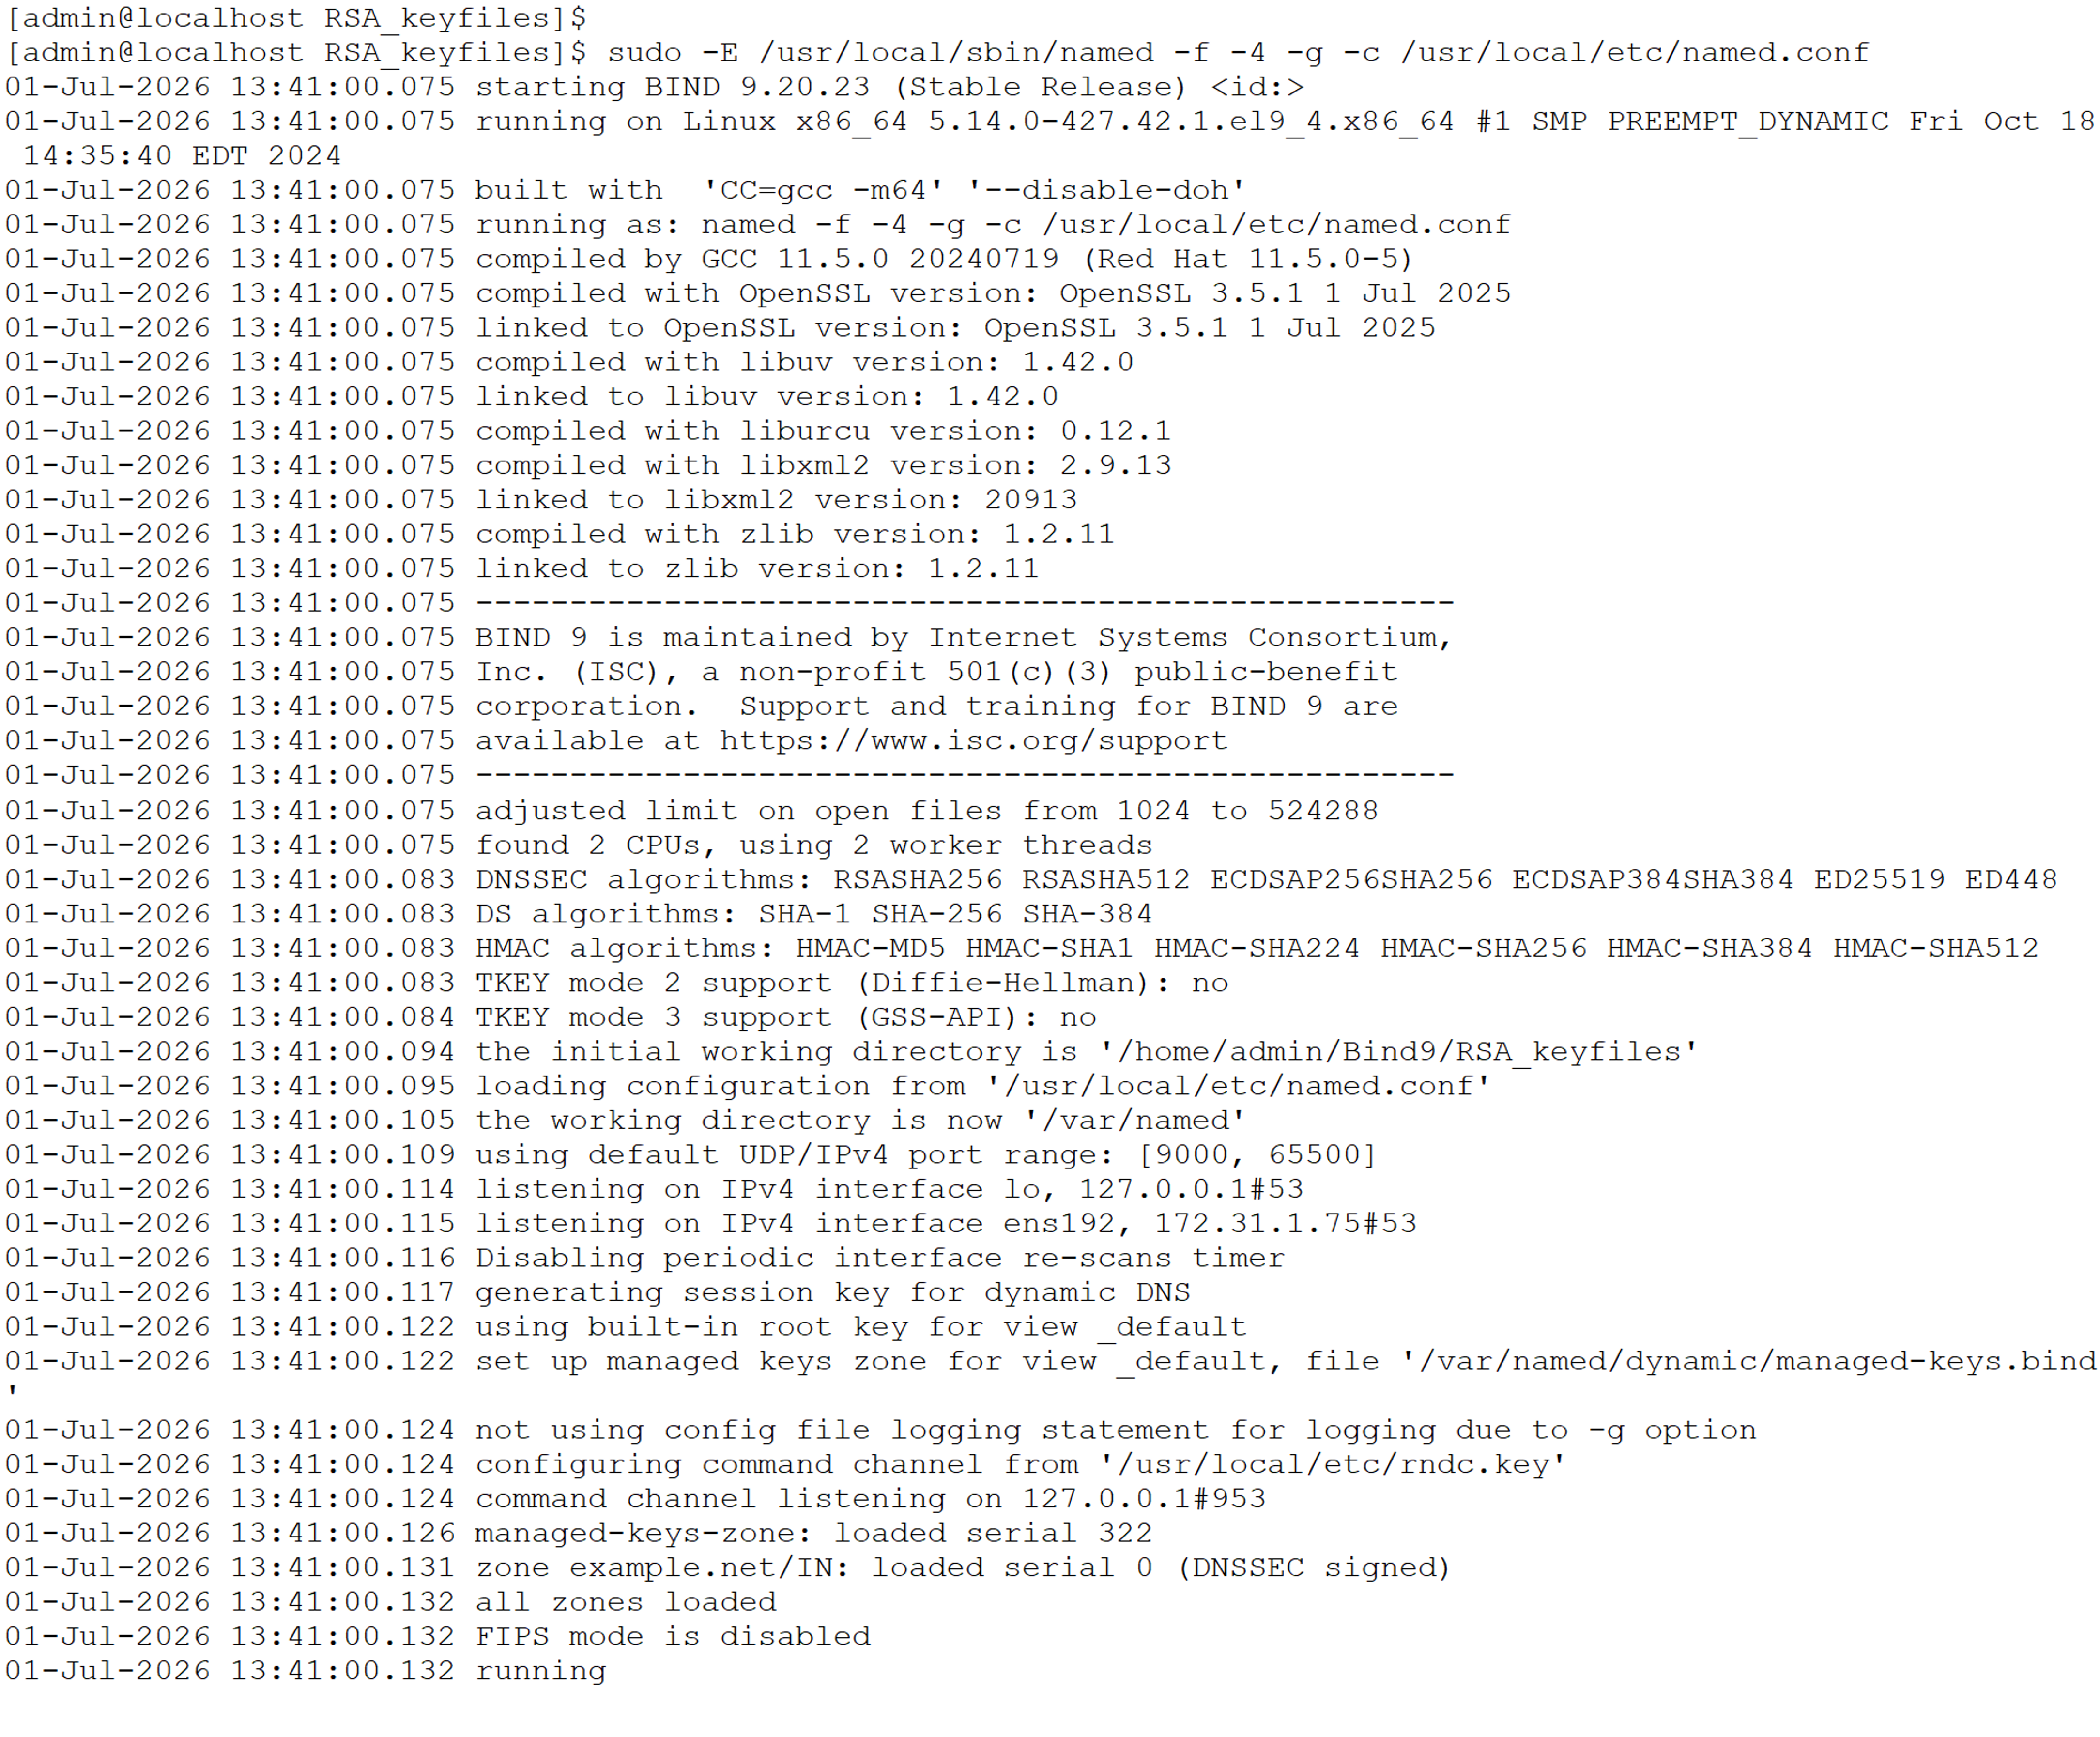
Starting named service
This completes the Integration for Bind9 with Utimaco SecurityServer.