

Follow the procedures below to complete the configurations outside ESKM that are required for the integration.
Register Service with Azure
The following steps enable you to register your ESKM DKE service. Registering your ESKM DKE service is the last step in deploying DKE before you can start creating labels.
To register ESKM DKE service:
-
In your browser, open the Microsoft Azure portal, and go to All Services > Identity > App Registrations.
-
Select New registration and enter a meaningful name.
-
Select an account type from the options displayed either single or multi-tenant.
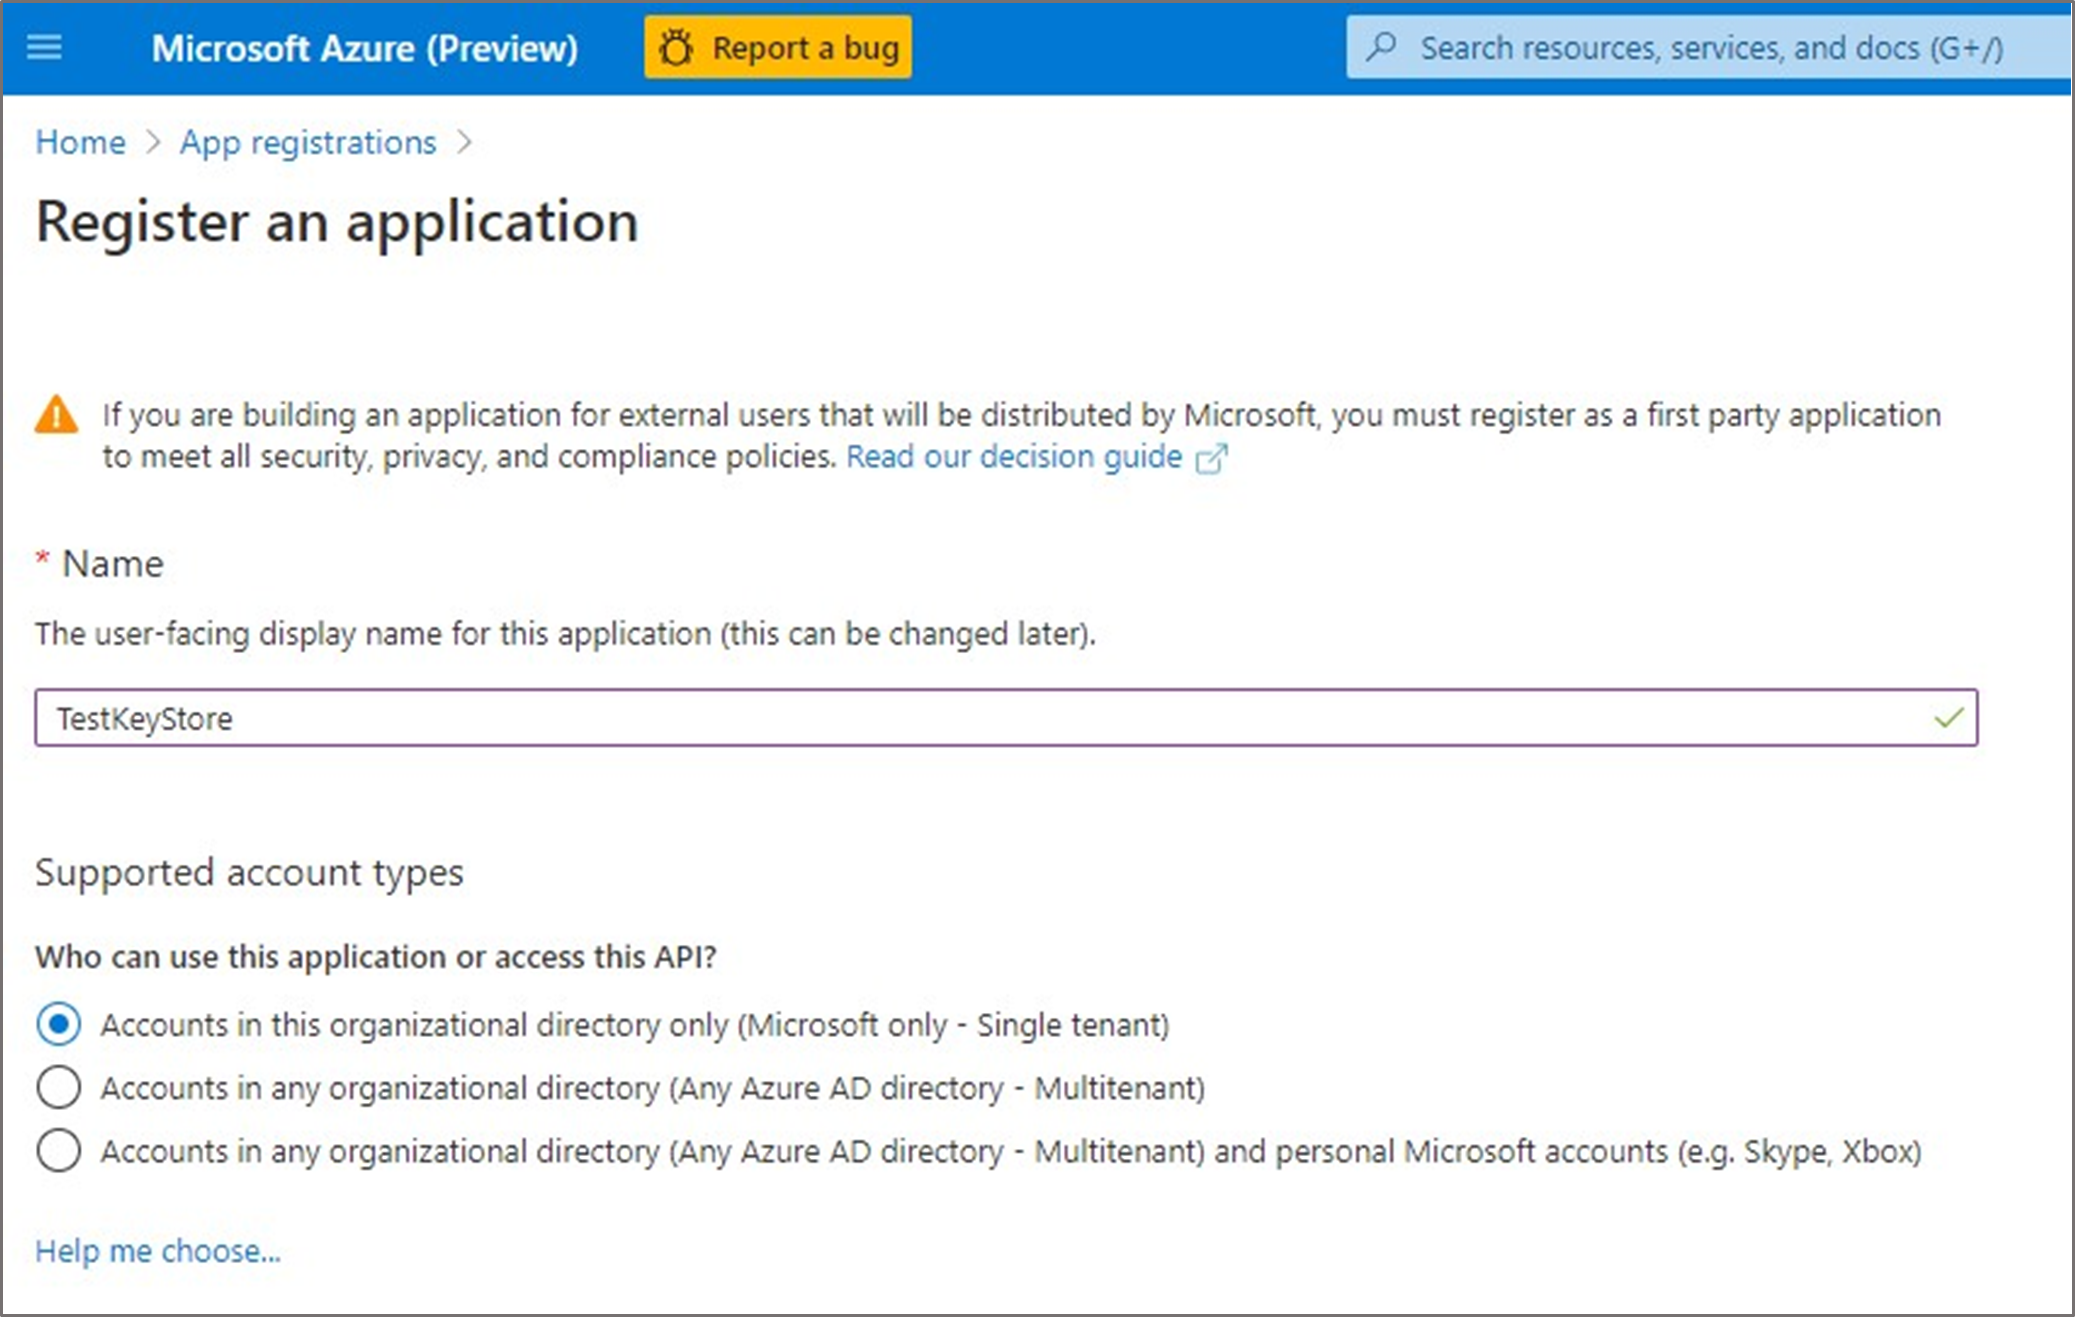
Register an application
-
At the bottom of the page, select Register to create the new App Registration.
-
In your new App Registration, in the left pane, under Manage, select Authentication.
-
Select Add a platform.
-
On the Configure platforms popup, select Web.
-
Under Redirect URIs, enter the URI of your double key encryption service. Enter the App Service URL, including both the hostname and domain and click on Configure button. For example: https://eskm.utimaco.com
The ESKM Public URL needs to be based on the root level, i.e., not a sub directory
example: https://eskm.utimaco.com/mykey
This example does not work: https://eskm.utimaco.com/dkeservice/mykey
No trailing slash in DKE URL. The DKE URL must not contain a trailing slash:
example: https://eskm.utimaco.com/mykey
This example does not work: https://eskm.utimaco.com/mykey/
-
Under Implicit grant, select the ID tokens checkbox.
-
Select Save to save your changes.
-
On the left pane, select Expose an API, next to Application ID URI, click on Set and enter your App Service URL, including both hostname and domain and click on Save.
-
Still on the Expose an API page, in the Scopes defined by this API area, select Add a scope. In the new scope:
-
Define the scope name as
user_impersonation. -
Select the administrators and users who can consent.
-
Define any remaining values required.
-
Select Add scope.
-
Select Save at the top to save your changes.
-
-
Still on the Expose an API page, in the Authorized client applications area, select Add a client application. In the new client application:
-
Define the Client ID as
d3590ed6-52b3-4102-aeff-aad2292ab01c. This value is the Microsoft Office client ID and enables Office to obtain an access token for your key store. -
Under Authorized scopes, select the
user_impersonationscope. -
Select Add application.
-
Select Save at the top to save your changes.
-
Repeat these steps, but this time, define the client ID as
c00e9d32-3c8d-4a7d-832b-029040e7db99.
-
This value is the Azure Information Protection unified labeling client ID.
Create Sensitivity Labels using DKE
In the Microsoft Purview portal, navigate to the Information Protection section.
-
On Sensitivity Labels page, select + Create to start the new sensitivity label configuration.
-
On Provide basic details for this label, specify the following:
-
Name – The name used to identify the sensitivity label in Microsoft Purview.
-
Display name – The name displayed to users in applications where the label is published.
-
Description for users – A description that helps users understand the purpose of the sensitivity label.
-
Description for admins – A description for administrators who manage the sensitivity label.
-
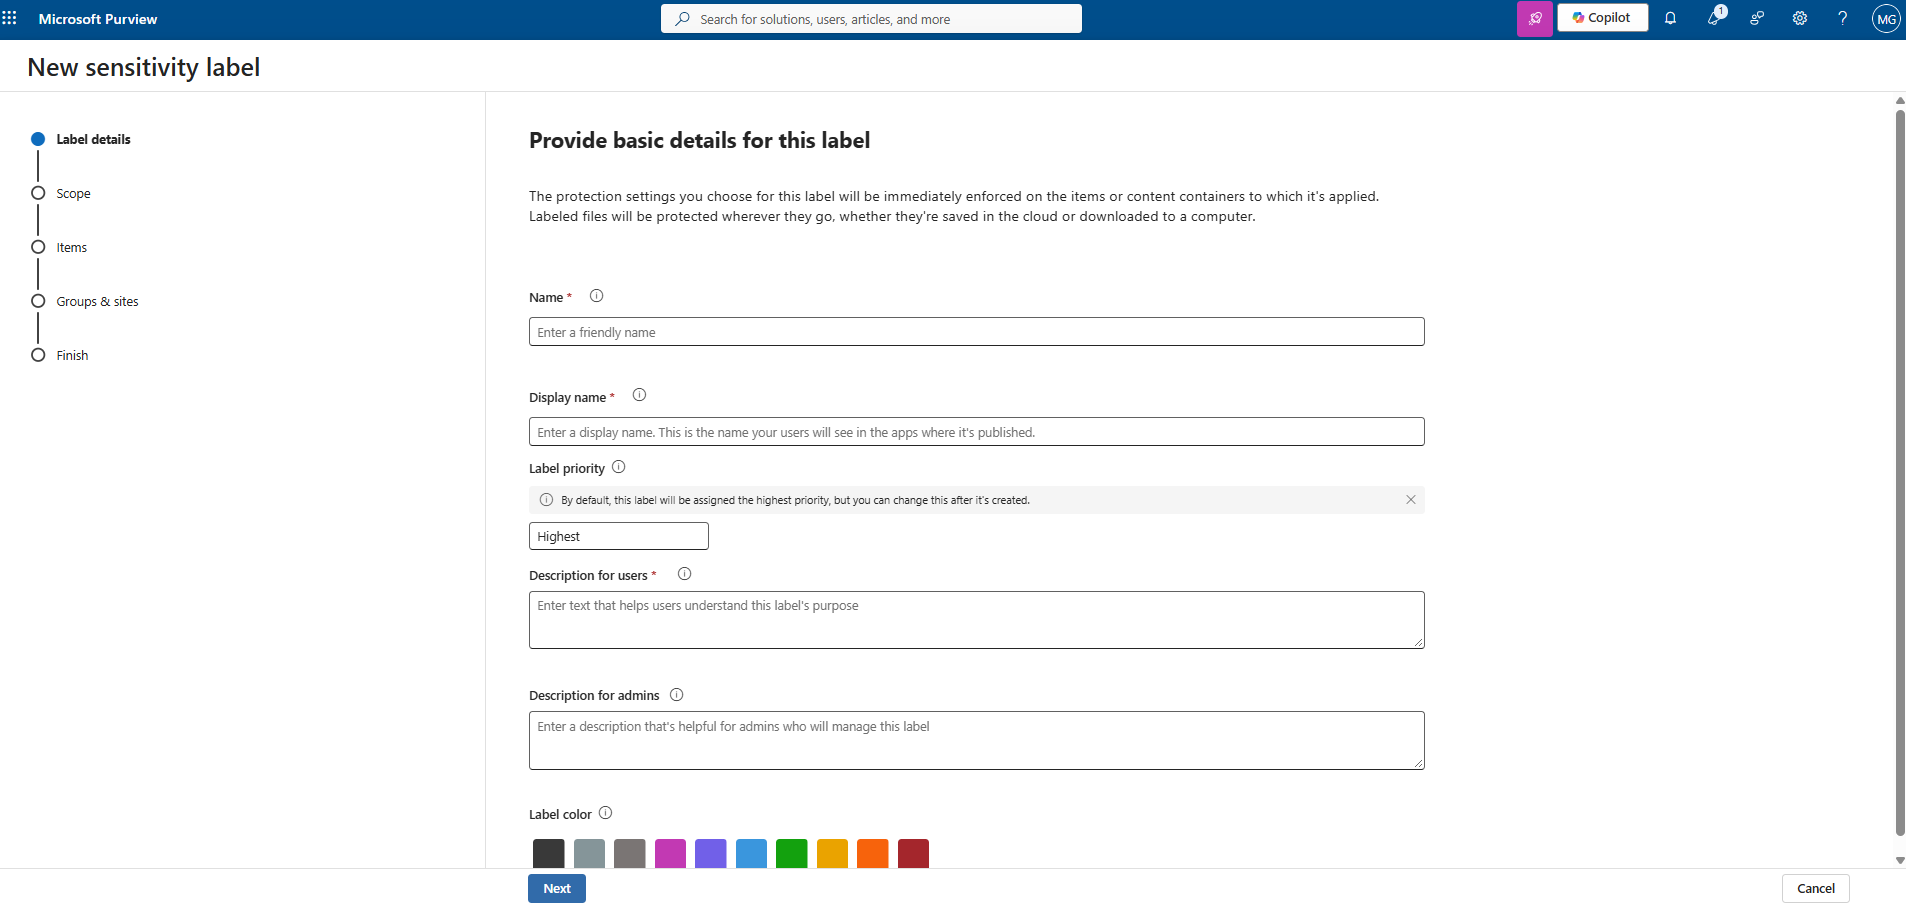
Create label
-
Click on Next button.
-
On Define the scope for this label, select the required scope for the sensitivity label. For example, select Files & other data assets and click on Next button.
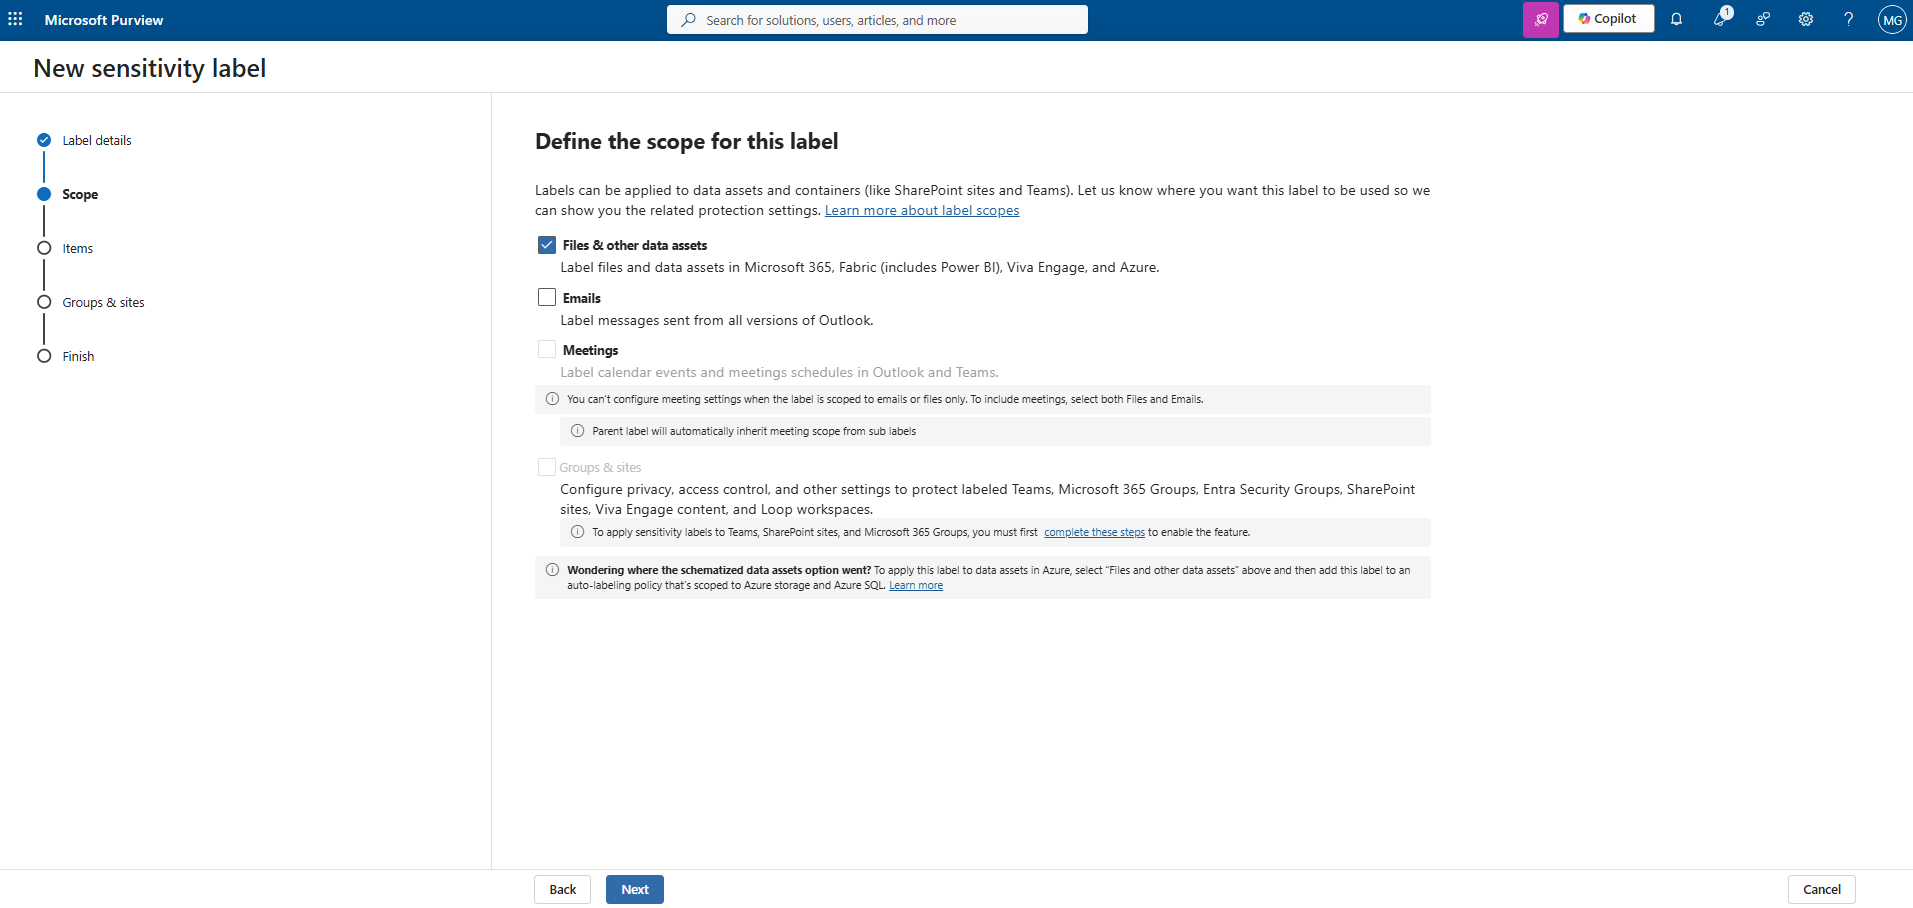
Define the scope for this label
-
On Choose protection settings for the types of items you selected, select Control access to configure permissions for content to which the label is applied. Since the primary purpose of this procedure is to secure the files, configure the appropriate access control settings. Select Apply content marking, and then select Next.
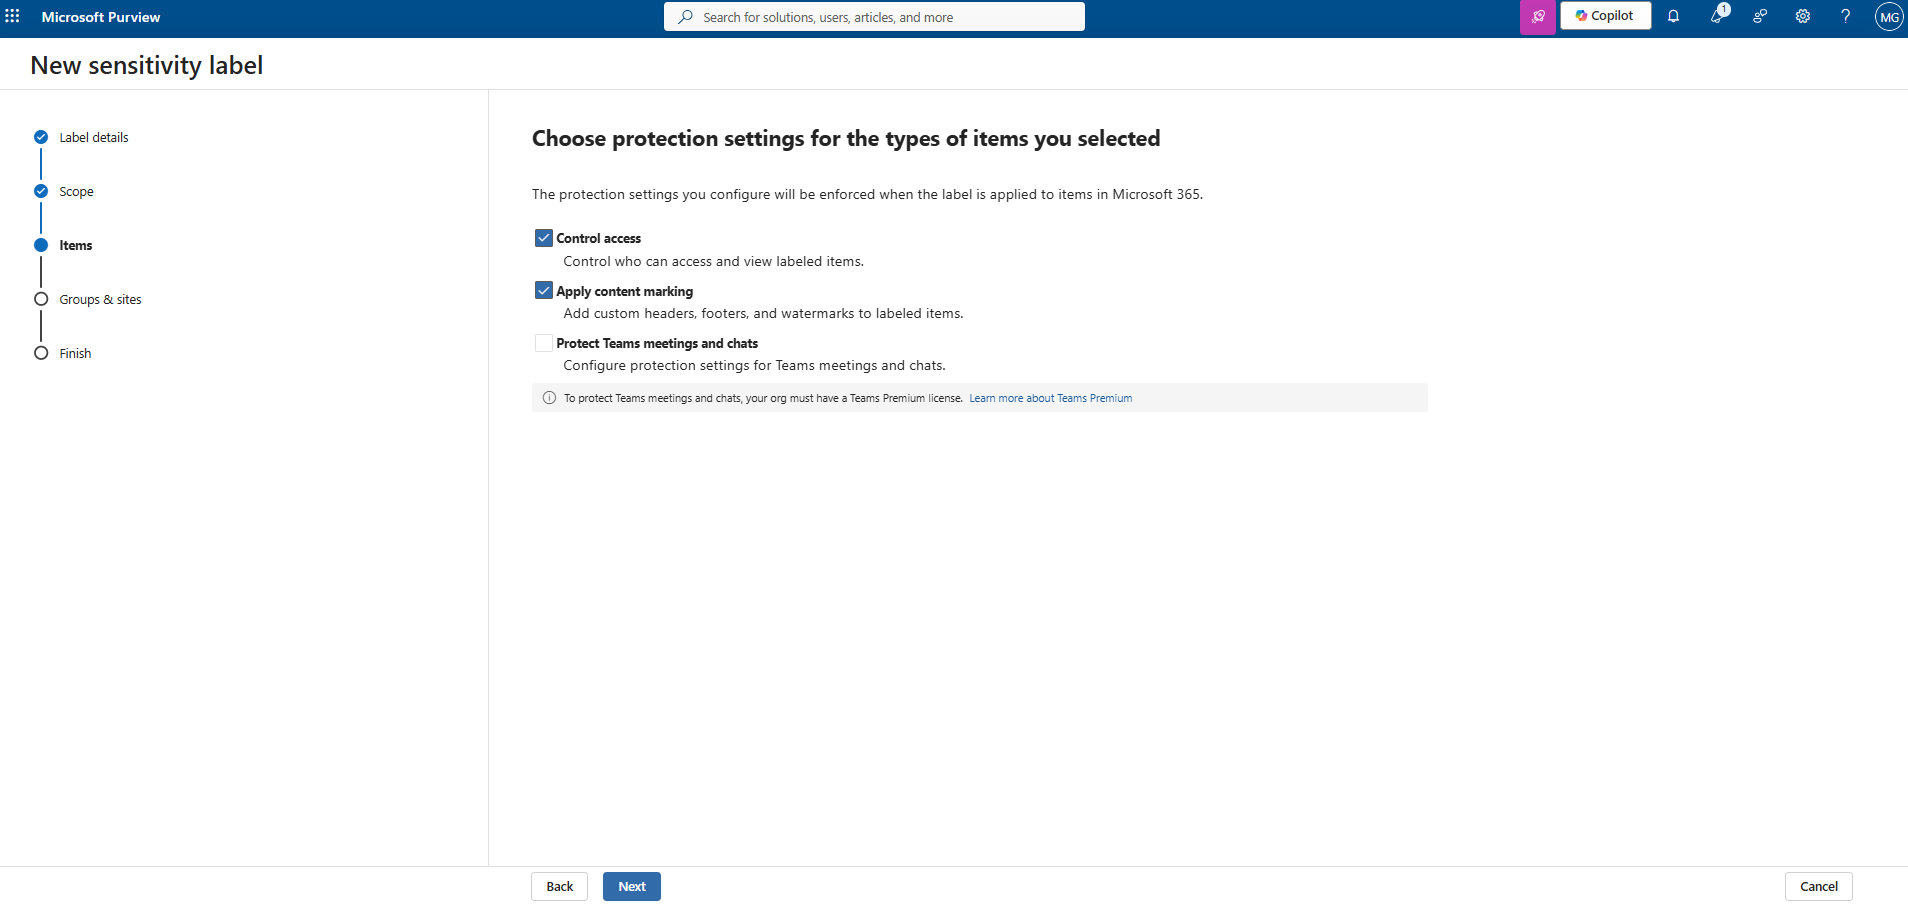
Choose protection settings
-
On Access control, configure the access settings as follows:
-
Assign permissions now or let users decide? – Select Assign permissions now.
-
User access to content expires – Select Never to allow users to access protected files without an expiration period.
-
Allow offline access – Select Always.
-
Under Assign permissions to specific users and groups, select Assign permissions and specify the users or groups that require access to the protected content.
-
Select Use Double Key Encryption and enter the appropriate DKE Key URL obtained from the ESKM Cloud UI and select Next.
-
Use the DKE Key URL from the ESKM Cloud UI. Refer to Section Viewing Microsoft DKE Key Information.
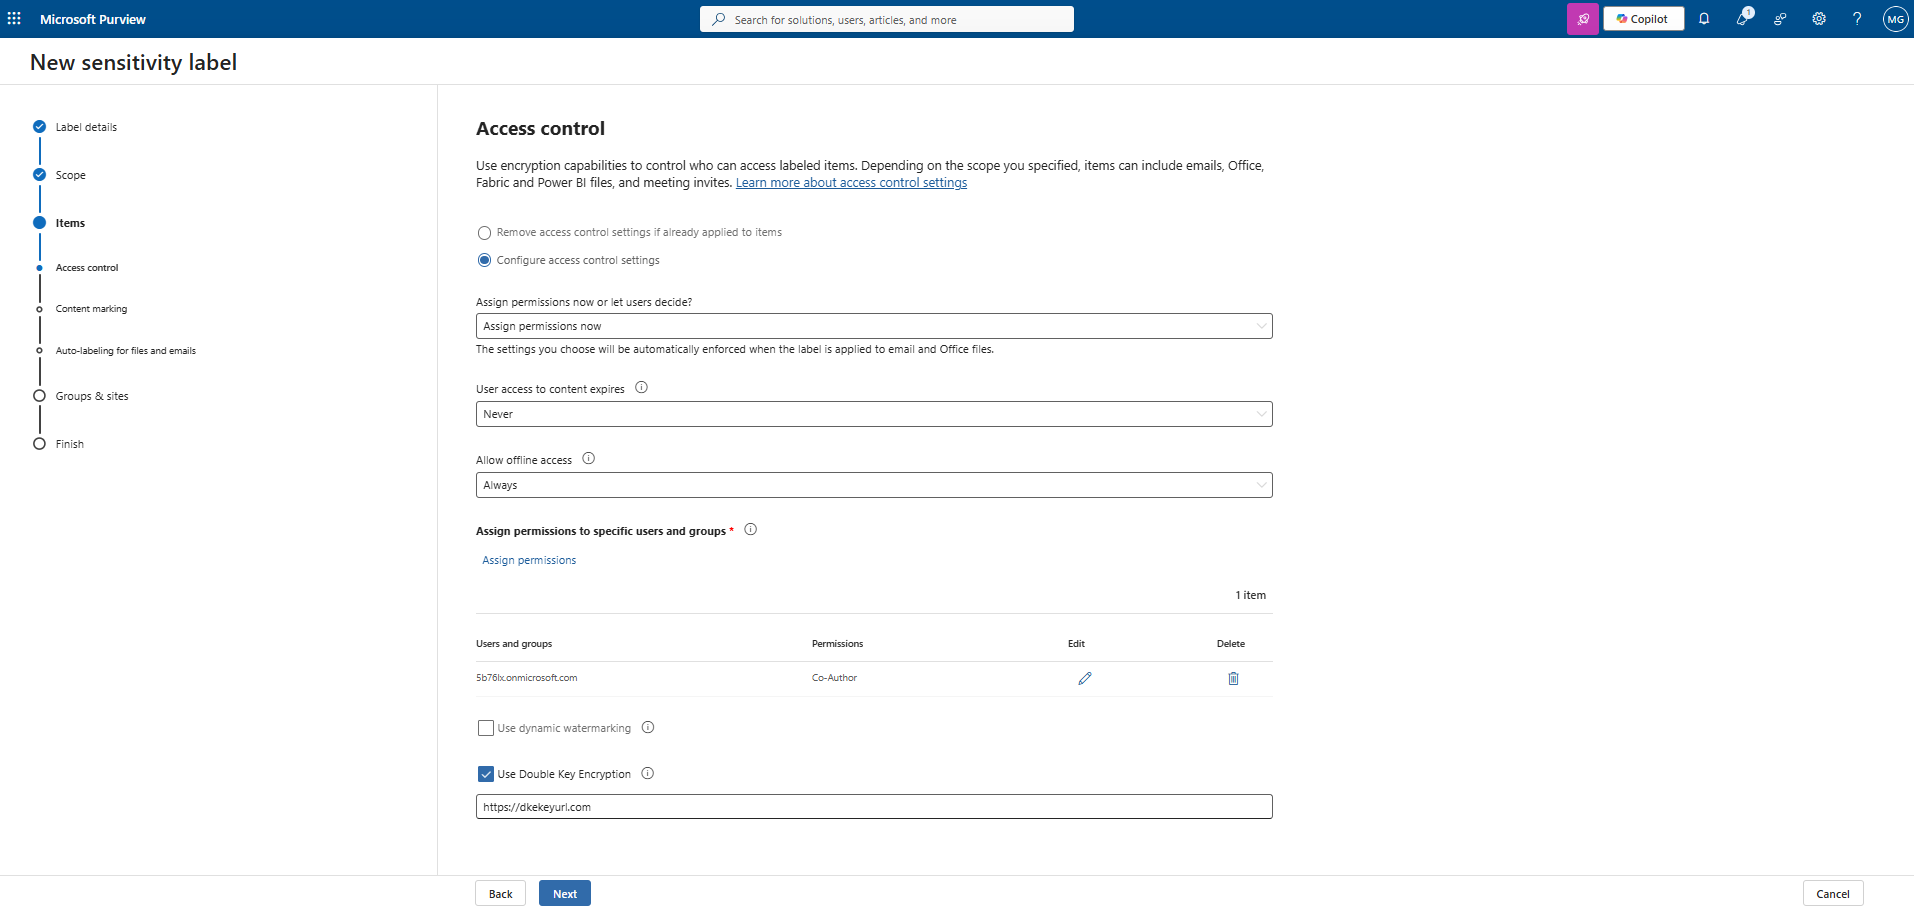
Access control
The sensitivity label used for DKE protection needs to provide sufficient permissions for all intended recipients of the documents.
-
On Content marking, configure how the sensitivity label is displayed on protected content. Enable Content marking, and configure the required watermark, header, and footer settings. Select Next.
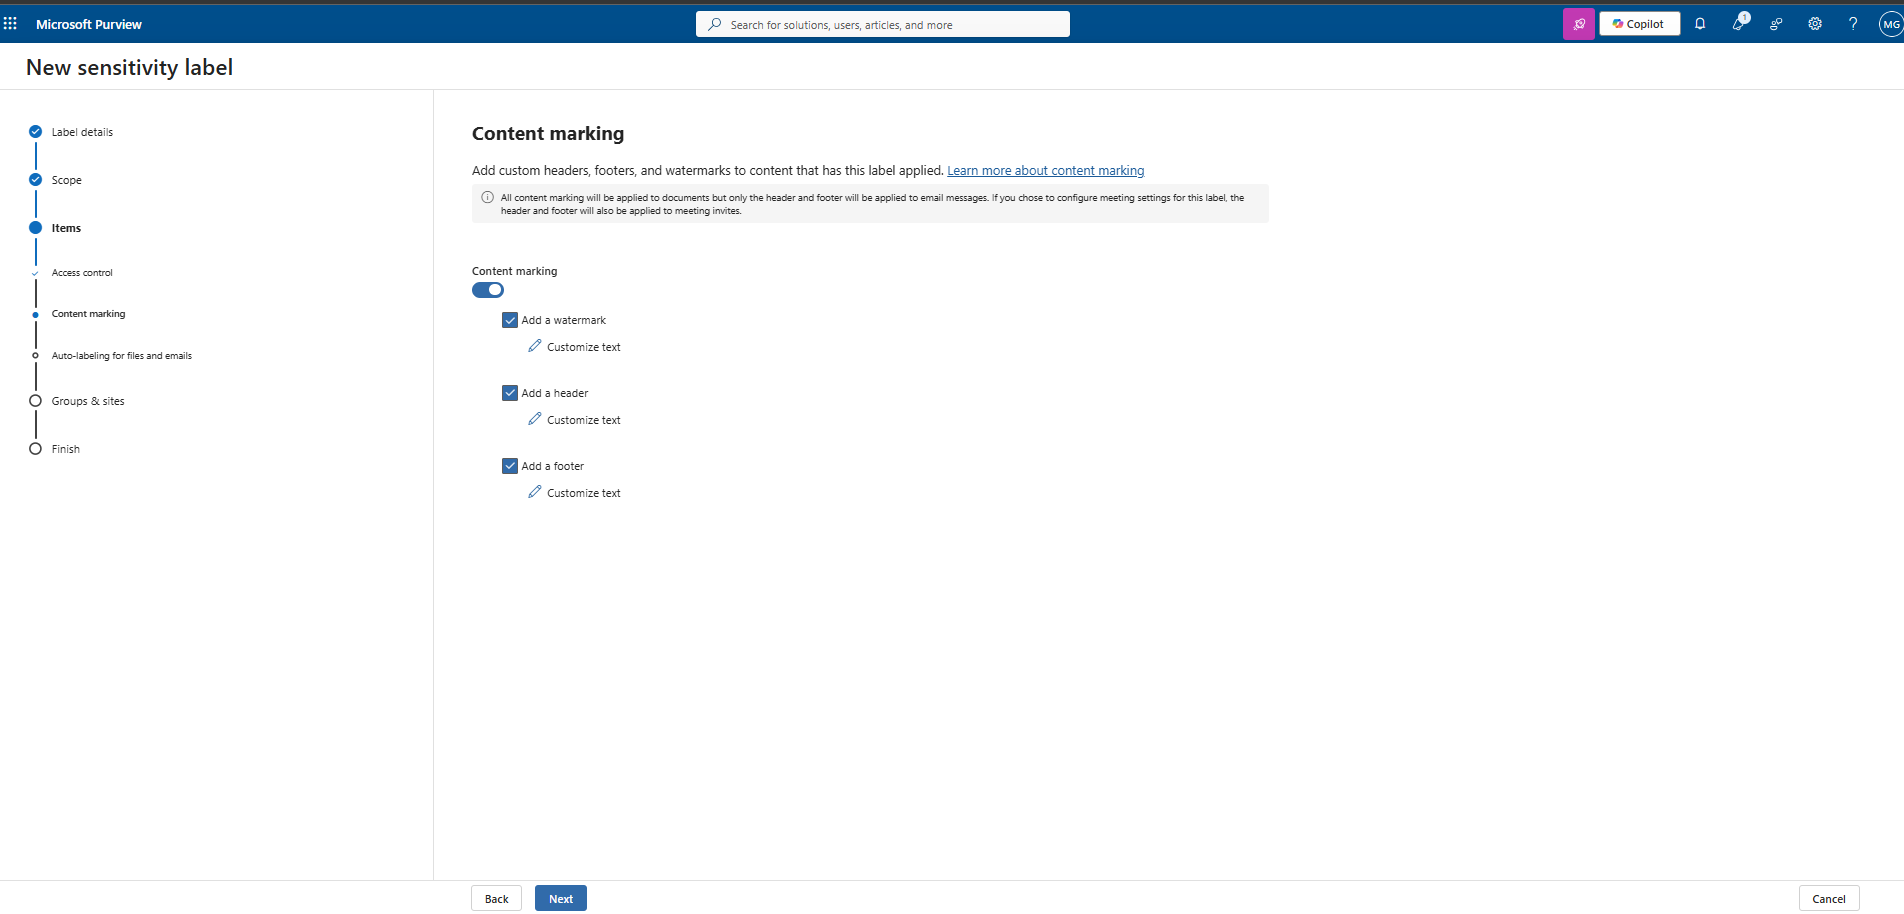
Content marking settings
-
On Auto-labeling for files and emails, enable Auto-labeling for files and emails. Configure the required conditions for detecting content and select the action to be performed when the content matches the specified conditions. Then select Next.
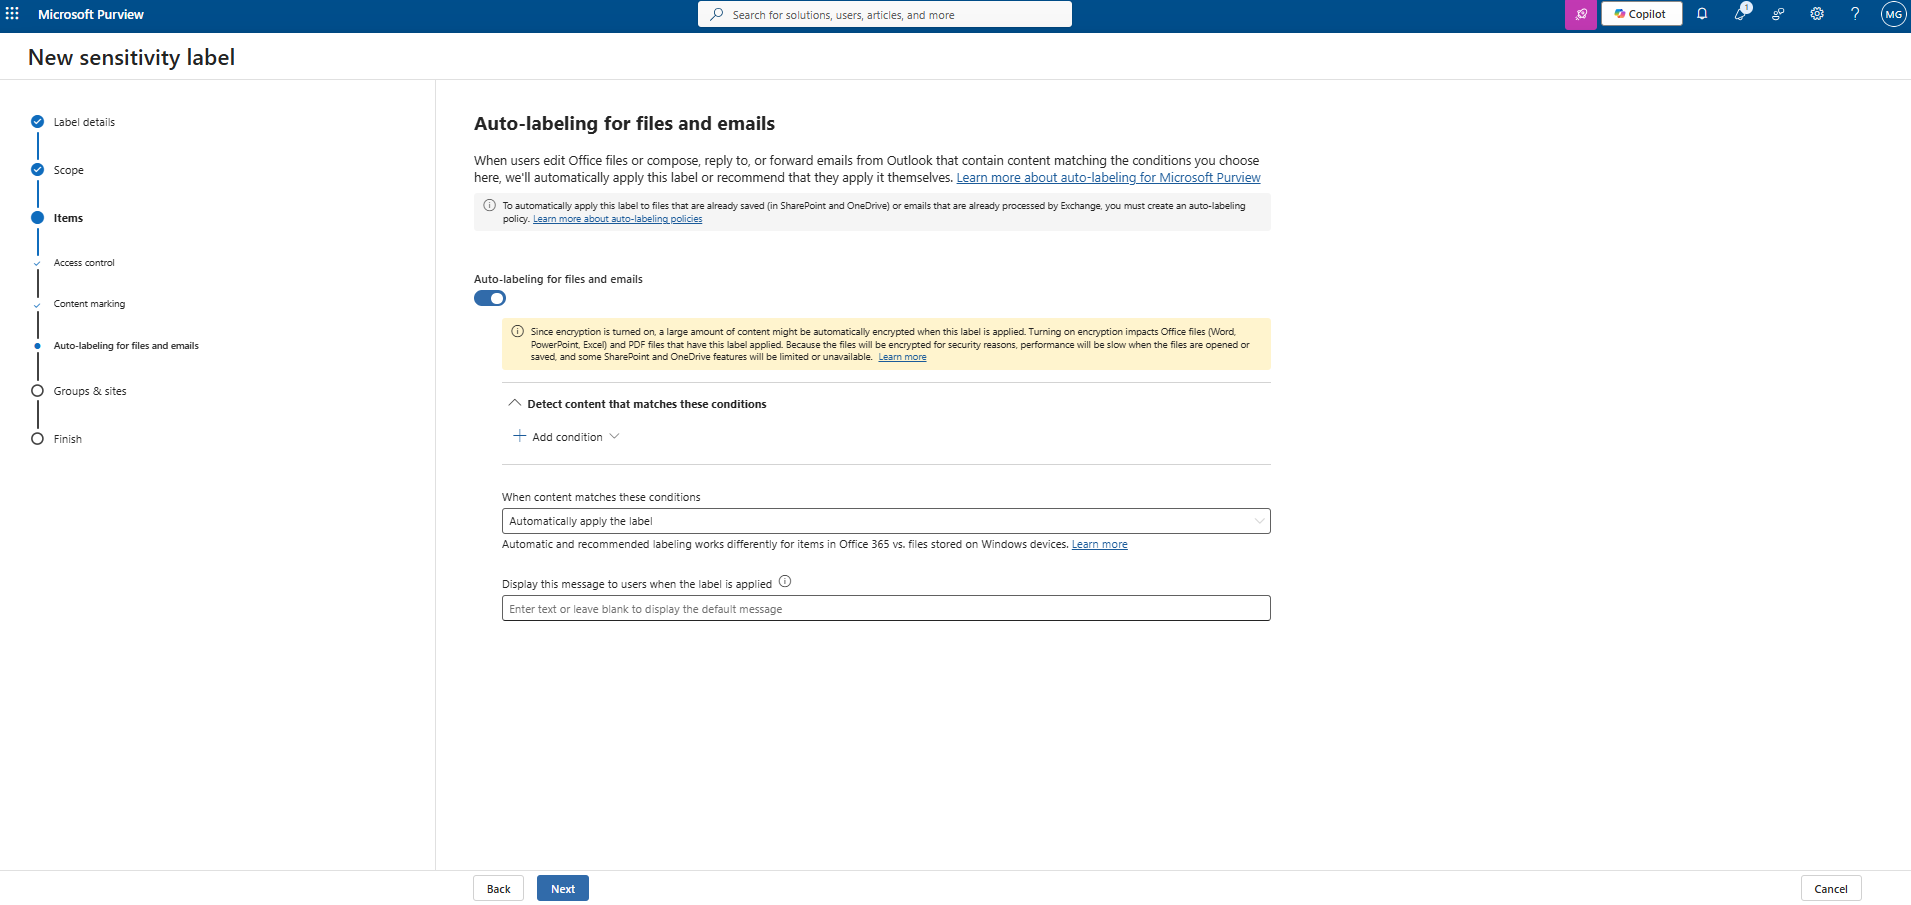
Auto-labeling for files and emails
-
On Define protection settings for groups and sites, configure the required protection settings for groups and sites. These settings apply to teams, groups, and sites, and not directly to the files stored in them. Then select Next.
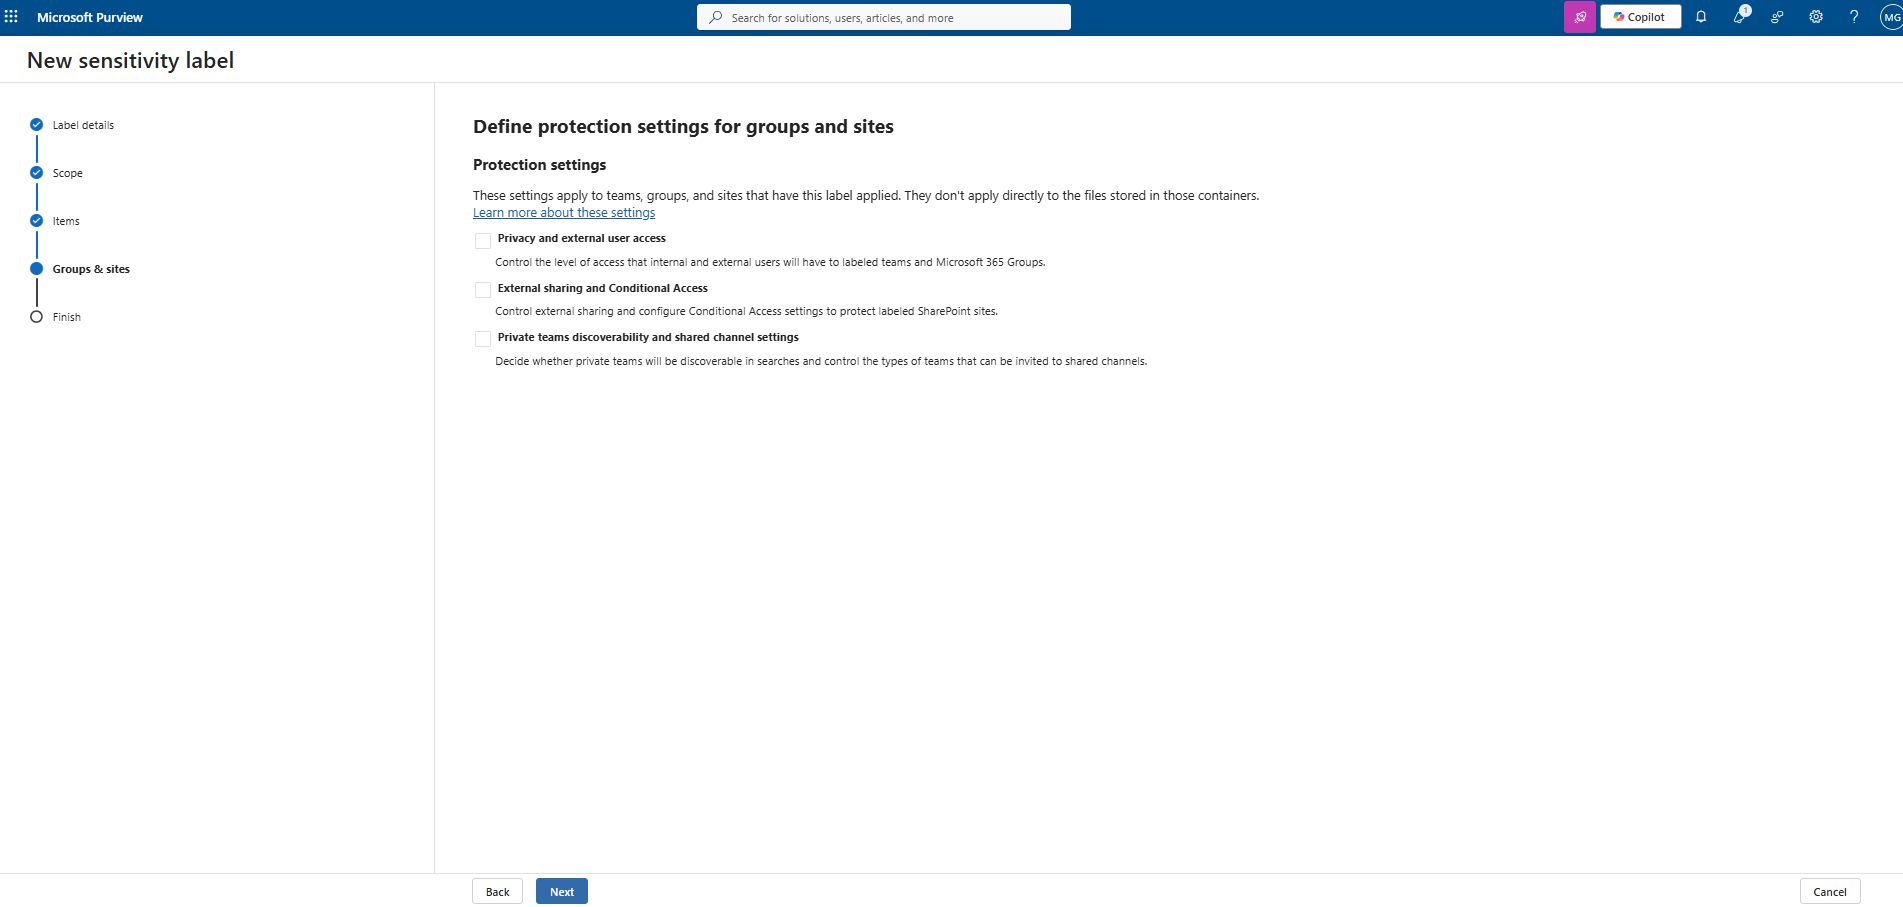
Define protection settings for groups and sites
-
On Review your settings and finish, review the configured settings and make any required changes. Select Create label to create the sensitivity label, and then select Done.
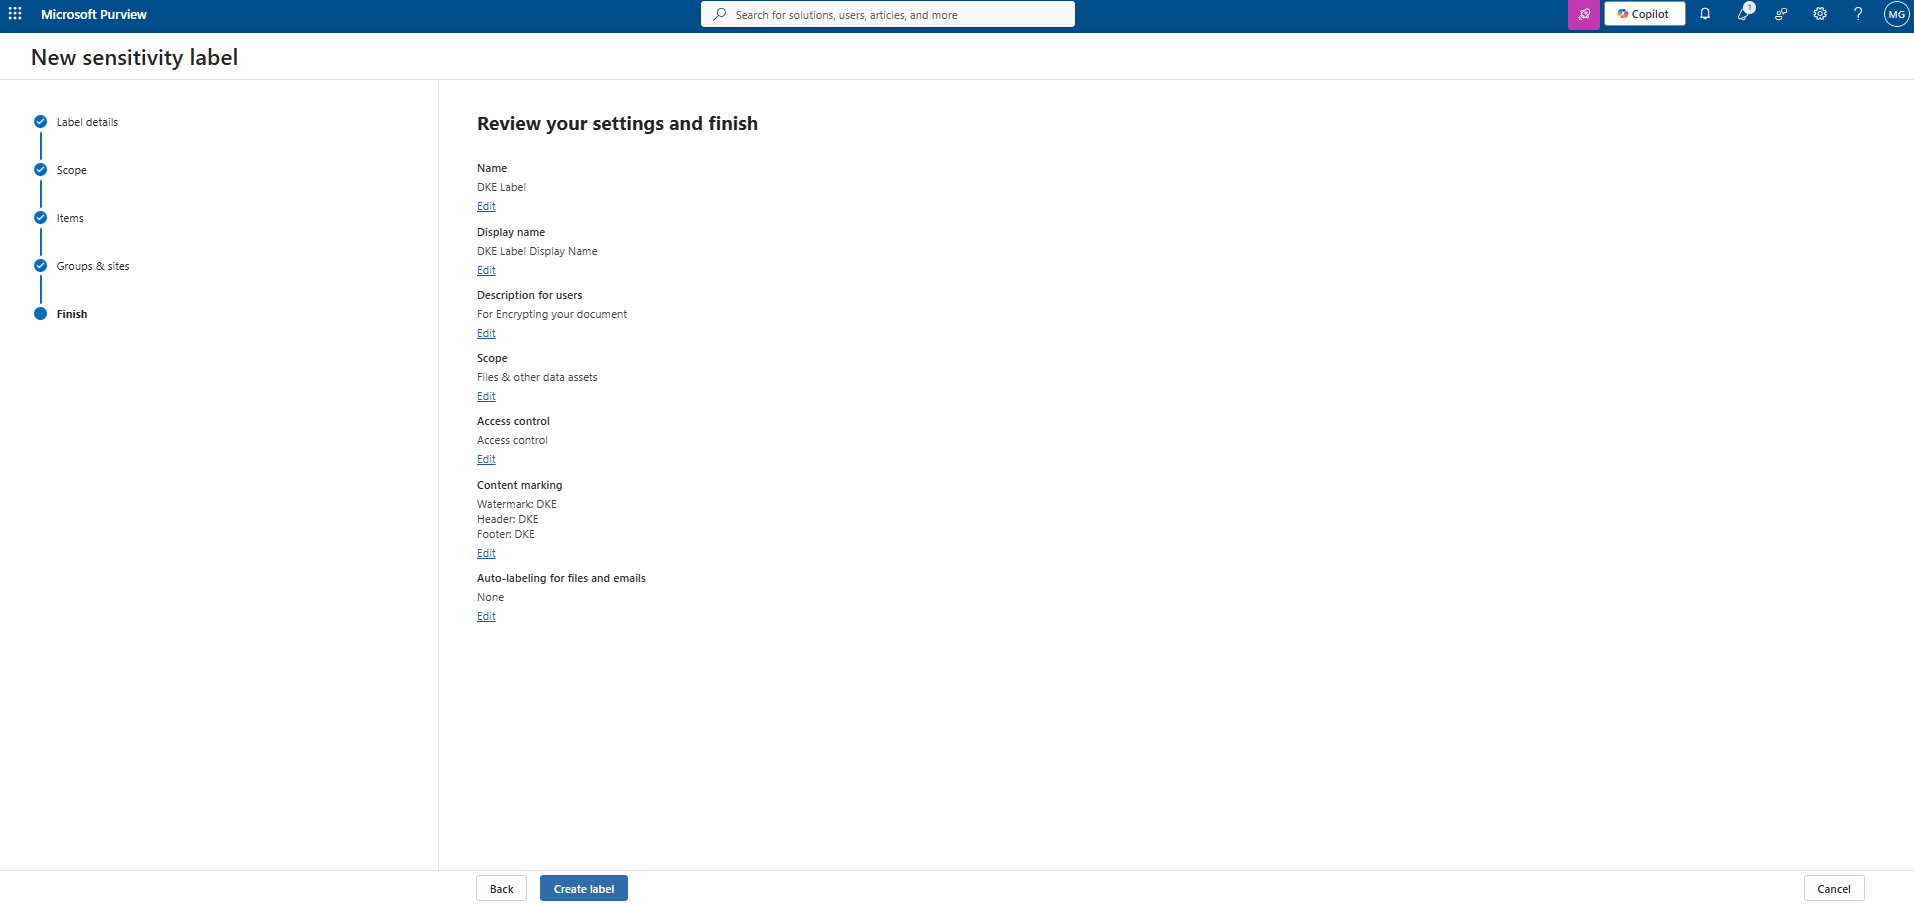
Review label settings
Publish the Sensitivity Label
After the sensitivity label is created, it must be published to make it available to users.
-
On Your sensitivity label was created, select Publish label to users' apps, and then select Done.
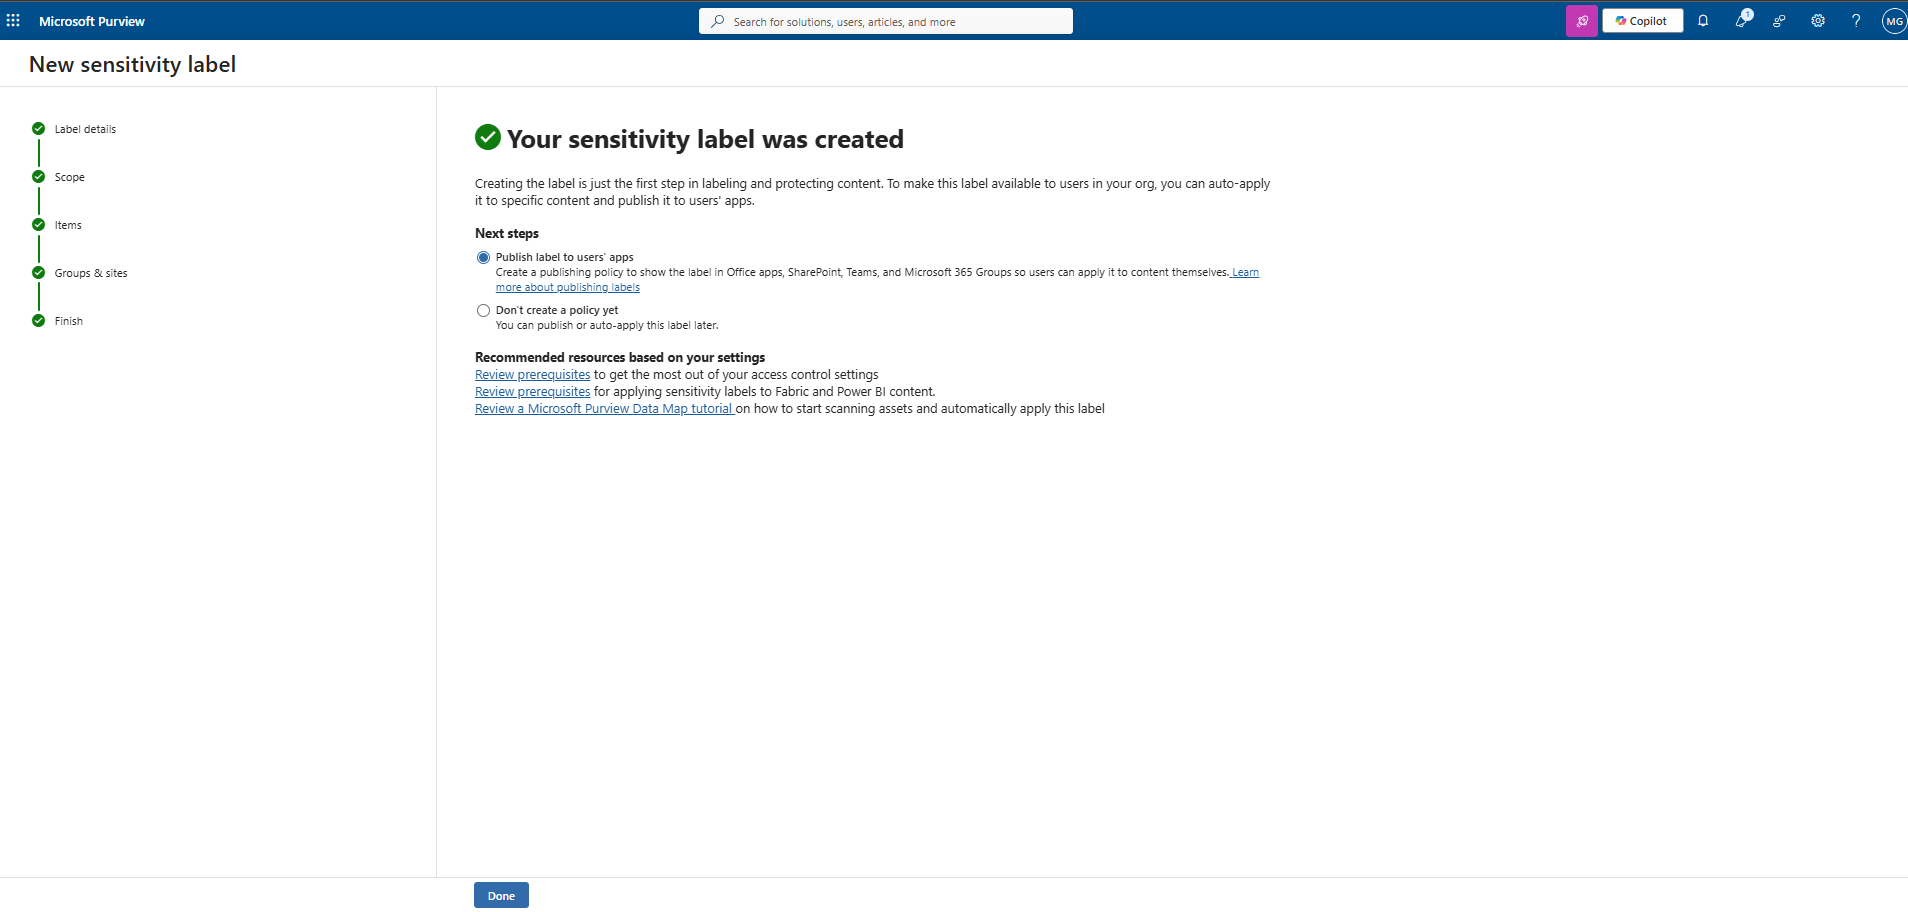
Sensitivity label created
-
On Publish label, select Create new label policy to create a new publishing policy, or select an existing Label Policy if an appropriate policy is already available.
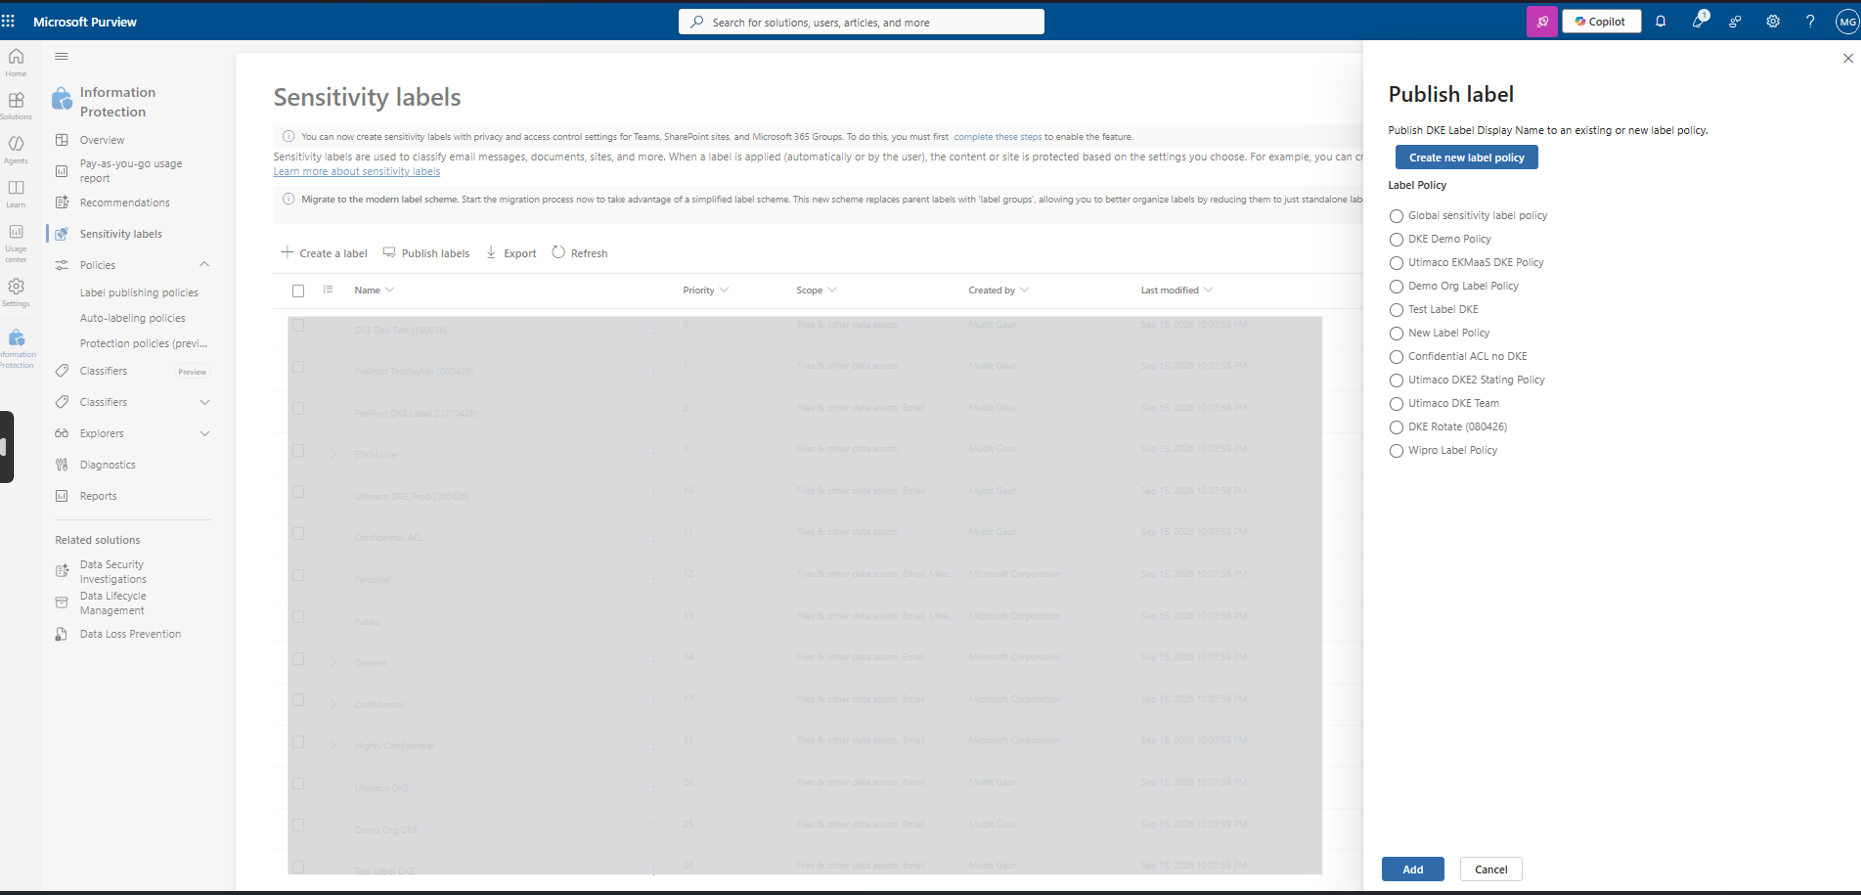
Publish label
-
On Choose sensitivity labels to publish, select Choose sensitivity labels to publish, select the sensitivity label created earlier, and then select Add, and then select Next.
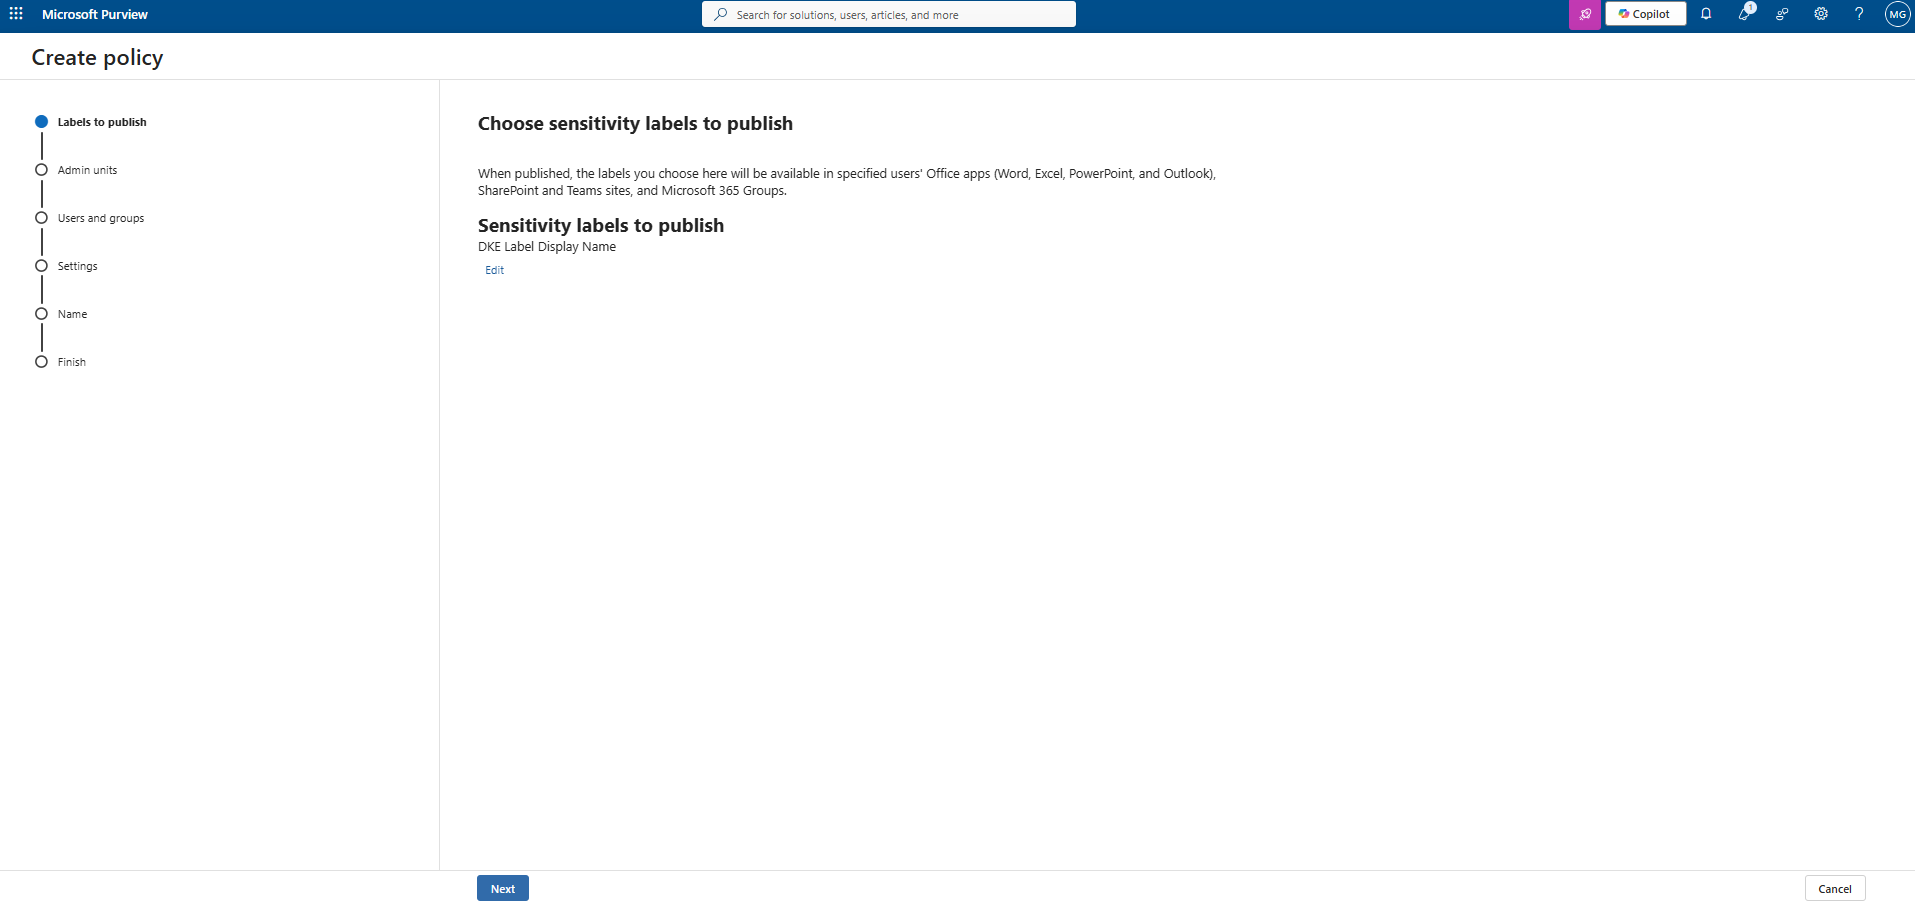
Choose sensitivity labels to publish
-
On Publish to users and groups, specify the users or groups for which the sensitivity label should be available, and then select Next.
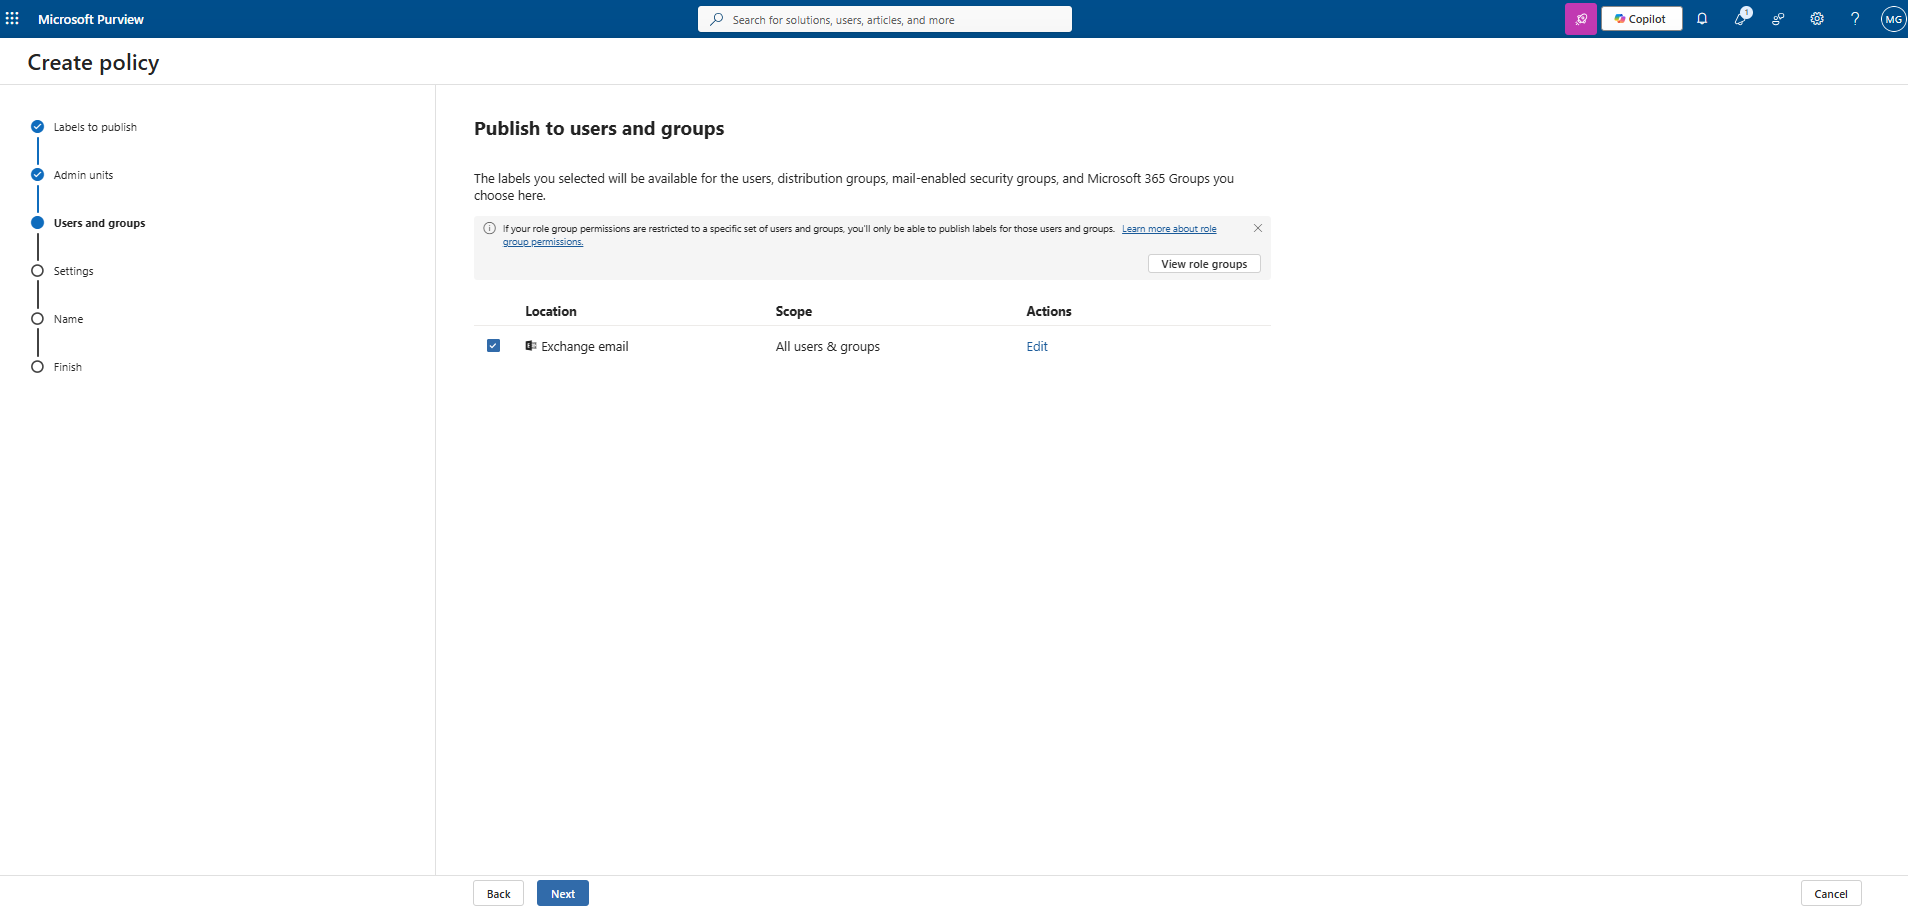
Publish to users and groups
-
On Policy settings, configure the required policy settings as applicable:
-
Users must provide a justification to remove a label or lower its classification.
-
Require users to apply a label to their emails and documents.
-
Require users to apply a label to their Fabric and Power BI content.
-
Provide users with a link to a custom help page.
-
Then select Next.
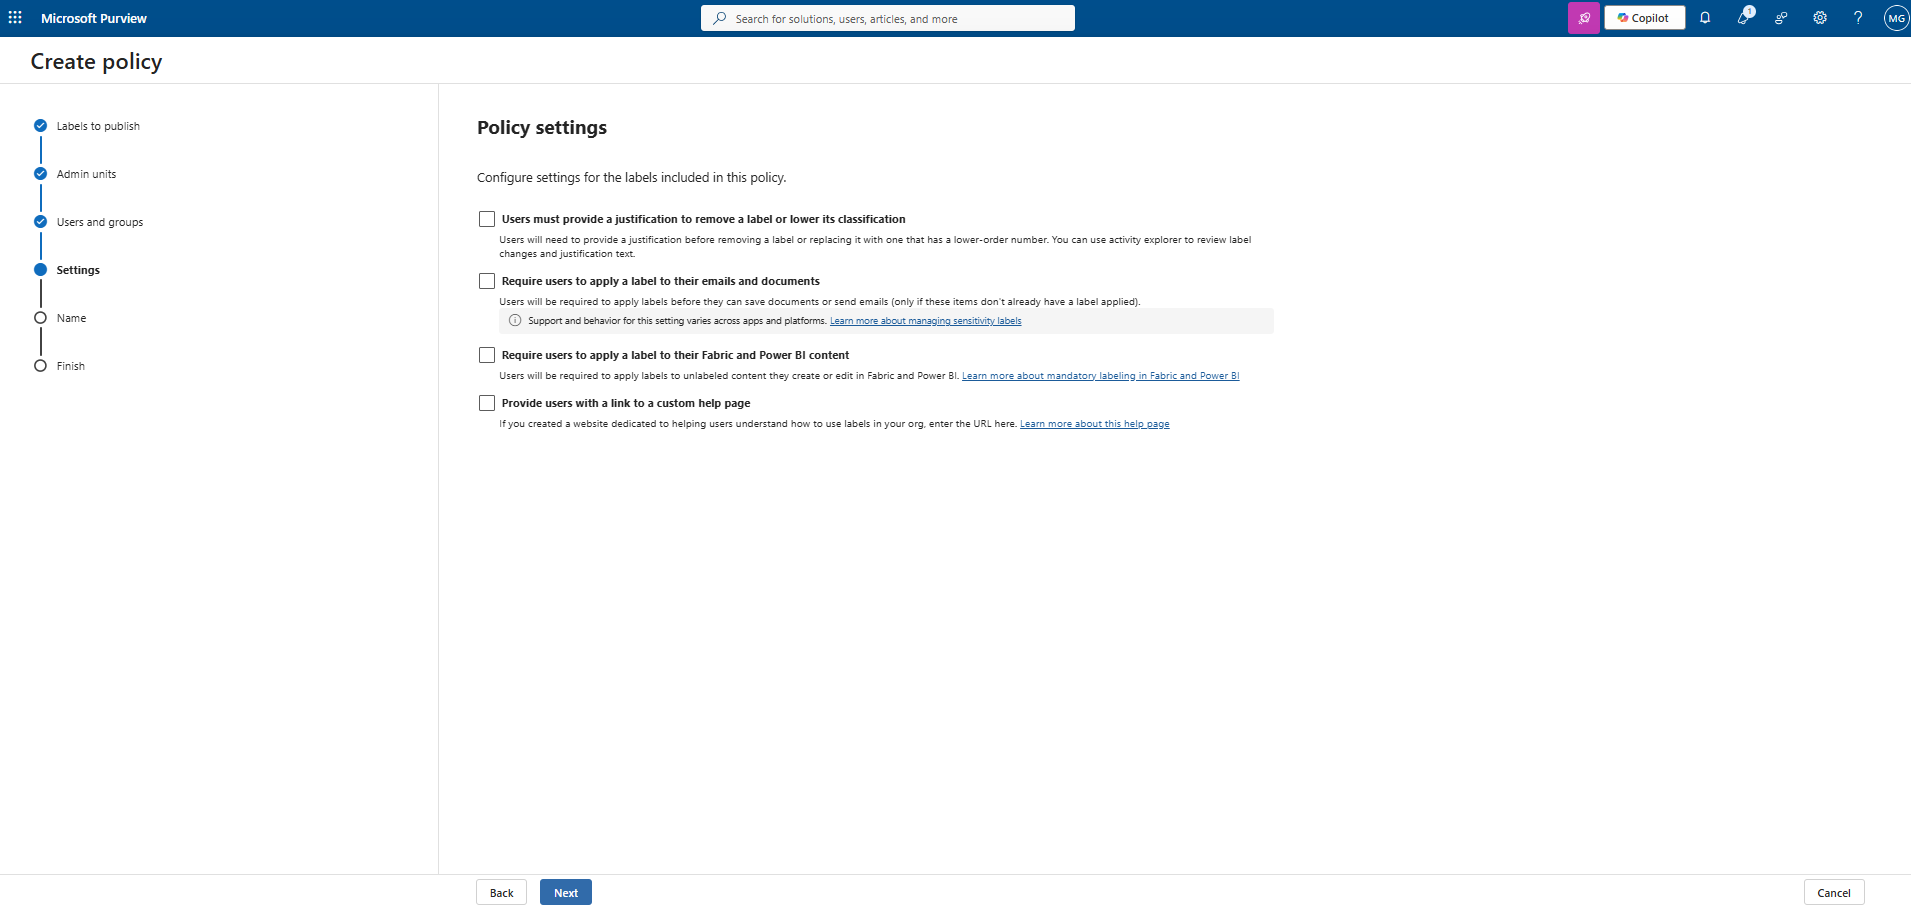
Policy settings
-
Configure the default label settings for Documents, Emails, Meetings, and Fabric and Power BI as required on the subsequent pages, selecting Next after each configuration.
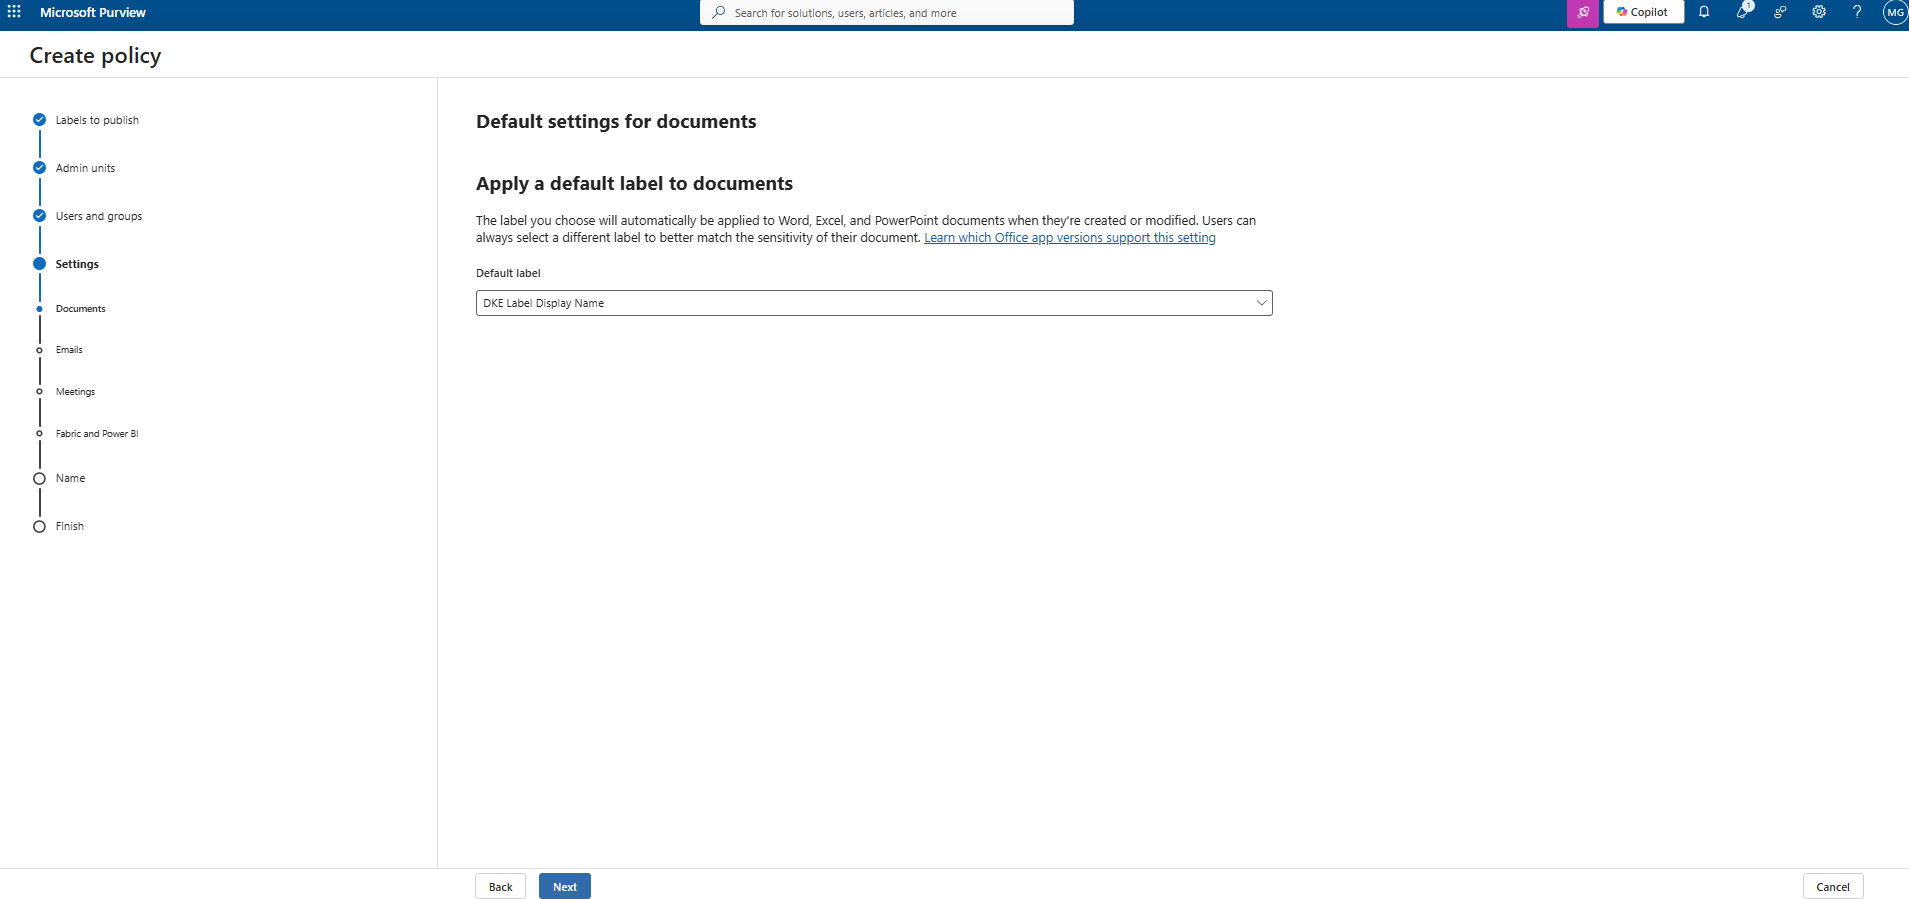
Default settings for documents
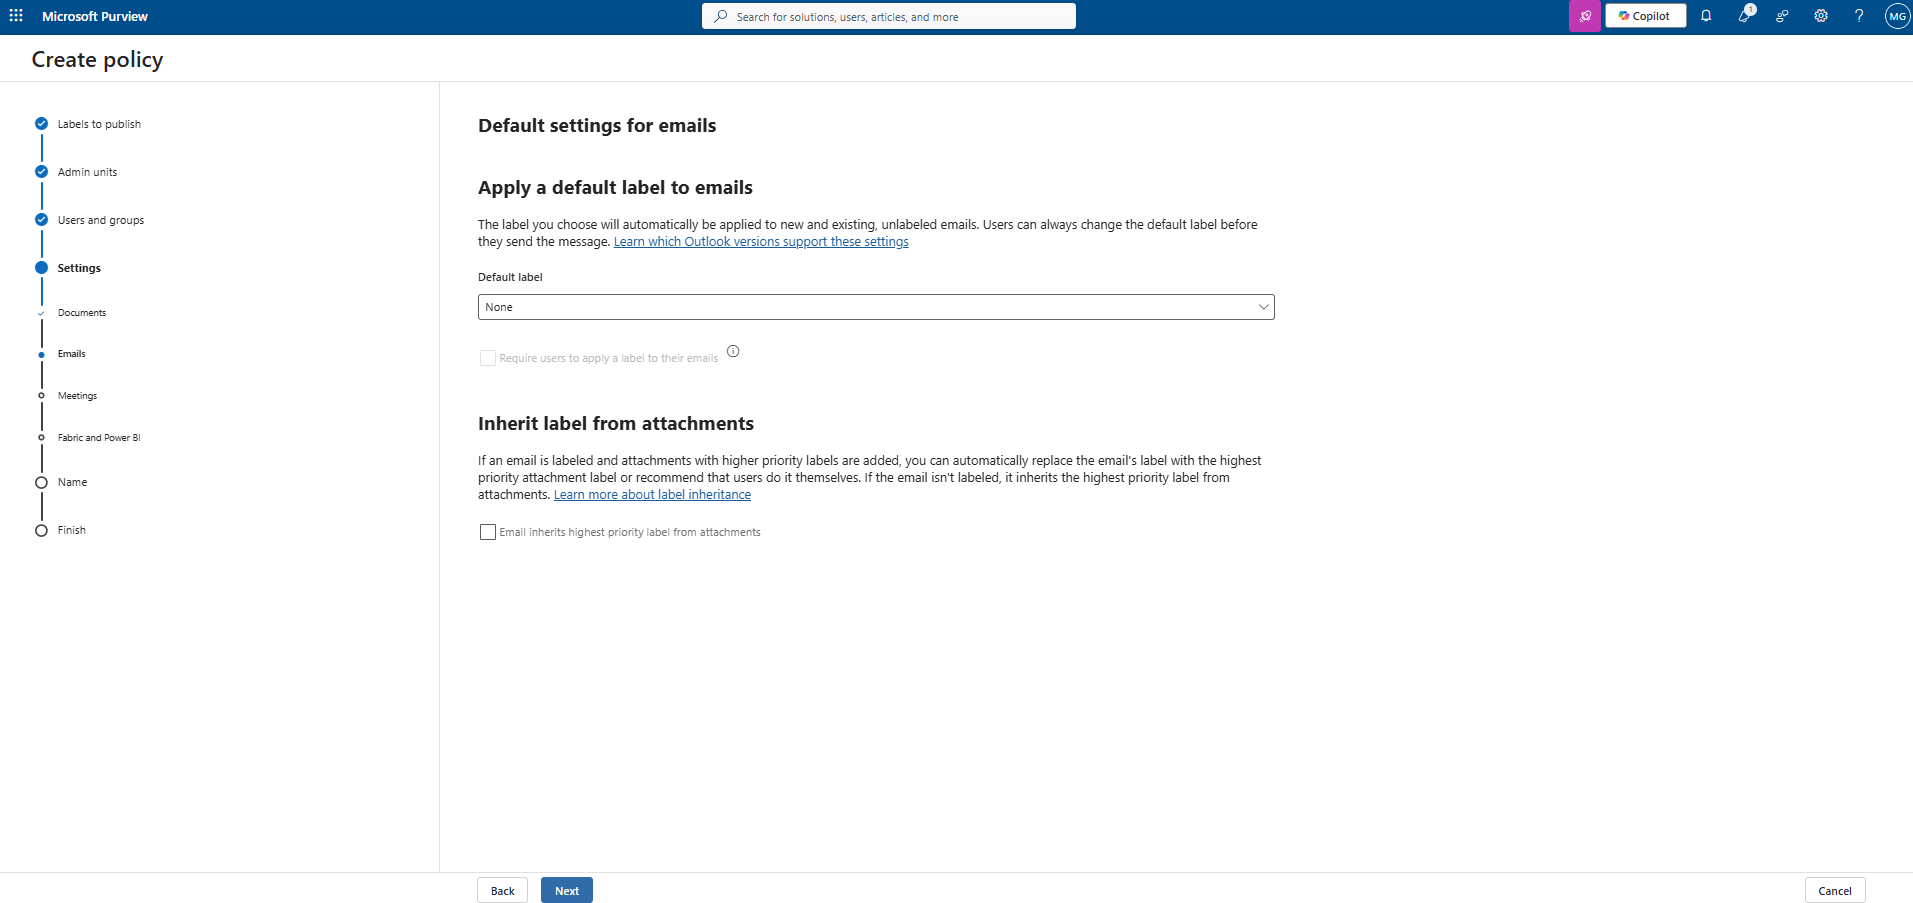
Default settings for emails
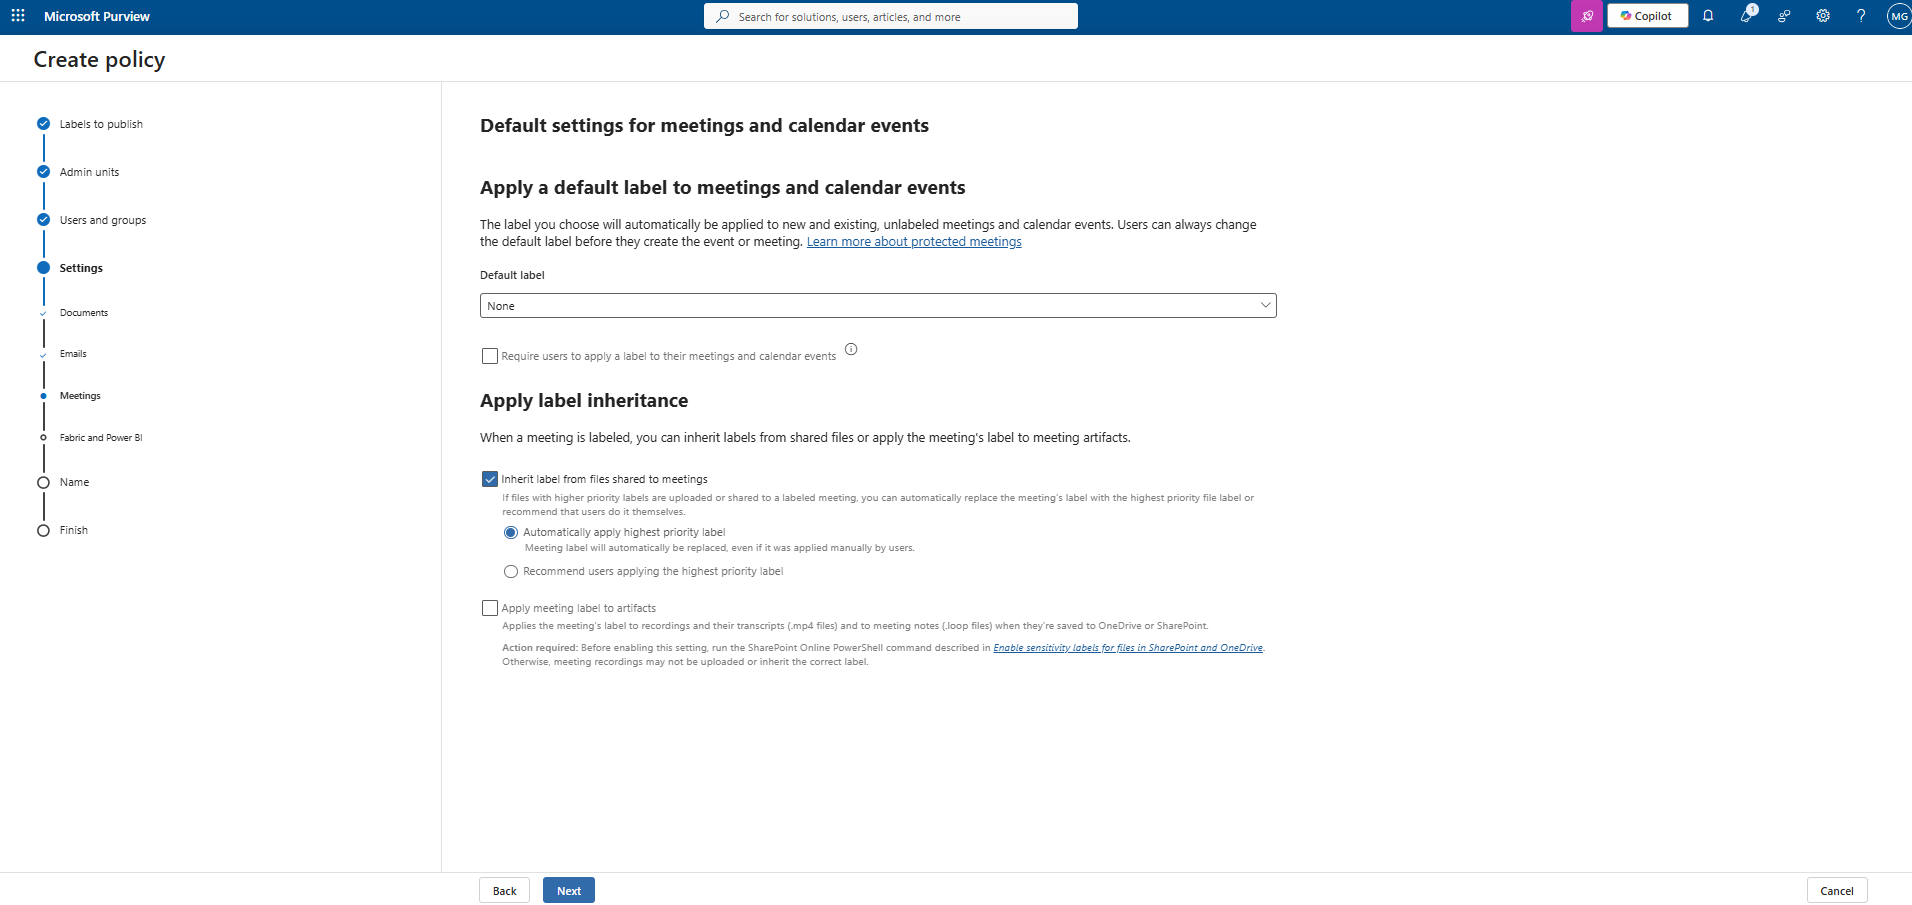
Default settings for meetings and calendar events
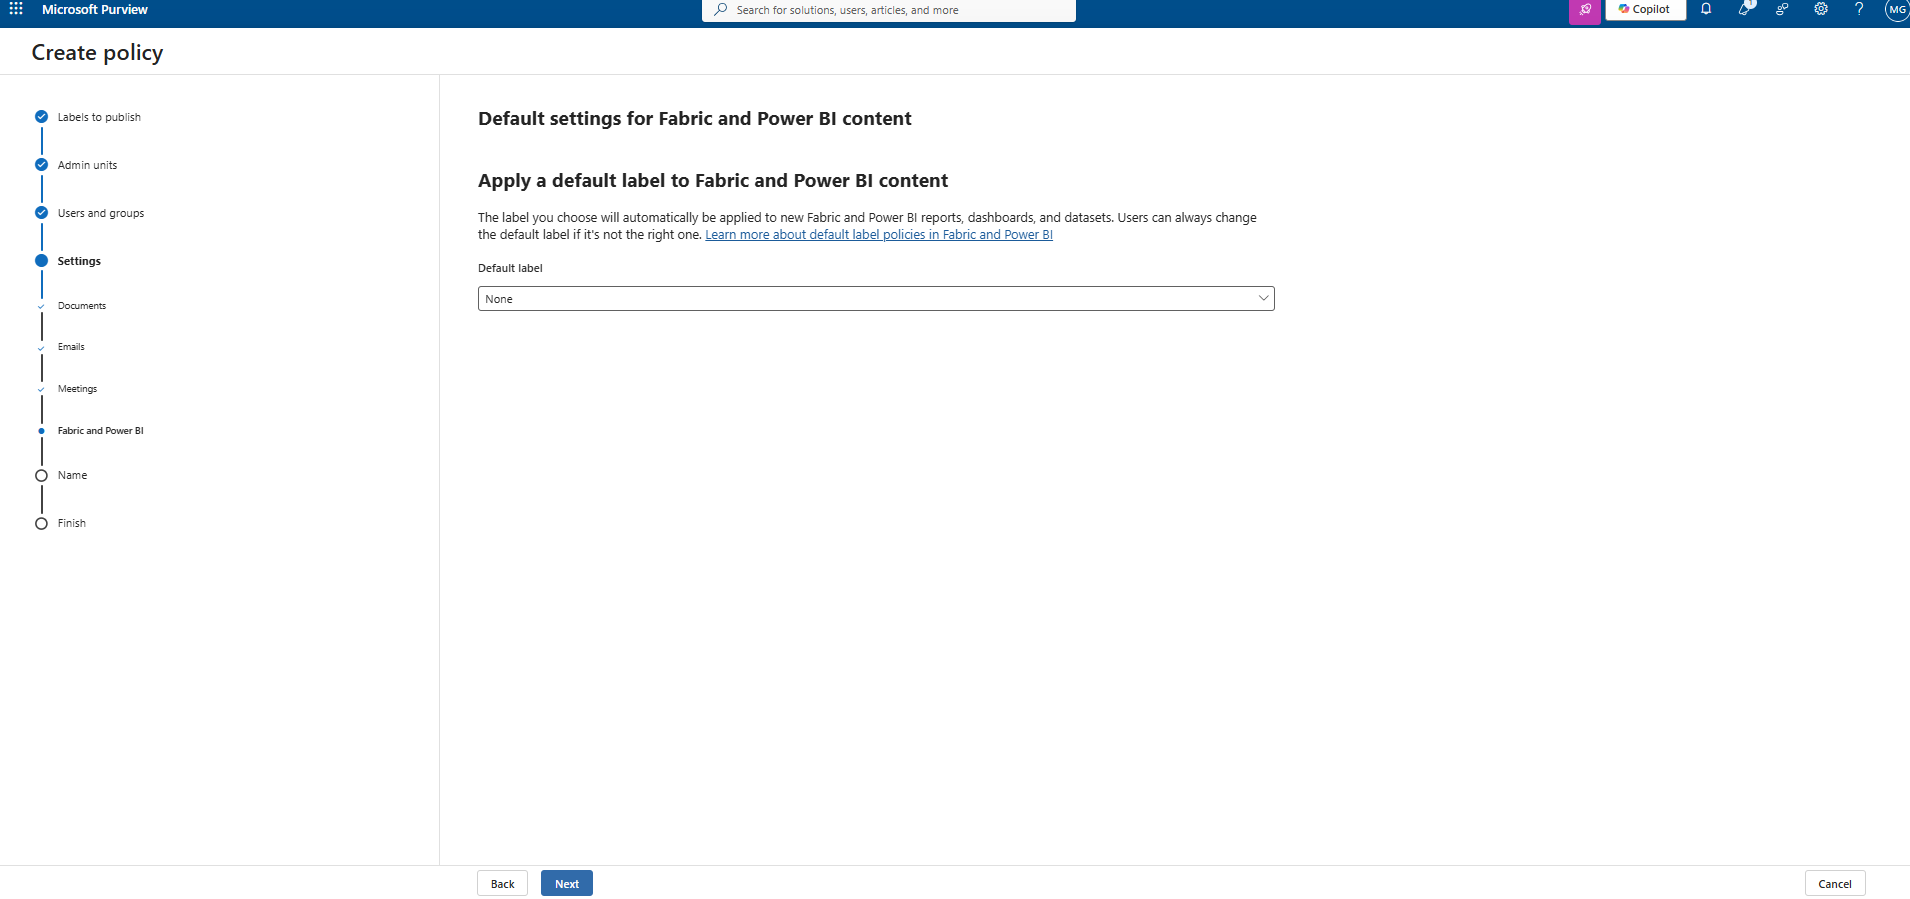
Default settings for Fabric and Power BI content
-
On Name your policy, enter a Name for the sensitivity label policy and, optionally, provide a Description. Select Next.
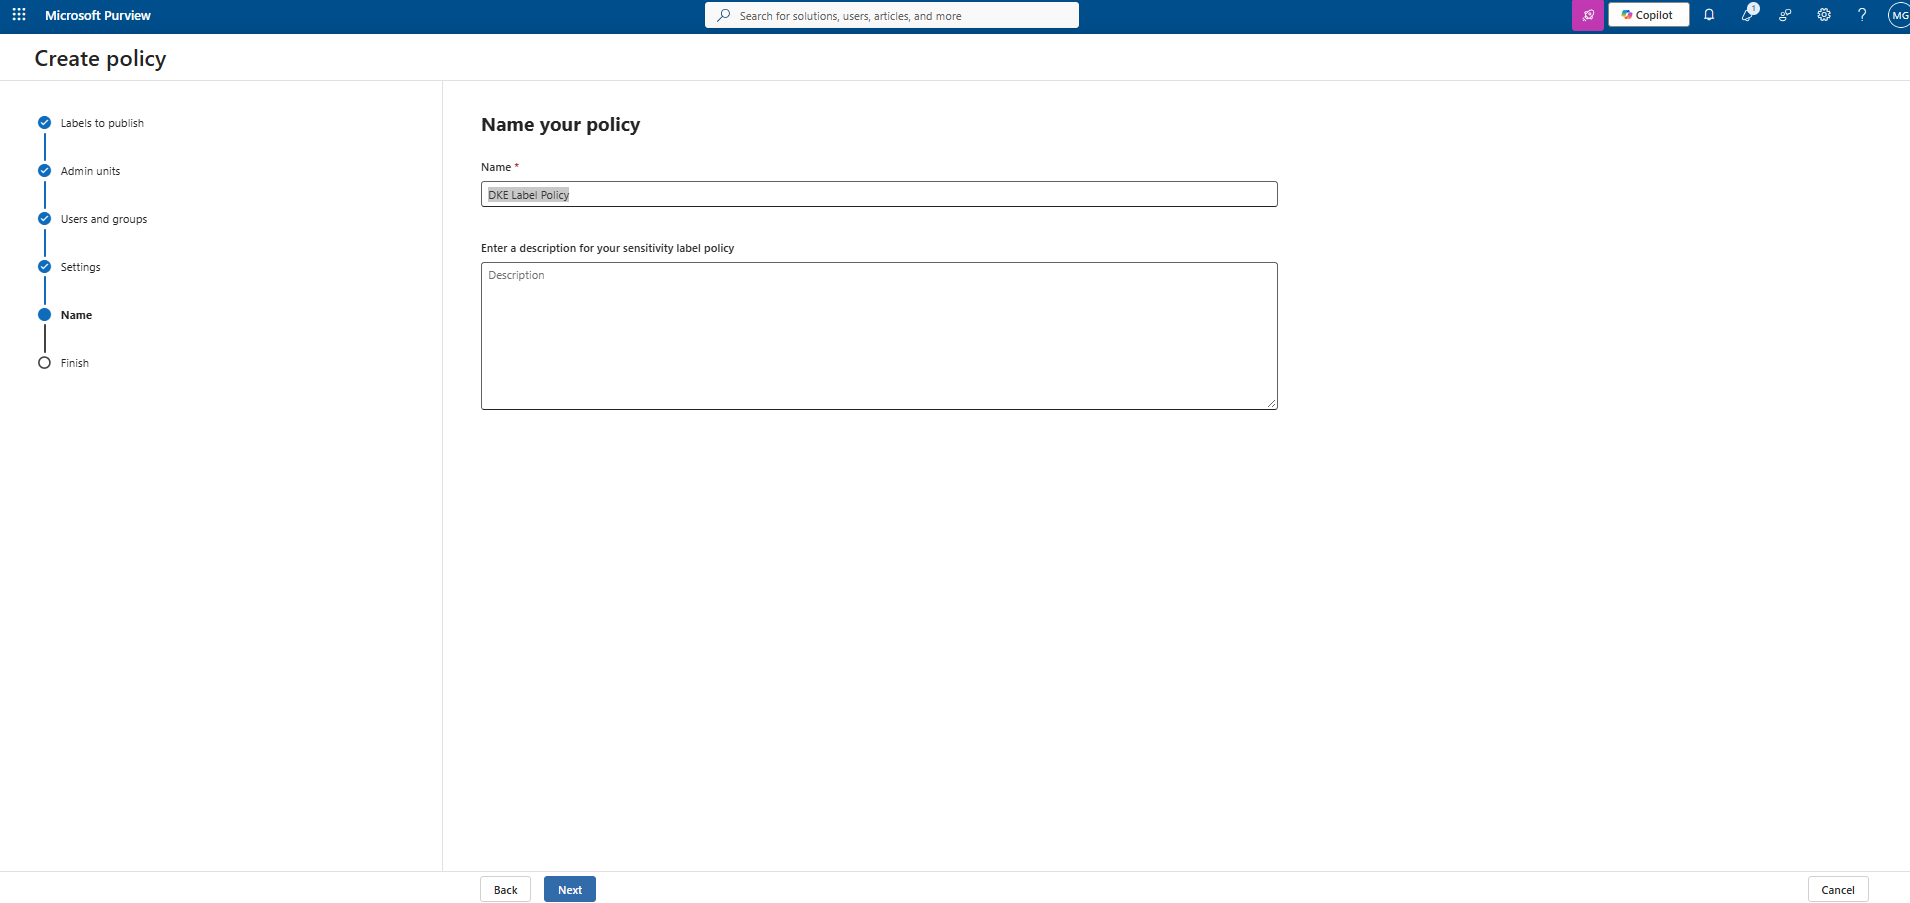
Name your policy
-
On Review and finish, review the policy configuration and make any required changes. Select Submit to create the policy.
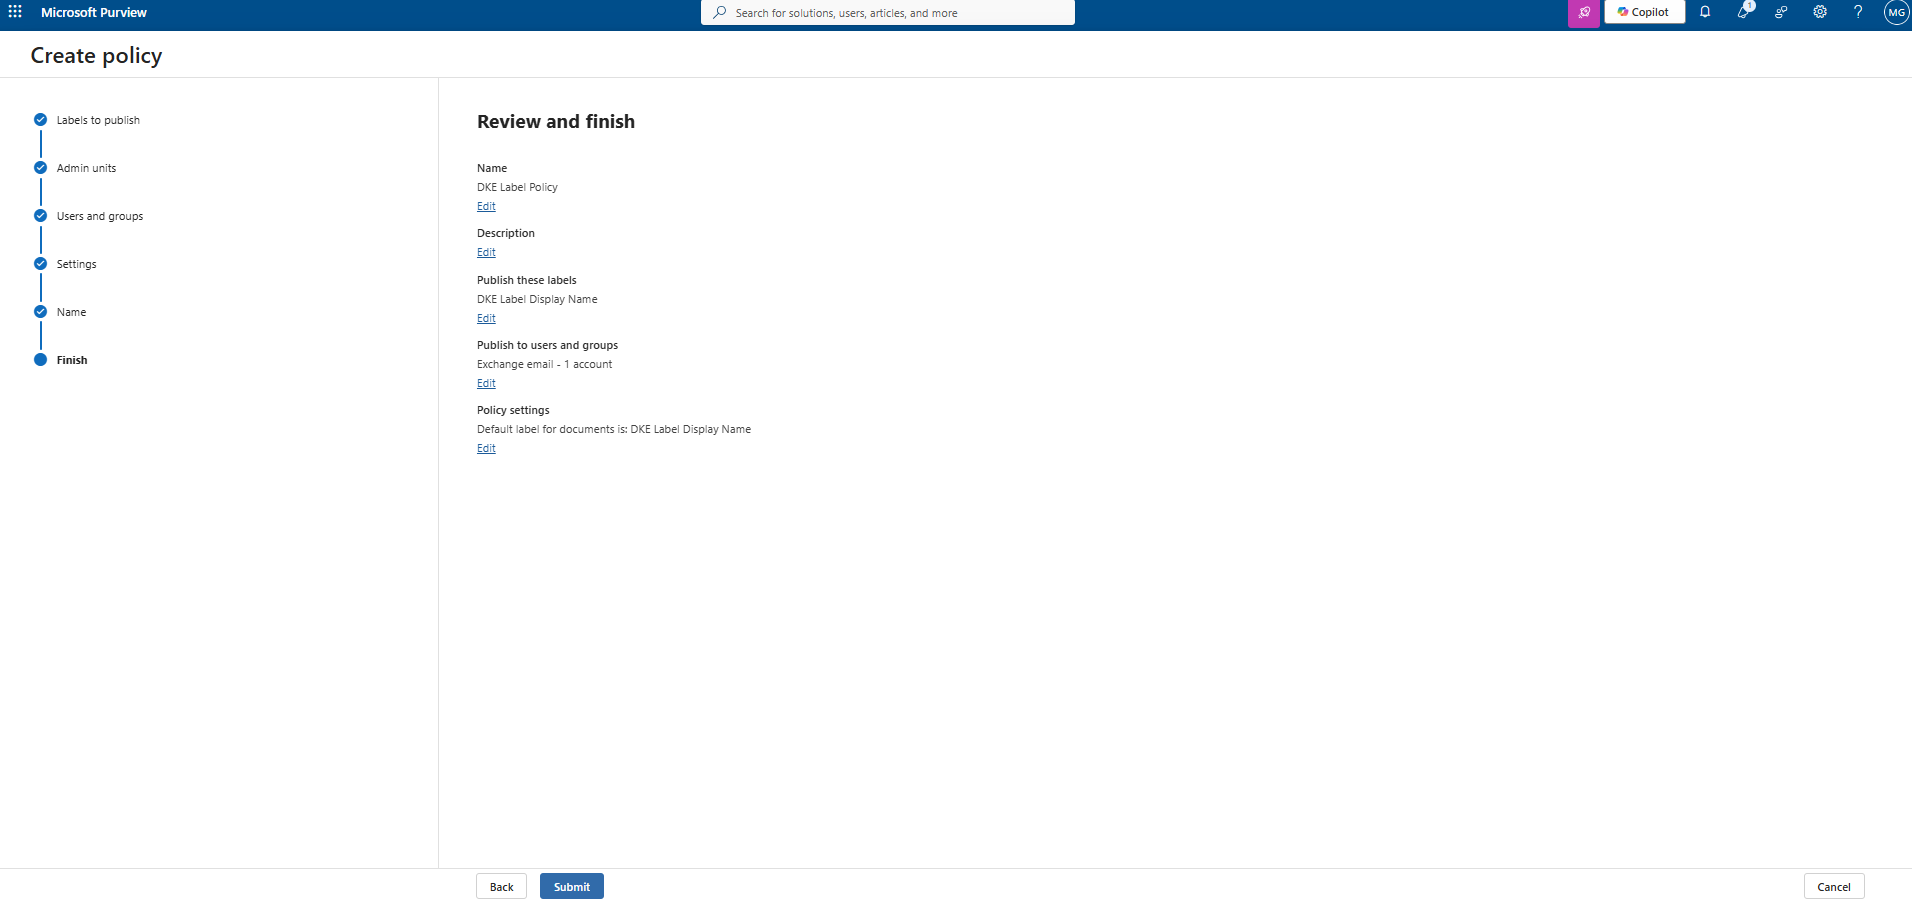
Review and finish
-
On New policy created, verify that the policy was created successfully, and then select Done.
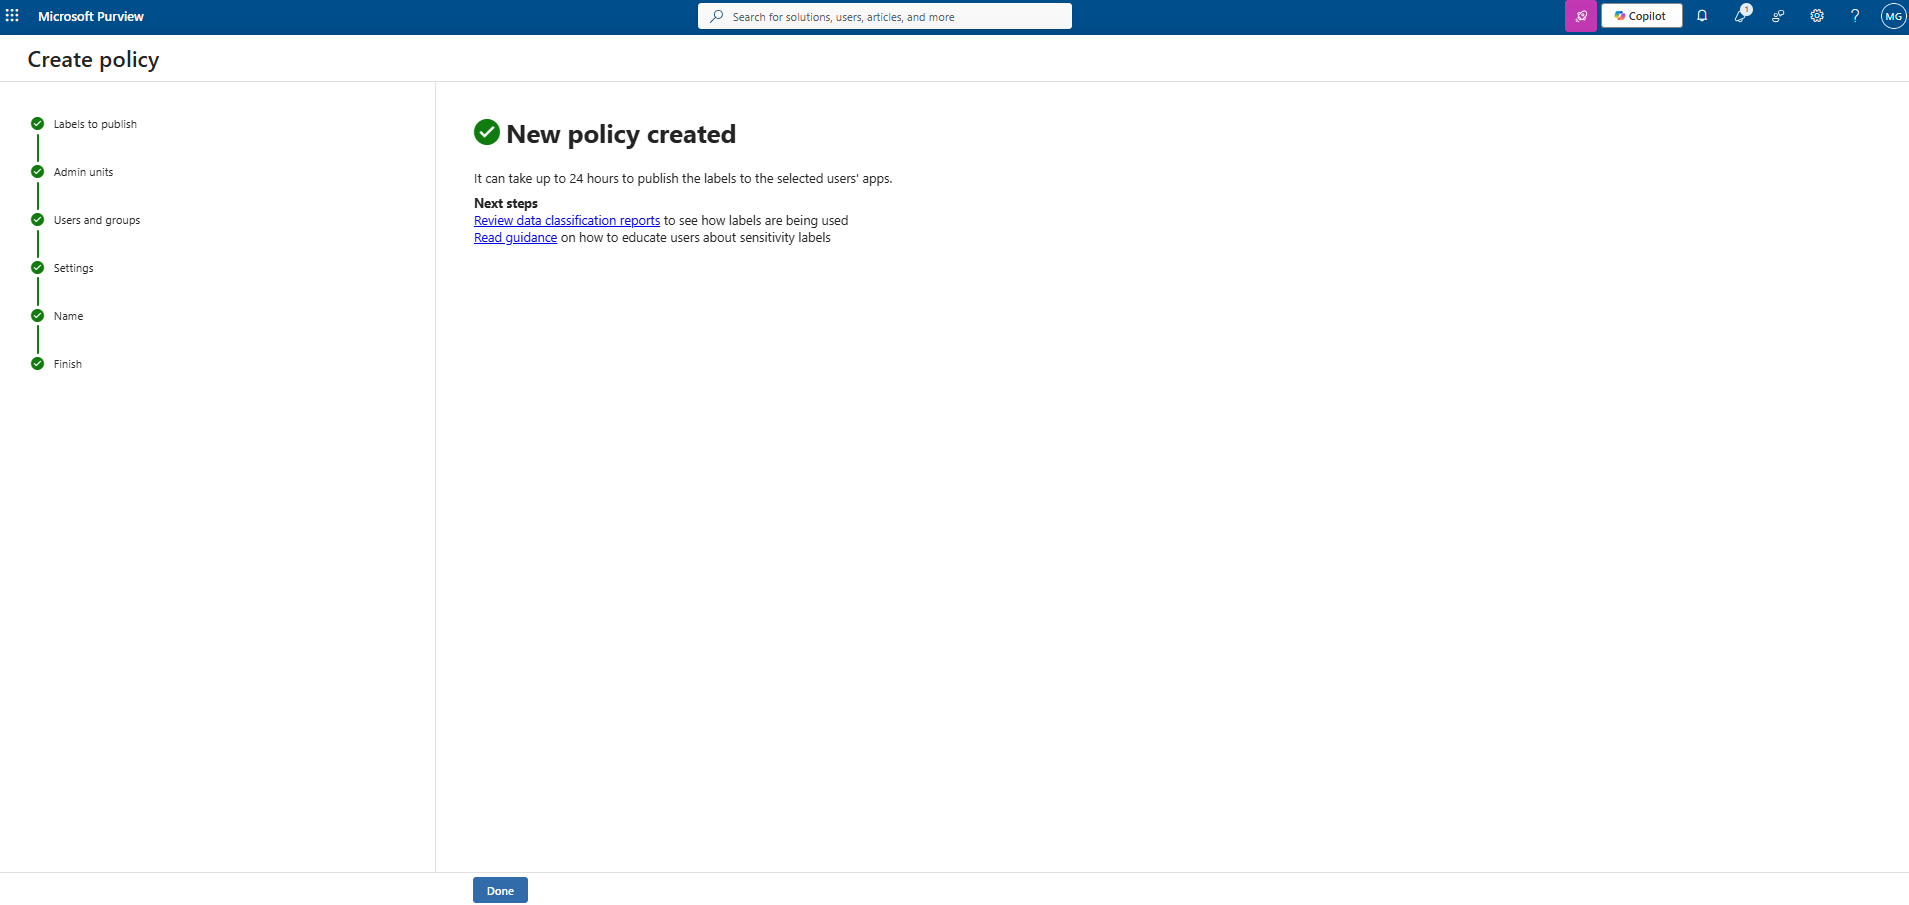
New policy created
It may take up to 24 hours for the clients to refresh with the new labels.
Install Azure Information Protection Unified Labelling Client
Please ensure that the Azure Information Protection Unified Labeling Client is installed on each client machine. Use the following URL to download the Azure Information Protection Unified Labeling Client:
https://www.microsoft.com/en-us/download/details.aspx?id=53018
Verify Encryption and Decryption with DKE on Microsoft 365 Client
-
Log in to the client machine as a user for whom access has been provided while creating the key in Microsoft DKE instance. Refer to Creating a Key on Microsoft DKE.
Make sure before creating any file delete the cache folder data from both client machines on this location: C:\Users\<username>\AppData\Local\Microsoft\MSIP and MSIPC
-
Create a word document and assign a sensitivity label. (e.g., DKE).
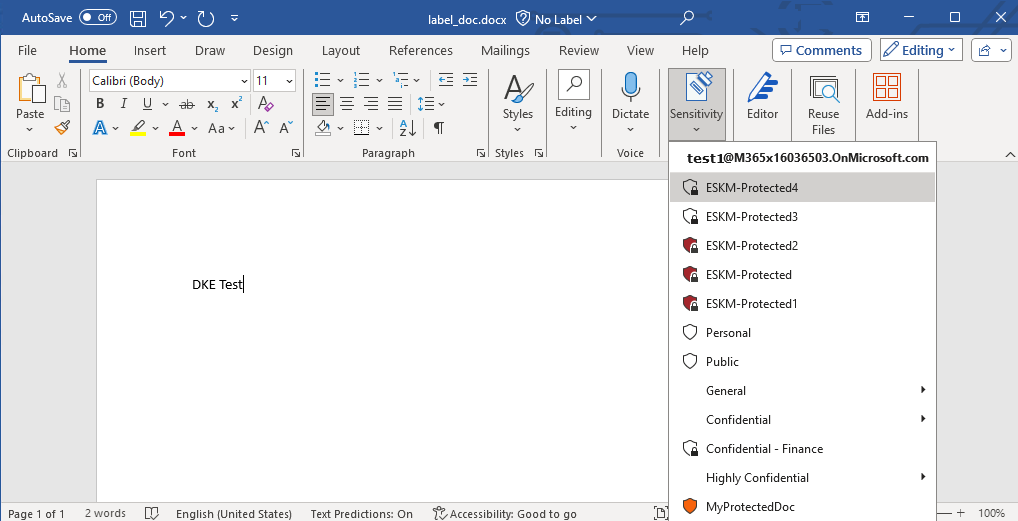
Word Document
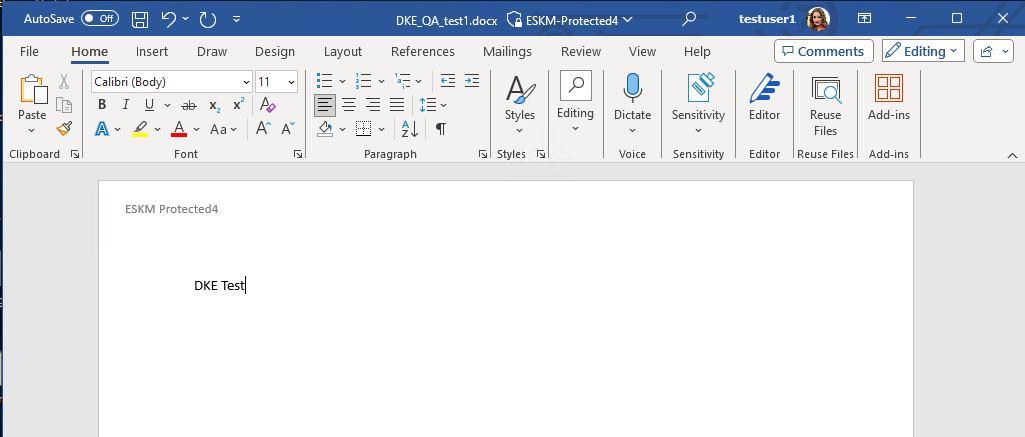
Encrypted word document
-
Save this file to any location.
-
Copy this file to another client machine and user with allowed access to this sensitivity label and DKE.
-
Open the file and verify that this authorized user is able to open the document.
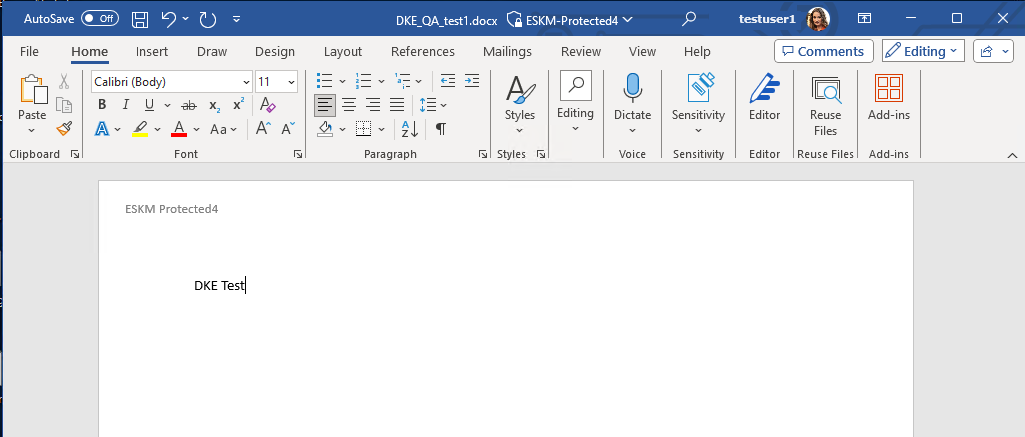
Encrypted Word Document
-
Copy the same file to another client machine with a user who is not authorized to this sensitivity label and DKE.
-
Try to open the document. You will get an error with the below permission message.
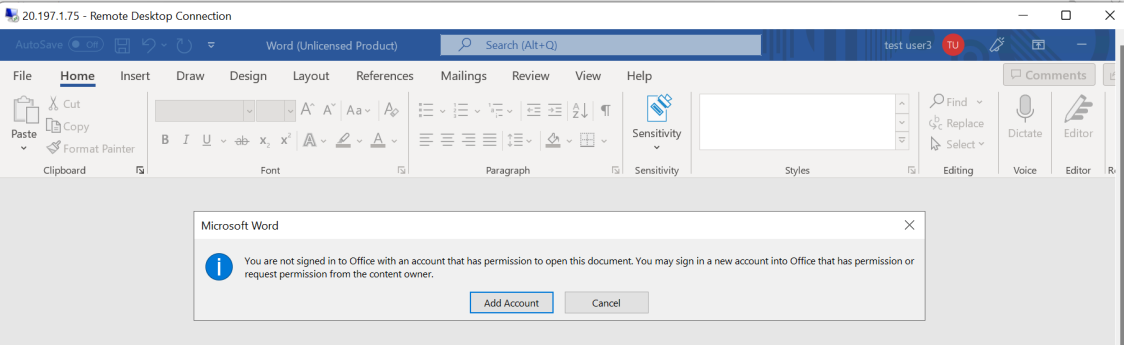
Access denied message