

To enable OpenID Connect (OIDC) authentication between Microsoft Azure and Utimaco Enterprise Secure Key Manager (ESKM), an application registration must be created in Microsoft Entra ID. The application registration establishes the trust relationship between Microsoft Entra ID and ESKM and provides the identifiers and credentials required for OIDC authentication.
Creating an App Registration
-
Sign in to the Azure Portal.
-
Navigate to Microsoft Entra ID → Manage → App registrations.
-
Click New registration.
-
In the Register an application page, configure the following settings:
-
Name: Enter a descriptive name for the application, for example, ESKM-OIDC.
-
Supported account types: Select the appropriate supported account type based on your organization's requirements. In this example, Single tenant only - Default Directory is selected.
-
Redirect URI: Leave this field blank during initial creation.
-
Click Register.
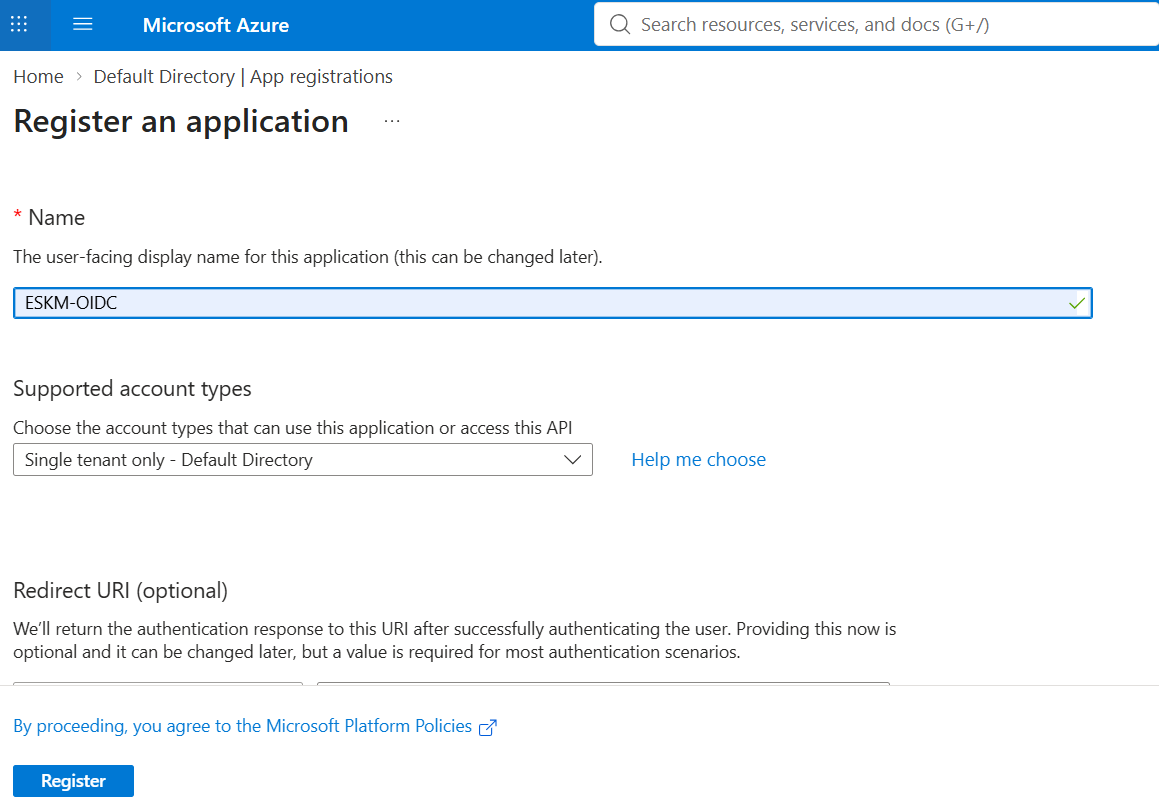
Register an application
After the application registration is created, Microsoft Entra ID redirects to the Overview page. Record the following values, as they will be required when configuring OpenID Connect authentication in ESKM:
-
Application (client) ID
-
Directory (tenant) ID
-
Display Name
The Application (client) ID uniquely identifies the application, while the Directory (tenant) ID identifies the Microsoft Entra ID tenant in which the application is registered.
Creating a Client Secret
A client secret is required to allow Utimaco Enterprise Secure Key Manager (ESKM) to authenticate with Microsoft Entra ID during the OpenID Connect (OIDC) authentication process.
-
From the application registration Overview page, navigate to Manage → Certificates & secrets.
-
Under Client secrets, click New client secret.
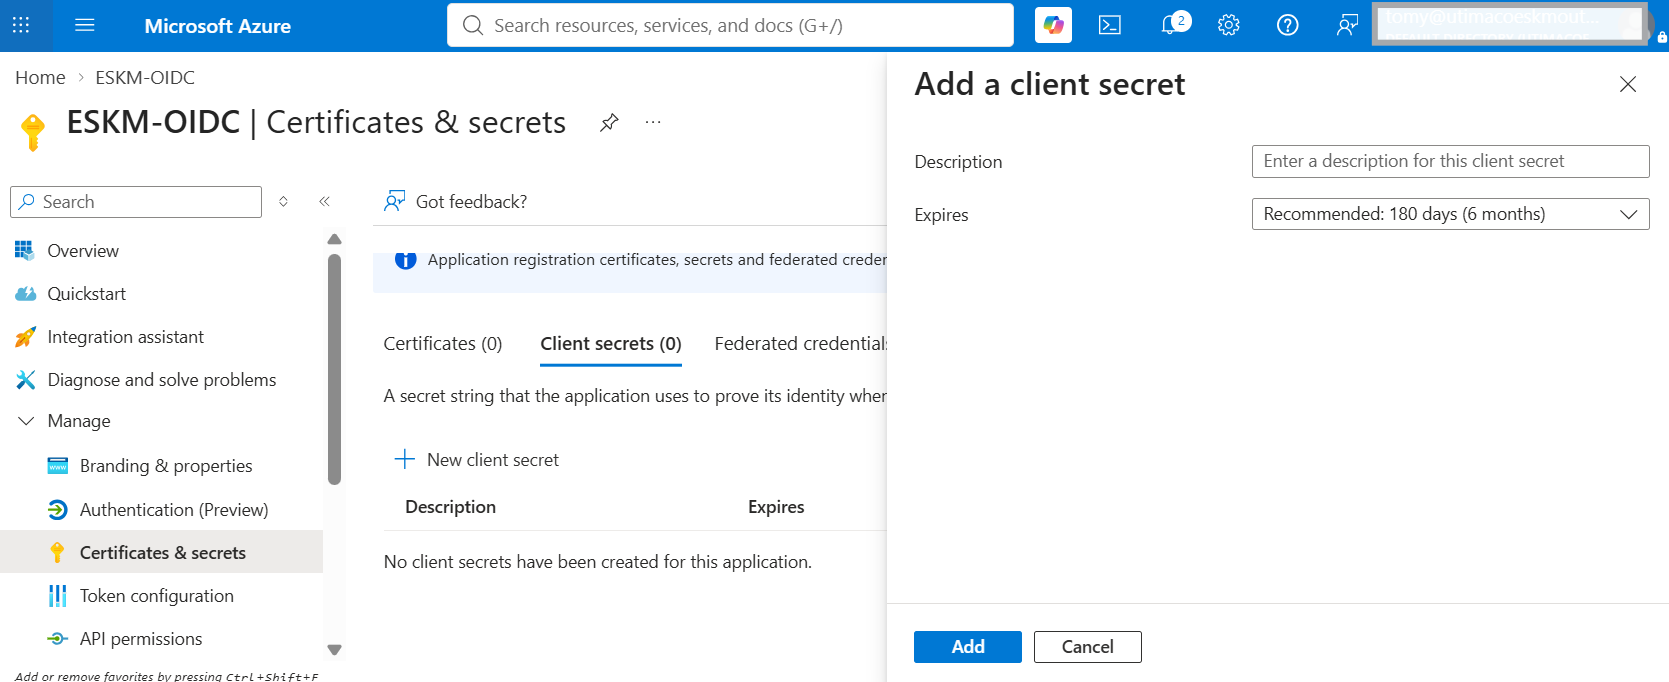
Add a client secret
-
In the Add a client secret pane:
-
Enter a meaningful description for the secret.
-
Select the desired expiration period.
-
-
Click Add.
Once the client secret is created, copy and securely store the value displayed in the Value field.
The client secret value is displayed only once after creation. Ensure the value is copied and stored securely before leaving the page.
Configuring Authentication Settings
Configure the application authentication settings and add the redirect URI that will be used by Utimaco Enterprise Secure Key Manager (ESKM).
-
From the application registration page, navigate to Manage → Authentication.
-
In the Redirect URI configuration section, click Add Redirect URI.
-
In the Select a platform to add redirect URI pane, select Web.
-
In the Redirect URI field, enter the callback URL generated by ESKM (For example: https://<ESKM_HOSTNAME>:8443/byok/login/oauth2/code/<Application_Client_ID>)
-
Click Configure.
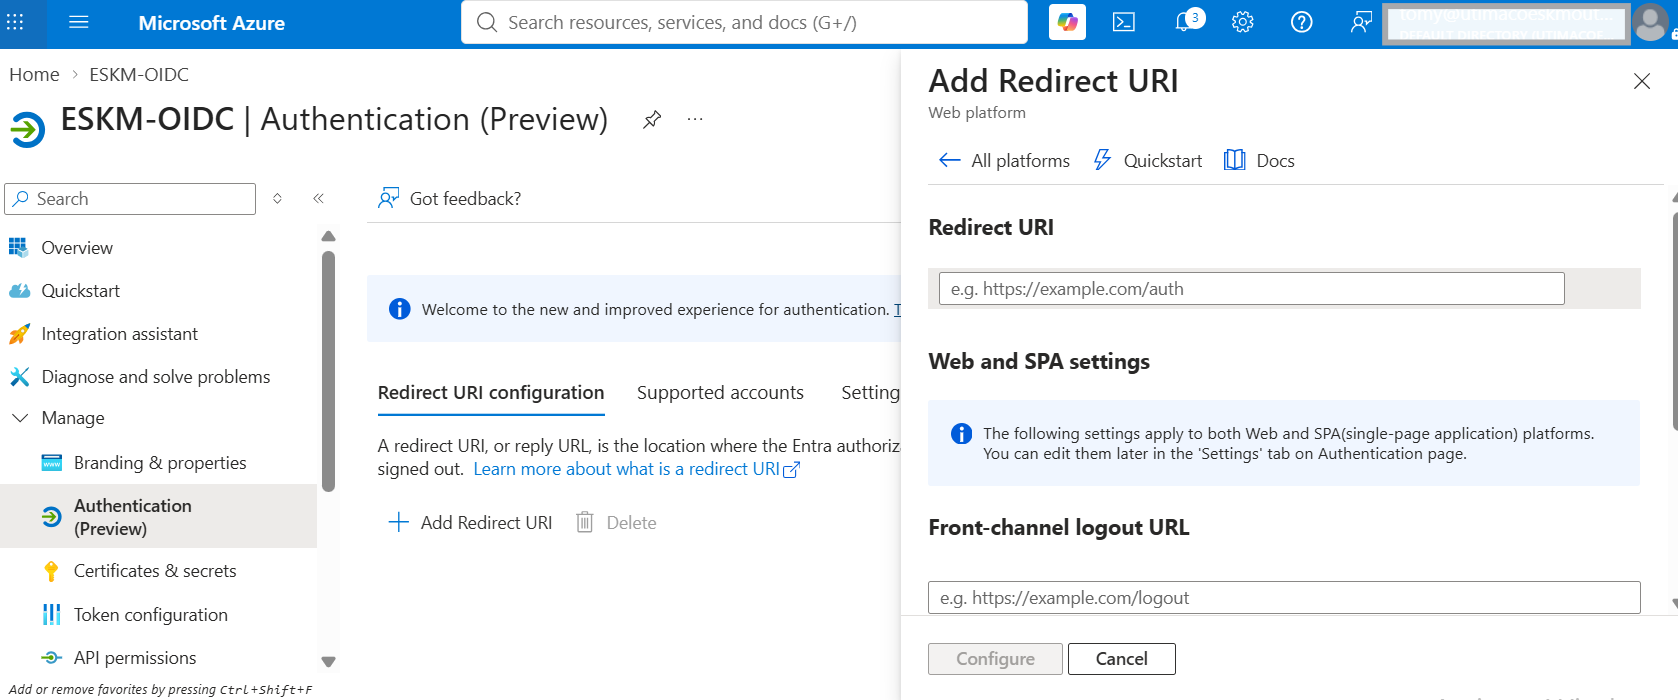
Add redirect URI
In this integration, the ESKM Registration ID is configured with the same value as the Microsoft Entra ID Application (Client) ID during the OIDC configuration process described in the subsequent steps. Therefore, the callback URL includes the Application (Client) ID as the final path component.