

Deploy Proxmox VE
-
Install Proxmox VE 9.2.2 on a machine/VM.
-
Refer to the official documentation – Installing Proxmox VE – to install Proxmox.
-
Note down the user ID and password during the installation which will be used to login to the web UI of the Proxmox.
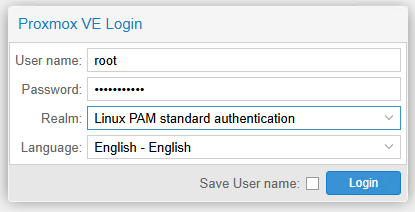
Proxmox Login screen
-
To create an empty VM, click on the Create VM button in the top right corner.

Crete VM button at top right
-
Enter the below values in the Create Virtual Machine window.
-
Name: Eskm
-
VM ID: 103
-
Click on the Next button.
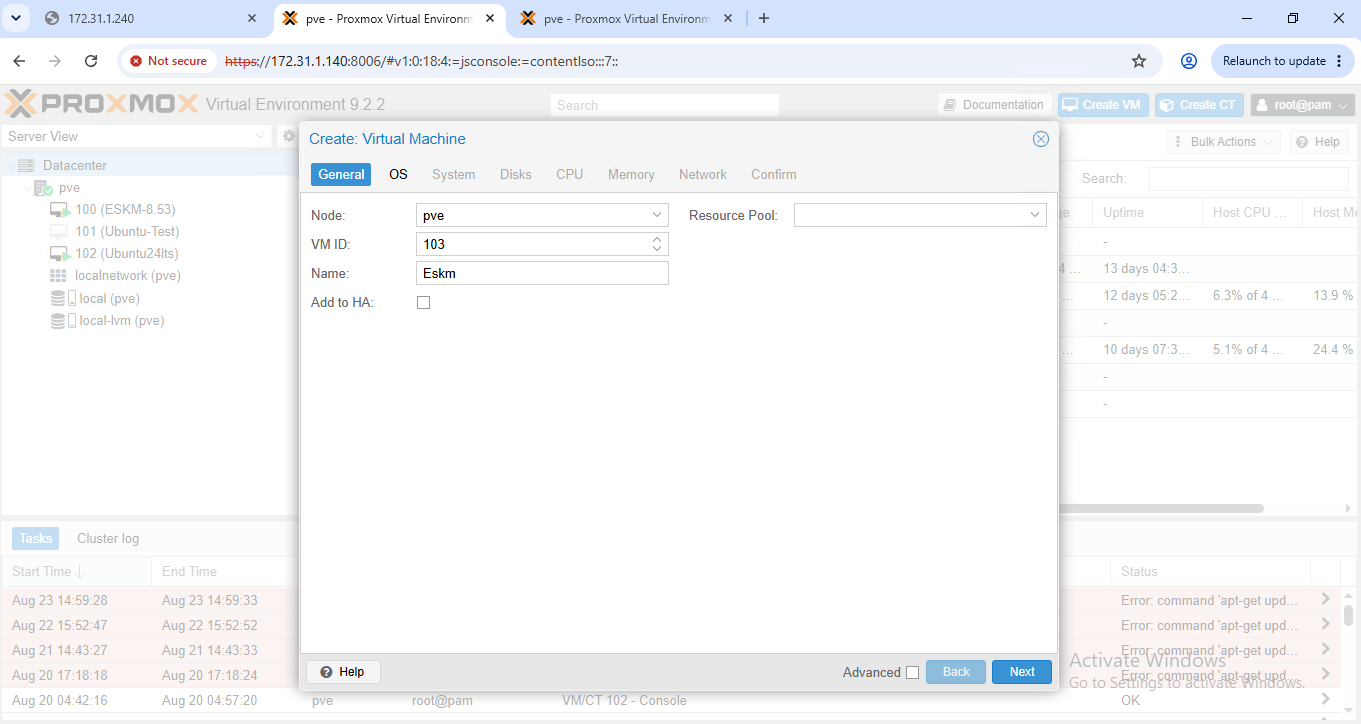
Create virtual machine general tab
-
OS: Do not use any media
-
OS Type: Linux
-
Version: 7.x - 2.6 Kernel
-
Click on the Next button.
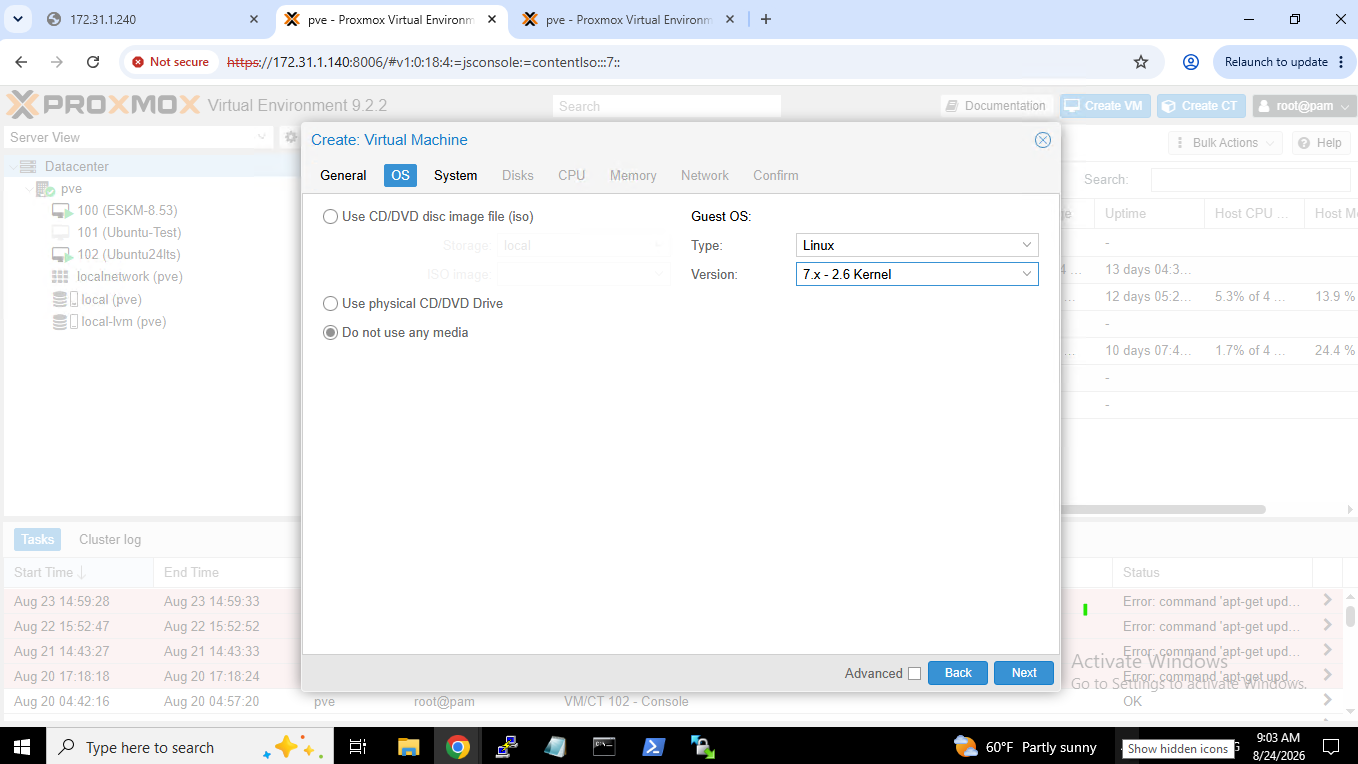
OS specification
-
Machine Type: i440fx
-
BIOS: SeaBIOS
-
SCSI Controller : VirtIO SCSI Single
-
Click on the Next button.
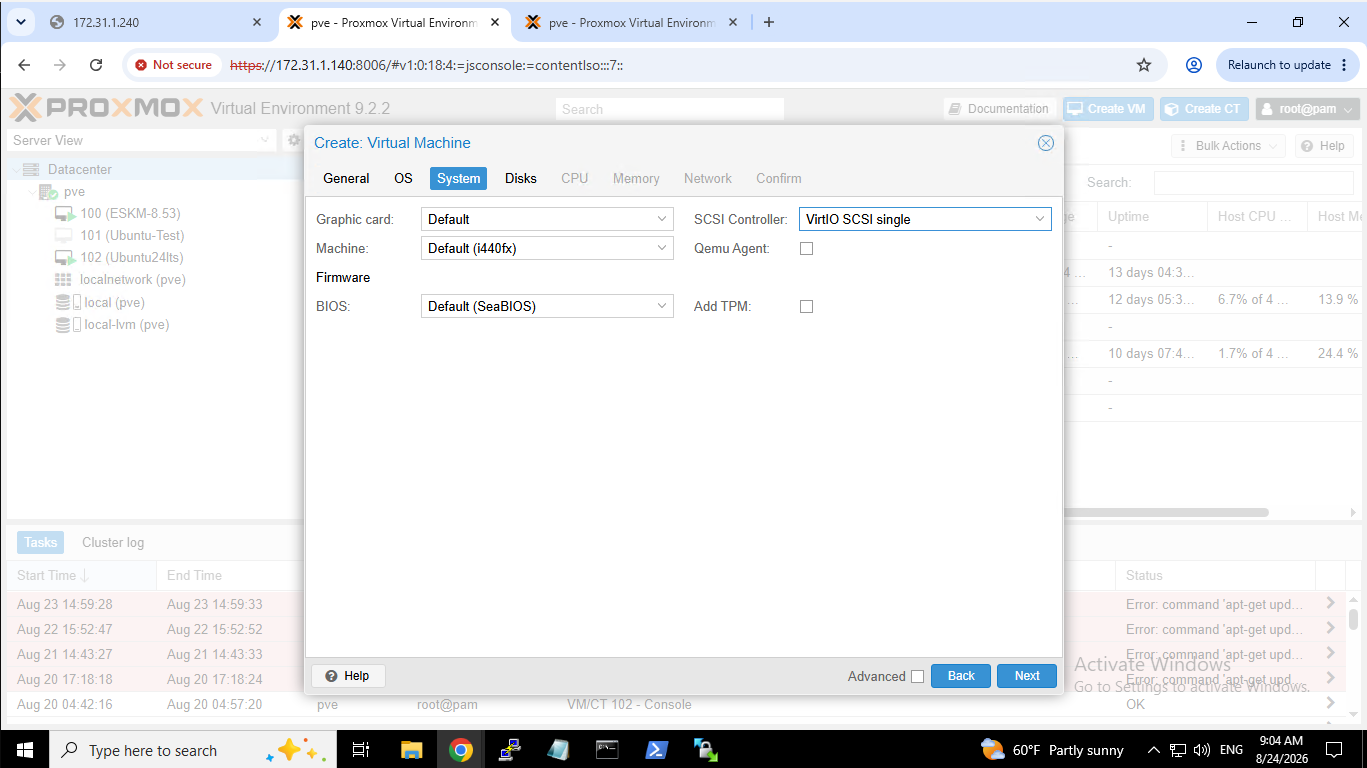
Hardware Specification
-
Select No Disk.
-
Click on the Next button.
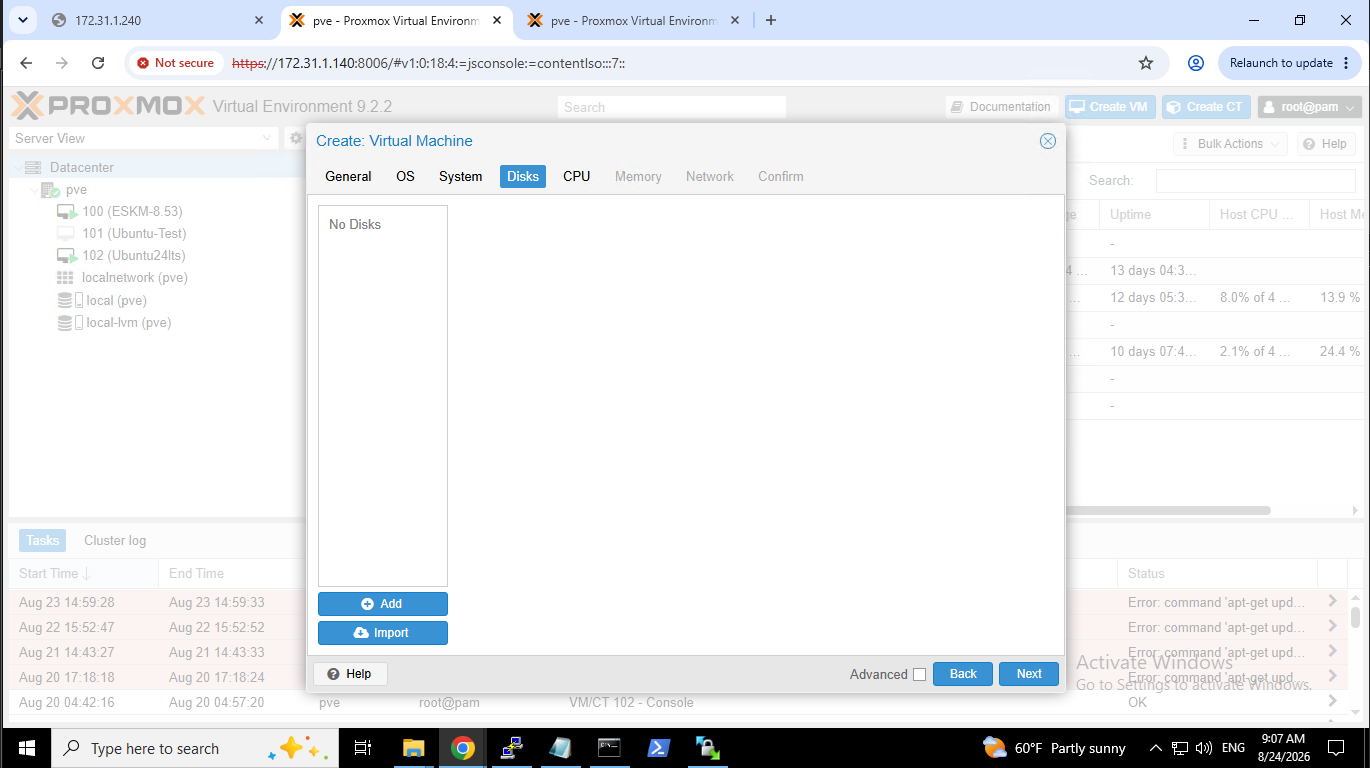
No Disk selected
-
CPU Type: host
-
Sockets: 1
-
Cores: 4
-
Click on the Next button.
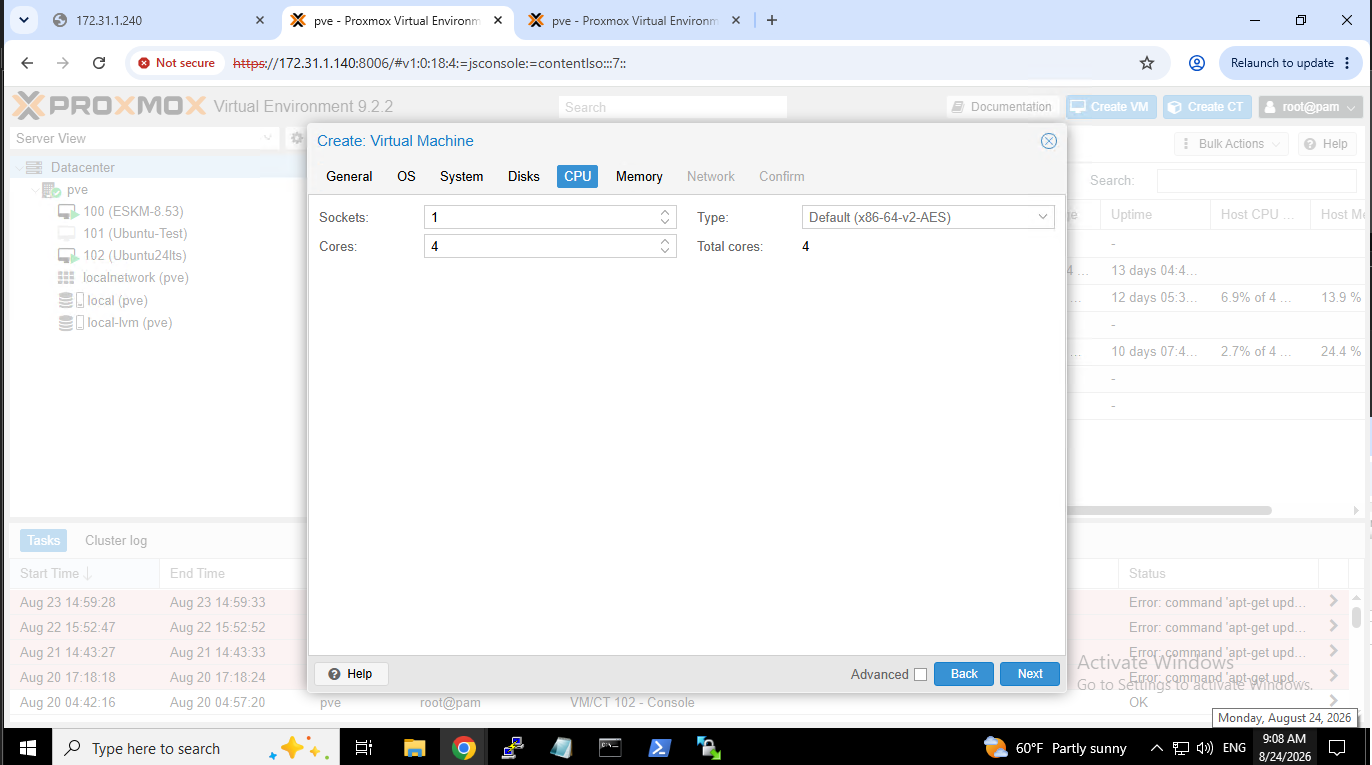
CPU Specifications
-
Memory: 8192 MB.
-
Click on the Next button.
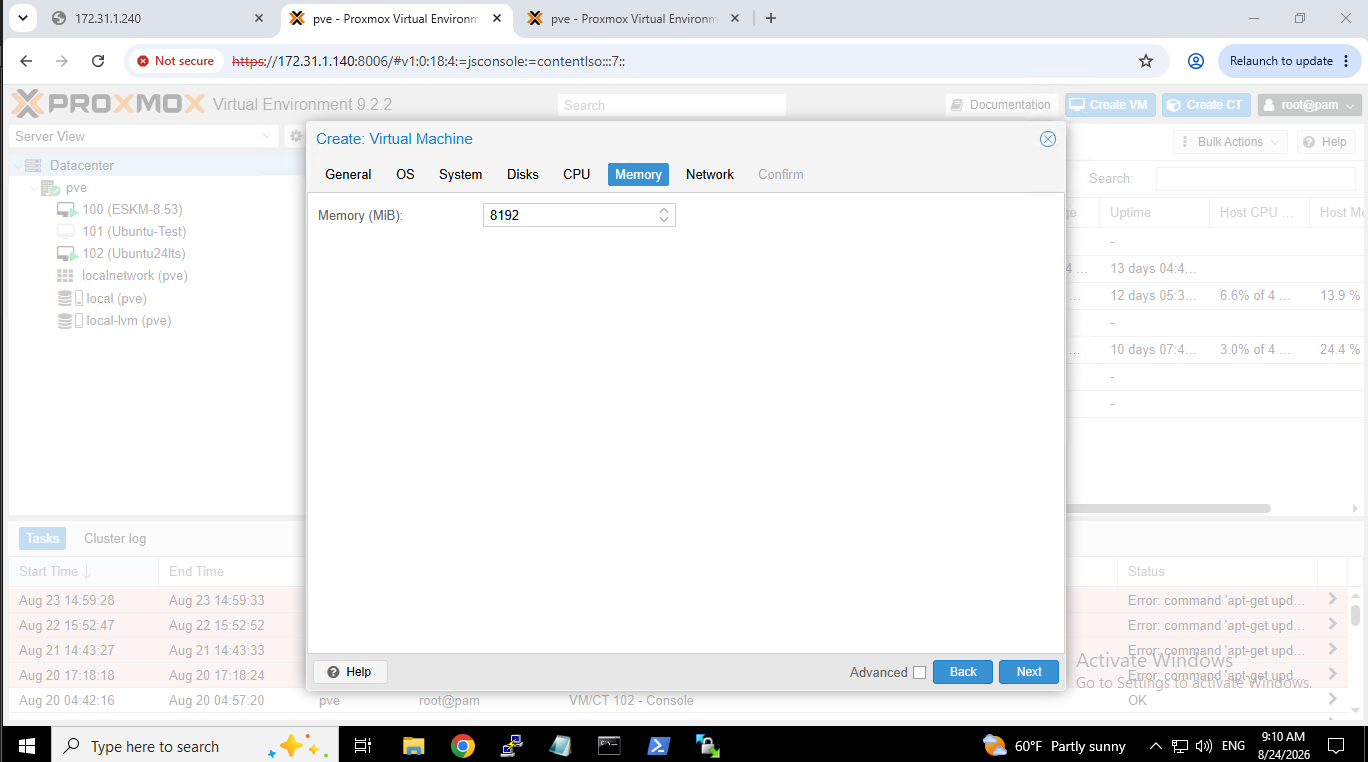
Memory Specifications
-
Network Model: VirtIO
-
Bridge: vmbr0
-
Firewall: No
-
Click on the Next button.
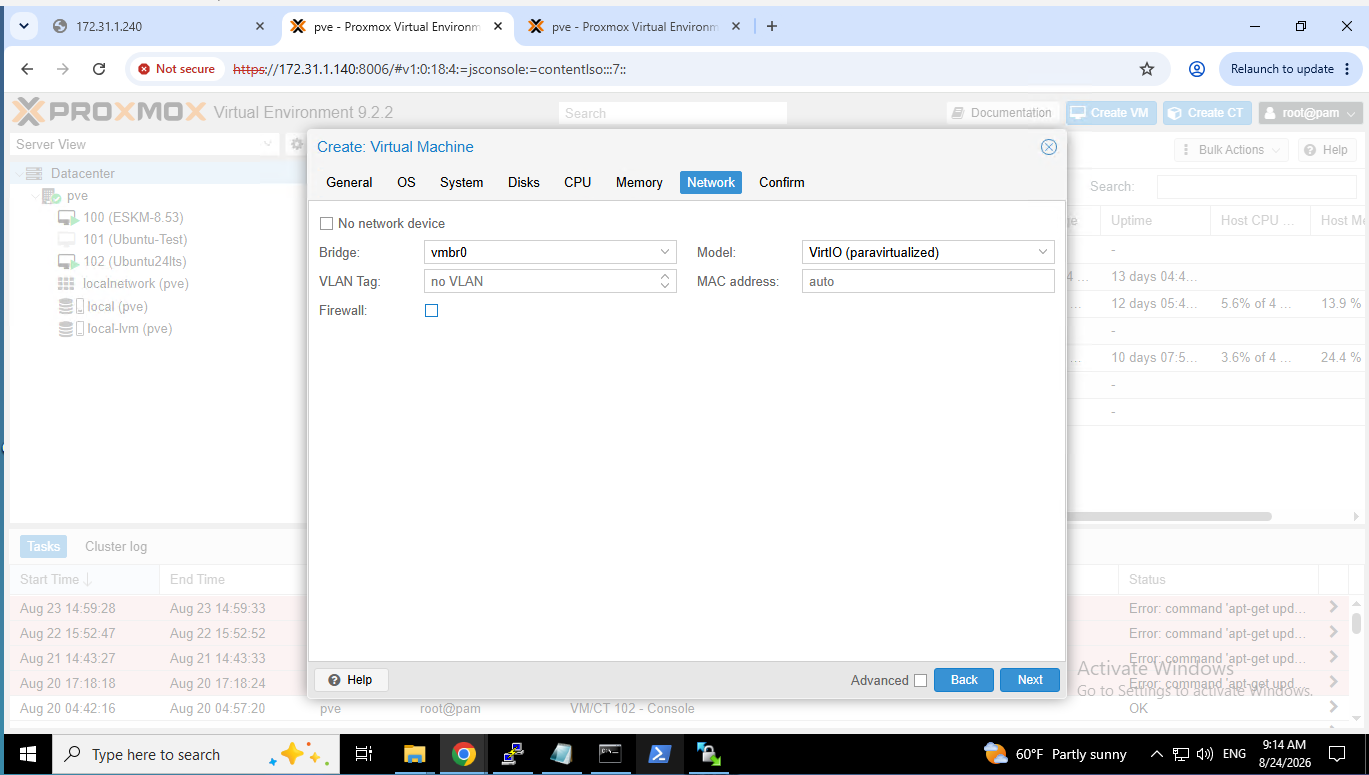
Network specifications
-
Leave the Start after created checkbox unchecked before clicking Finish button.
-
Complete VM creation by clicking the Finish button.
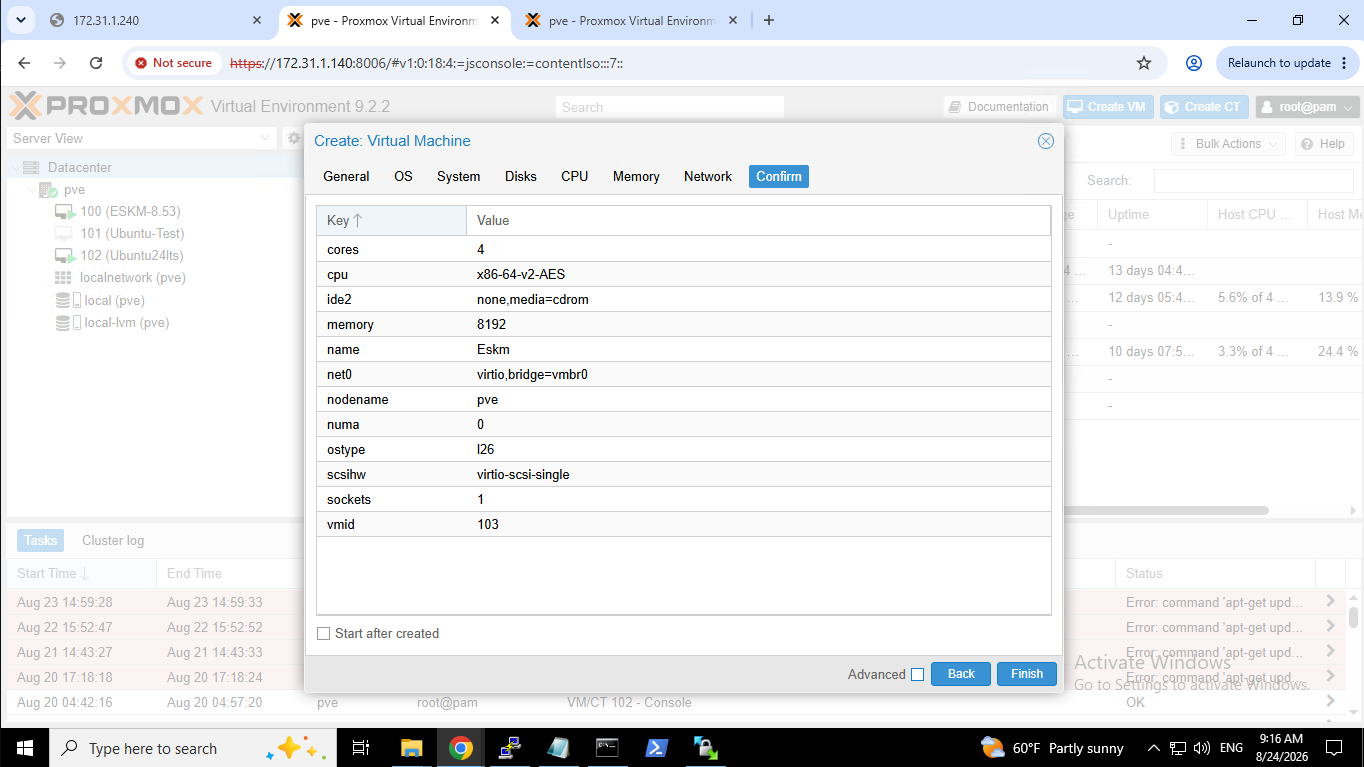
Overview of the VM configurations