

Generating Key on Utimaco HSM
-
Generate the key pair using the below
p11tool2command.
./p11tool2 Slot=0 LoginUser=Cloud123 PubKeyAttr=CKA_LABEL="rsa_public_key",CKA_MODULUS_BITS=2048,CKA_ID="01" PrvKeyAttr=CKA_LABEL="rsa_private_key",CKA_EXTRACTABLE=CK_FALSE,CKA_ID="01" GenerateKeyPair=RSA
-
Verify that the keys are generated.
./p11tool2 Slot=0 LoginUser=Cloud123 ListObjects
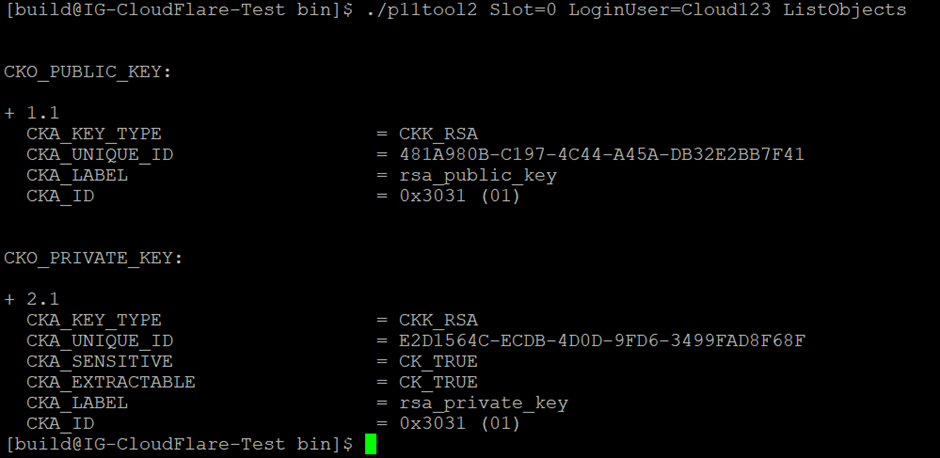
Viewing keys in HSM slot using p11tool
CSR Generation Using HSM-Based Private Key
-
Install
openssl.
sudo dnf install openssl -y
openssl version

openssl version
-
Generate the CSR.
./p11tool2 Slot=0 LoginUser=Cloud123 PubKeyAttr=CKA_LABEL="rsa_public_key",CKA_MODULUS_BITS=2048,CKA_ID="01" PrvKeyAttr=CKA_LABEL="rsa_private_key",CKA_EXTRACTABLE=CK_FALSE,CKA_ID="01" Mech=CKM_SHA256_RSA_PKCS DN='O=Integration,CN=utimaco.ssl4saas.com' ExportP10=/tmp/testhsm_v1.csr
This command generates a CSR using an RSA key pair stored in the HSM by specifying key attributes, authentication details, and the required certificate subject information.
DN='O=Integration,CN=utimaco.ssl4saas.com'
Defines the subject name for the CSR:
-
O→ Organization name (Integration). -
CN→ Common Name (domain name used in SSL certificate).
Signing CSR with Public Certificate Authority
This section outlines the general process of submitting the generated Certificate Signing Request (CSR) to a trusted Public Certificate Authority (CA) to obtain a signed SSL/TLS certificate.
The signed certificate is deployed at the Cloudflare edge to enable secure TLS communication as part of the Keyless SSL setup.
-
Select a Public Certificate Authority.
-
Choose a trusted CA based on organizational policies and production requirements.
-
Ensure the CA supports the required domain validation methods (e.g., DNS, HTTP, or email validation).
-
Submit the CSR.
-
Provide the generated CSR file to the selected CA through their portal or API.
-
Ensure that all required domain names (including SAN entries, if applicable) are correctly included in the CSR.
-
Complete Domain Validation.
-
Perform domain ownership verification as required by the CA.
-
This may involve adding DNS records, hosting validation files, or responding to validation emails.
-
Certificate Issuance.
-
After successful validation, the CA issues the signed certificate.
-
The certificate bundle may include:
-
Server certificate.
-
Intermediate CA certificate(s).
-
Root CA certificate (optional, depending on the CA).
-
-
Download the Certificate Chain.
-
Retrieve the signed certificate along with the full certificate chain from the CA.
-
Ensure the correct format is used (e.g., PEM).
-
Prepare for Deployment.
-
Verify that the certificate matches the private key stored in the HSM.
-
Confirm all required domains are covered and the certificate validity period meets operational requirements.
The choice of Certificate Authority and certificate lifecycle management (renewal, revocation, etc.) should align with organizational security policies.
Upload the Keyless SSL Certificate
This step sets up the Keyless SSL configuration in Cloudflare and uploads the signed certificate, allowing secure communication with the Keyless server for private key operations.
-
Log in to the Cloudflare Dashboard and select the target domain (zone).
-
Navigate to SSL/TLS → Edge Certificates.
-
Click on Upload Keyless SSL Certificate under Manage Edge Certificates.
-
In the configuration form, provide the following details.
-
Key Server Label.
Enter a descriptive label to identify the Keyless server (e.g.,keyless). -
Key Server Hostname.
Specify the fully qualified domain name (FQDN) of the Keyless server.
Example:kms.utimaco.ssl4saas.com. -
Key Server Port.
Enter the listening port (2407) configured for the GoKeyless service. -
SSL Certificate.
Paste the signed domain certificate (Refer to section 5.3).
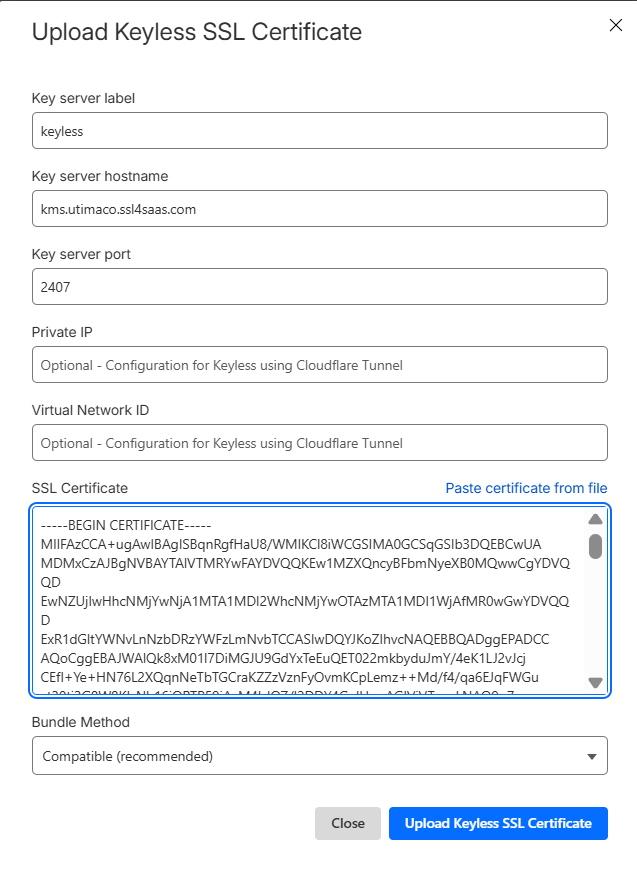
Uploading keyless SSL certificate in Cloudflare
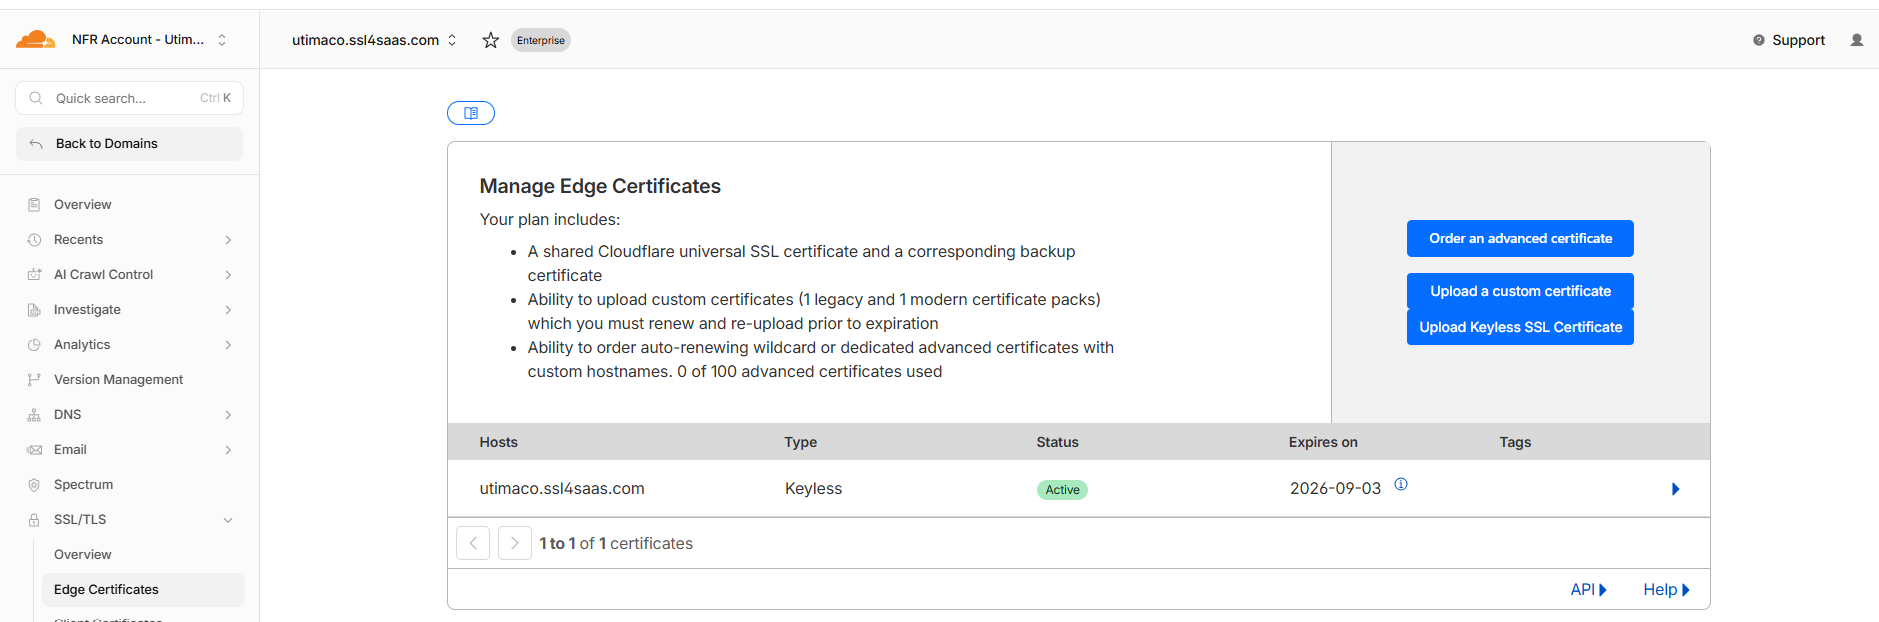
Viewing keyless SSL certificate status in Cloudflare
In this validation setup, Cloudflare SSL/TLS mode was set to Flexible, meaning HTTPS was enforced between the client and Cloudflare, while communication between Cloudflare and the origin server remained HTTP.
Customers using HTTPS at the origin should configure Cloudflare SSL mode as Full or Full (Strict) to ensure end-to-end encryption. The selection depends on whether a valid CA-signed certificate is installed on the origin server.
Misconfiguration of SSL mode can result in handshake failures, redirect loops, or insecure communication paths.
GoKeyless Configuration
This section describes the configuration of the GoKeyless service by updating the gokeyless.yaml file with environment-specific parameters, including Cloudflare account details, HSM configuration, and authentication certificate paths.
-
Update the GoKeyless Configuration File. Open the GoKeyless configuration file using the following command.
sudo nano /etc/keyless/gokeyless.yaml
The output is as follows:
# Set the log level (0 = DEBUG, 5 = FATAL).
loglevel: 1

# Hostname must match the key server hostname that was configured in the
# Cloudflare dashboard during custom certificate upload.
hostname:

# Zone ID can be found on the Cloudflare dashboard 'Overview' tab.
zone_id:

# Preferred credential used to request the server authentication certificate:
# a Cloudflare API token scoped Zone > SSL and Certificates > Edit. See
# https://developers.cloudflare.com/fundamentals/api/get-started/create-token/
api_token:

# Deprecated: the legacy Origin CA Service Key (found on the Cloudflare
# dashboard under the 'My Profile' section). Prefer api_token above. Only one
# of api_token or origin_ca_api_key needs to be set.
origin_ca_api_key:

# Configure one or more private key directories.
private_key_stores:- uri: "pkcs11:slot-id=0;object=rsa_private_key;id=%30%31;type=private?module
path=/opt/utimaco/lib/libcs_pkcs11_R3.so&pin-value=Cloud123"
#- dir: /etc/keyless/keys

# Optionally customize the location of the certificates used for mutual
# authentication with Cloudflare keyless clients.
auth_cert: /etc/keyless/server.pem
auth_key: /etc/keyless/server-key.pem
auth_csr: /etc/keyless/server.csr
cloudflare_ca_cert: /etc/keyless/keyless_cacert.pem

# Optionally customize the listen ports.
port: 2407
metrics_port: 2406

# Optionally write the PID to a file (note that sysv-based systems will
# ignore this value and always use /var/run/gokeyless.pid).
pid_file:
-
Save the changes and exit.
Note: When using GoKeyless v1.18 or later, configure a Cloudflare API Token instead of an Origin CA API Key, as v1.18 adds support for API Token-based authentication