
The first step is to add the HGS role by using the Server Manager or by running the following command in a PowerShell Console:
|
›_ PowerShell |
|---|
|
After this, you can install the HGS. It can be installed it in its own new forest or in an existing bastion forest. For more information about it check the complete integration description in Microsoft TechNet.
In the following example we are using an existing forest. Install the HGS using the following command:
|
›_ PowerShell |
|---|
|
You need to configure the Host Guardian Service with two certificates for encryption and signing purposes. Generate these certificates in your preferred way but be sure that you generated these certificates with the key storage provider; Utimaco CryptoServer Key Storage Provider. One way to generate these certificates is to generate new certificate templates for computer certificates where you define Utimaco CryptoServer Key Storage Provider as the only key storage provider which can be used in this template. Then you create two files, one each for encryption and for signing, similar to the following example:
|
|
|---|
|
|
|
|---|
|
Then create a new request of both INF files.
|
›_ PowerShell |
|---|
|
Send/Copy both request files to your certificate authority, and submit these requests.
|
›_ PowerShell |
|---|
|
If the requests are submitted, you will get two certificates. Copy these certificates back to your HGS server and accept these certificates.
|
›_ PowerShell |
|---|
|
You can check your keys stored inside the HSM with the following command:
|
›_ PowerShell |
|---|
|
You should see two keys, one for each certificate. This shows that the HGS is secured with the Utimaco CryptoServer.
In the last configuration step you have to initalize the HGS service. You need the thumbprints of both certificates to do this.
|
›_ PowerShell |
|---|
|
Now, you can initialize the HGS service with the following command.
|
›_ PowerShell |
|---|
|
Run the Local Machine Certificate Management Console (certlm.msc). Locate the encryption and signing certificates under the Personal folder, right-click each of them in turn and verify (or add the permission if necessary to) the service account (e.g. HGSSVC_276CF$) to the list of Groups and Users permitted to manage the private keys. Allow Read is the only needed permission.
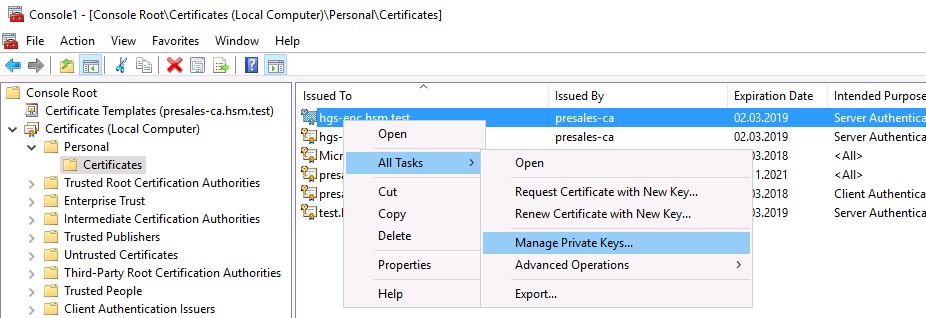
Menu of Manage Private Keys
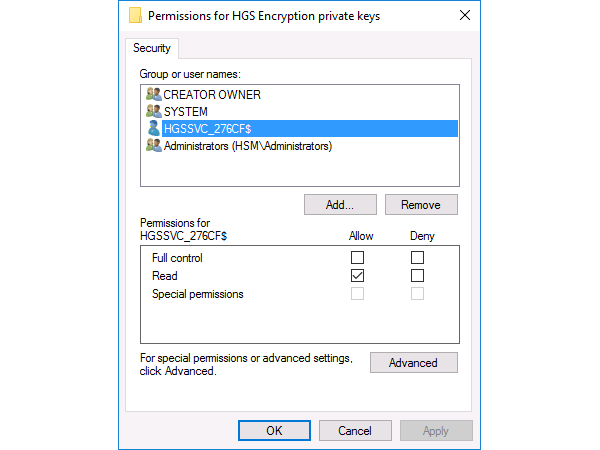
Security Tab with Permissions for HGS Private Keys
To confirm KPS has access to the private keys of your encryption and signing certificates, run the HGS diagnostics using Get-HgsTrace. If any tests fail, be sure to remedy the identified problems before continuing to configure any additional nodes.
|
›_ PowerShell |
|---|
|
For any further installation and configuration steps, please refer to the complete TechNet deployment guide which can be found at https://aka.ms/ShieldedVMs.