

-
Log in to the Nutanix Prism Element web console.
-
Do one of the following:
-
Select Expand Cluster in the Settings page, or
-
Go to the Hardware dashboard and click the Expand Cluster button.
-
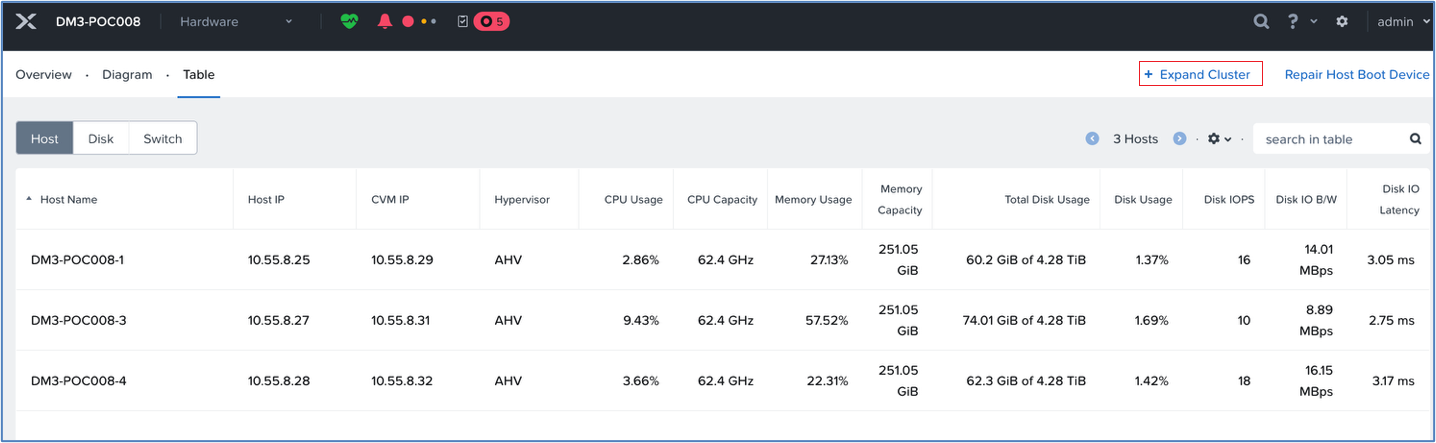
Expand cluster
-
In the Expand Cluster window, select Expand Cluster to begin the expansion immediately (after you complete the remaining configuration steps).
-
Click the Next button.
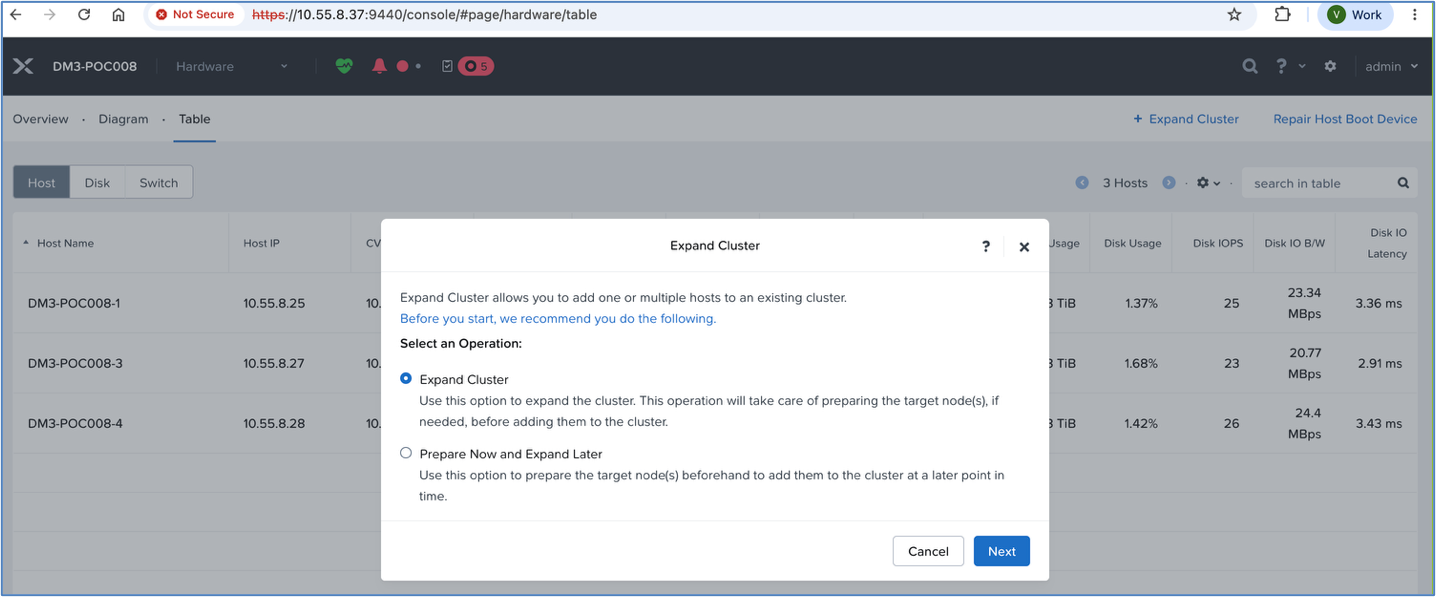
Expand cluster
Select Prepare Now and Expand Later to prepare the nodes now but delay adding them to the cluster until a later time. Preparing the nodes includes, if needed, imaging the hypervisor, upgrading the AOS version, and preparing a new node network configuration. For more information on expanding the cluster, see Expanding a Cluster.
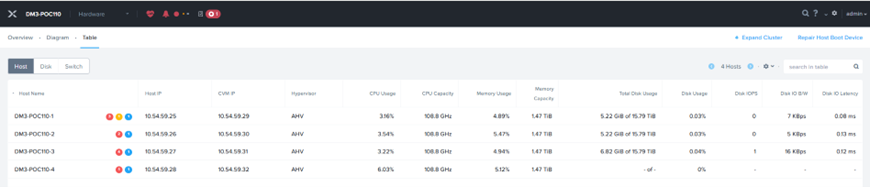
Expanded cluster
Ensure that factory-prepared node(s) are imaged with the same AOS/AHV version of the cluster. Re-imaging is not possible during expansion.
-
In Nutanix Prism Settings, expand the cluster and check if the node(s) appear in the discovered list.
-
Select the node(s) and add them to the cluster.
-
Enter the details for the Host Name, Controller VM, Hypervisor, and IPMI IP.
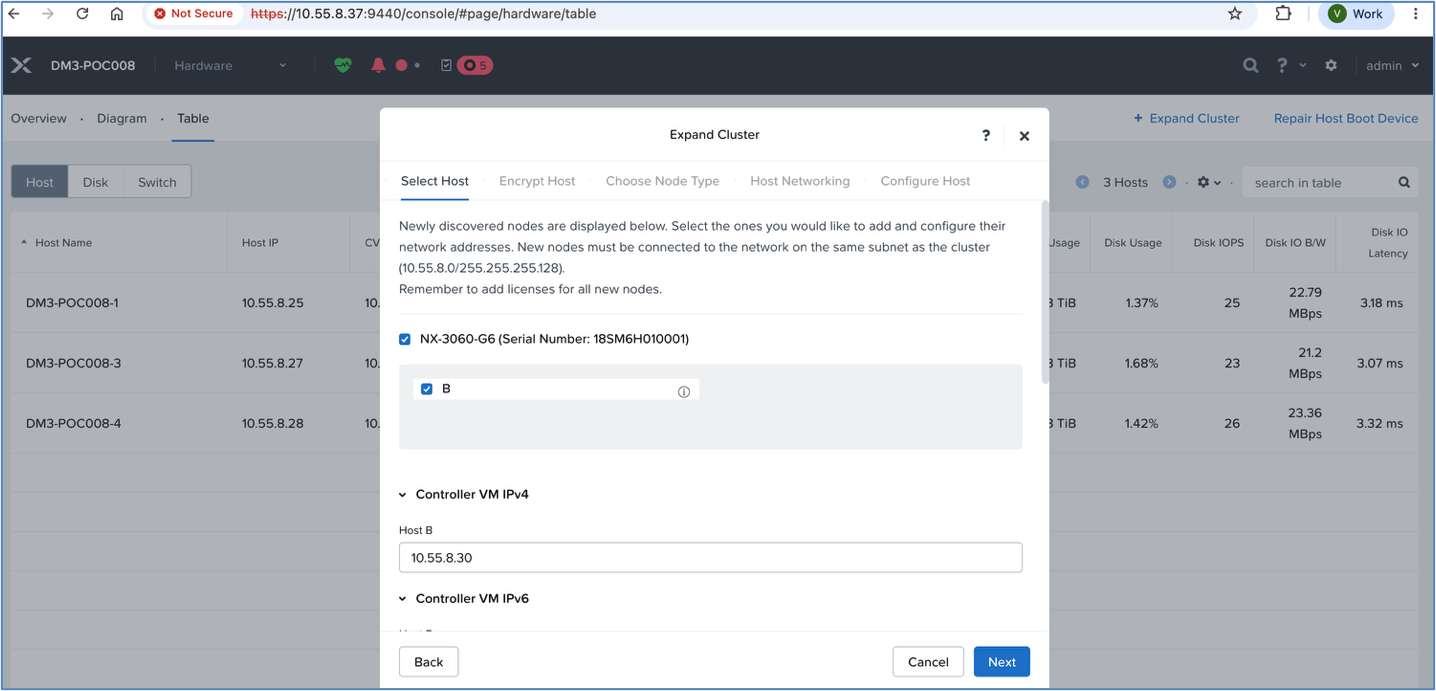
Select host
-
In the Encrypt Host tab, do the following:
-
In the Encrypt Host, under the Certificate Signing Request Information section, click Generate and Download for each node to be added.
-
Get the CSRs signed by a certificate authority (CA).
-
Click Select Files and upload a signed certificate in order for the nodes to connect to the KMS server. Click Next.
-
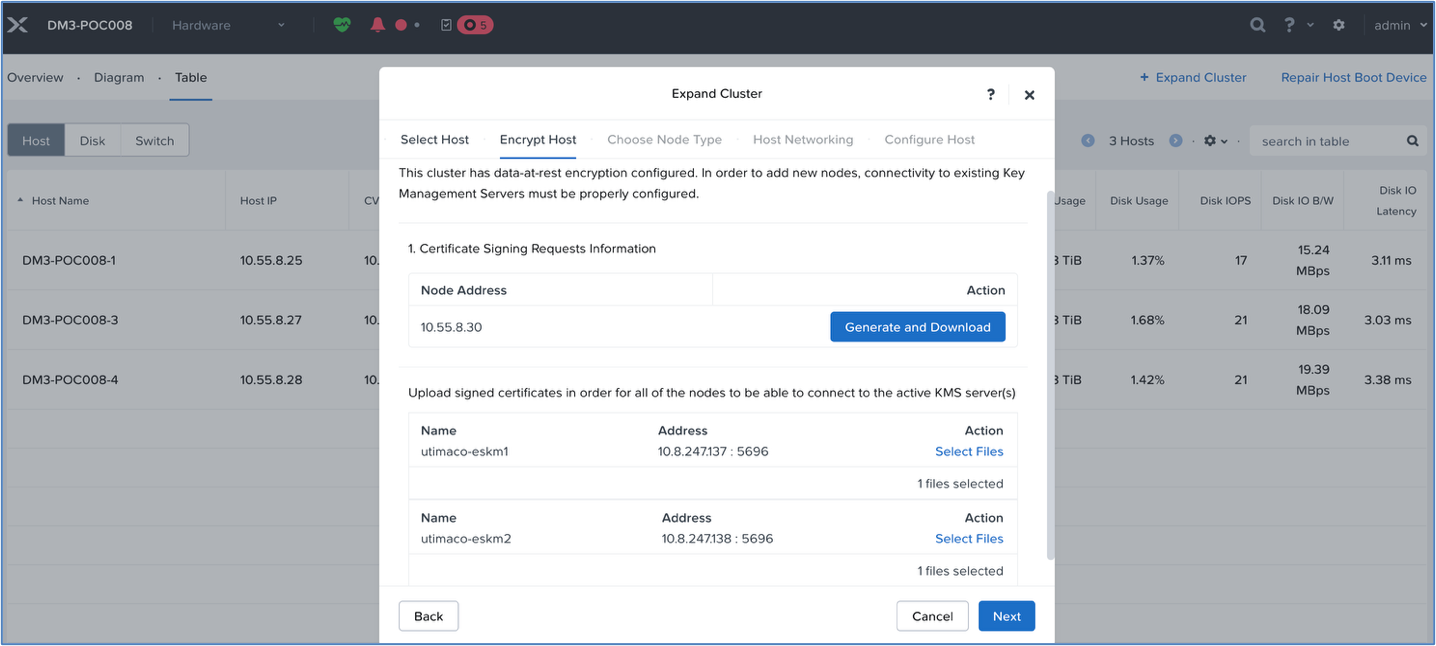
Encrypt host
-
In the Choose Node Type tab, select the Node Type as HCI Node.
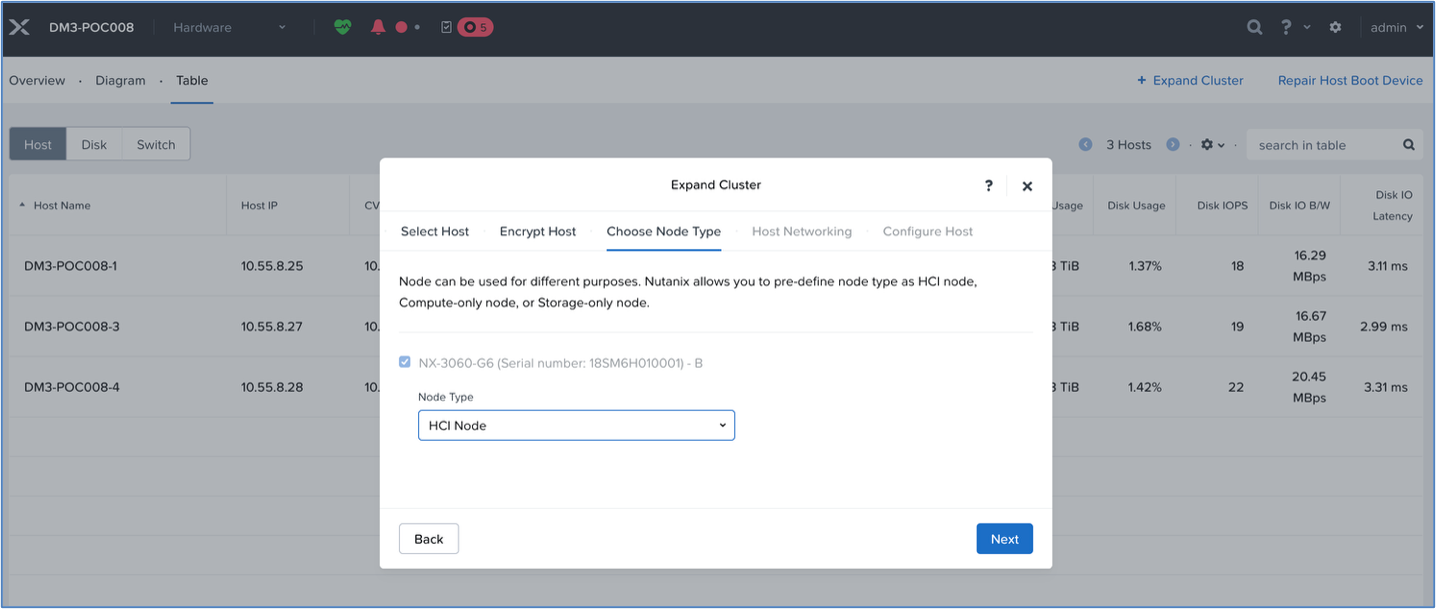
Choose node type
-
In the Host Networking tab, choose the Add Uplink for Host Networking. Click Next.
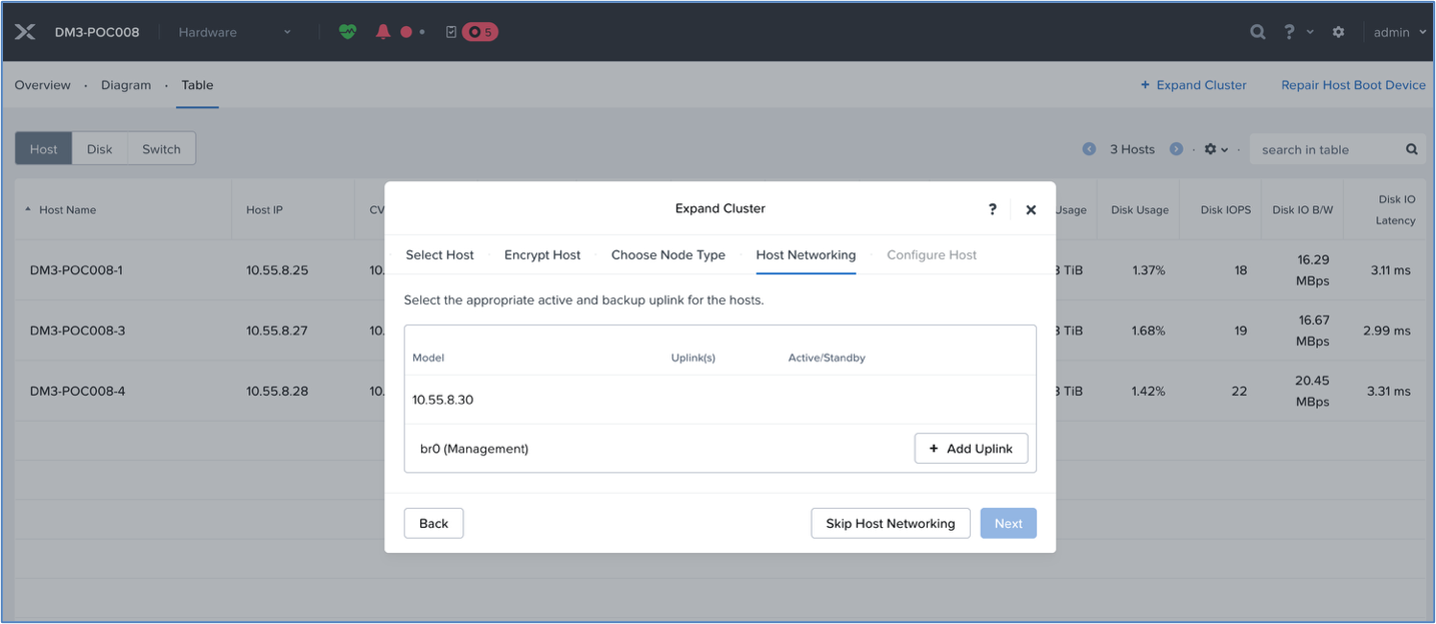
Host networking
-
In the Configure Host tab, click Run Checks to verify that the nodes are ready.
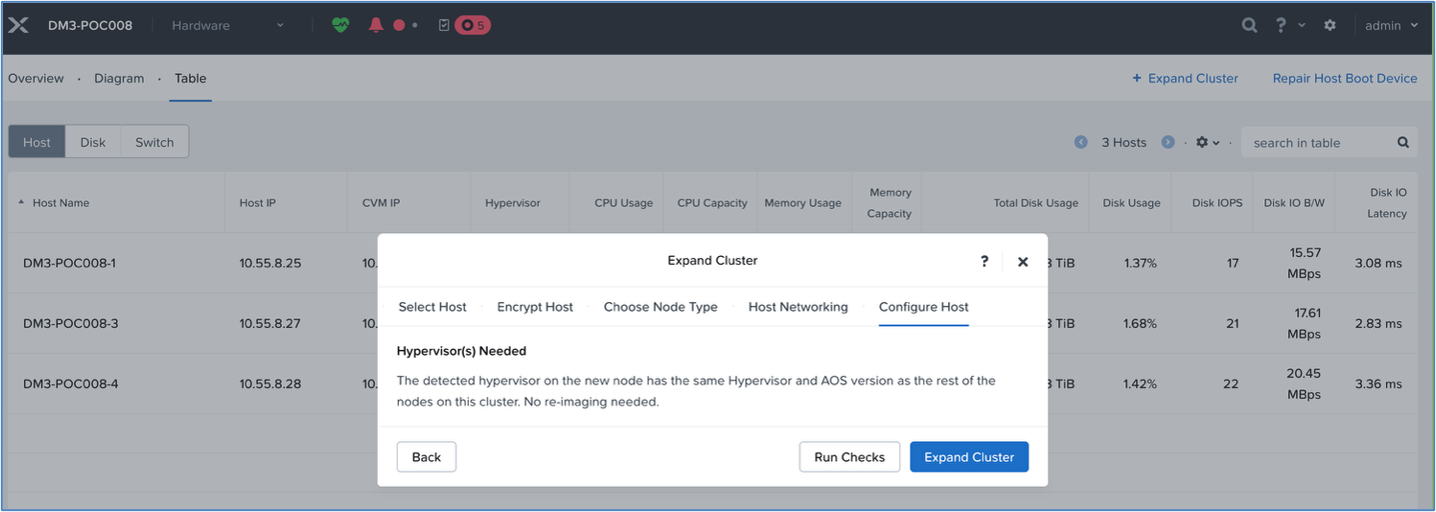
Configure host
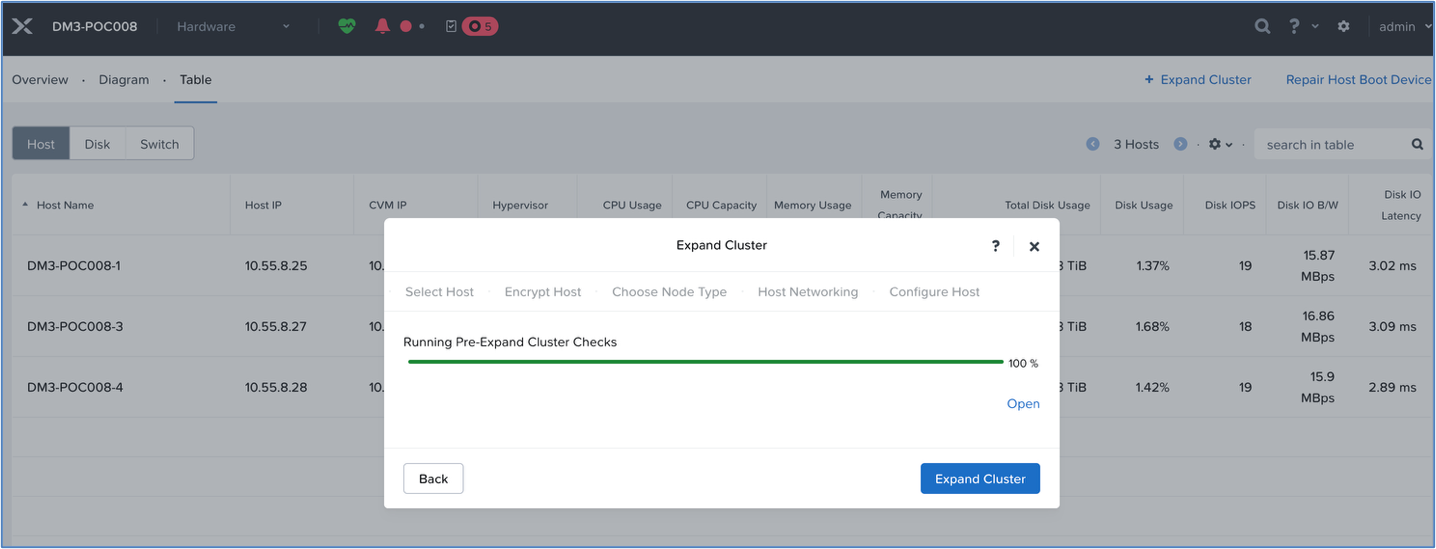
Running pre-expand cluster checks
-
Click Expand Cluster to complete the cluster expansion.
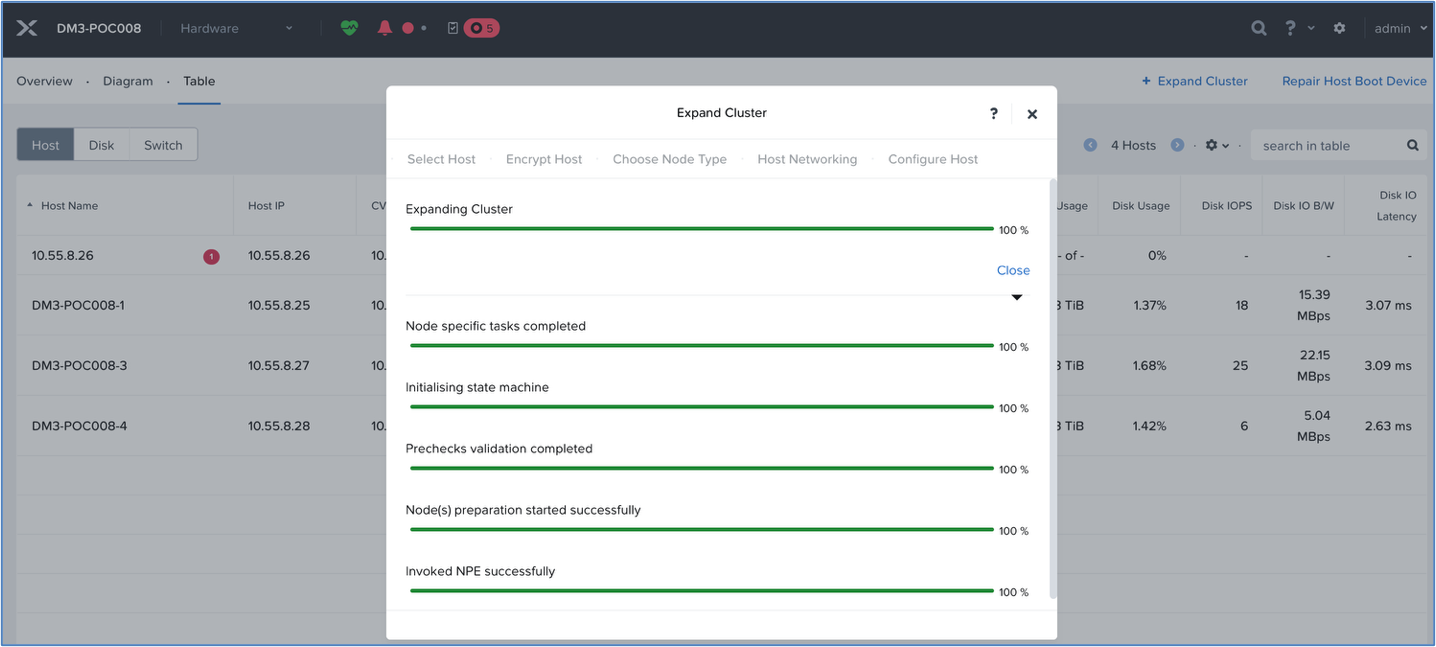
Expanding cluster status
Verify that the node is successfully added to the cluster and test the connectivity to the KMS servers.
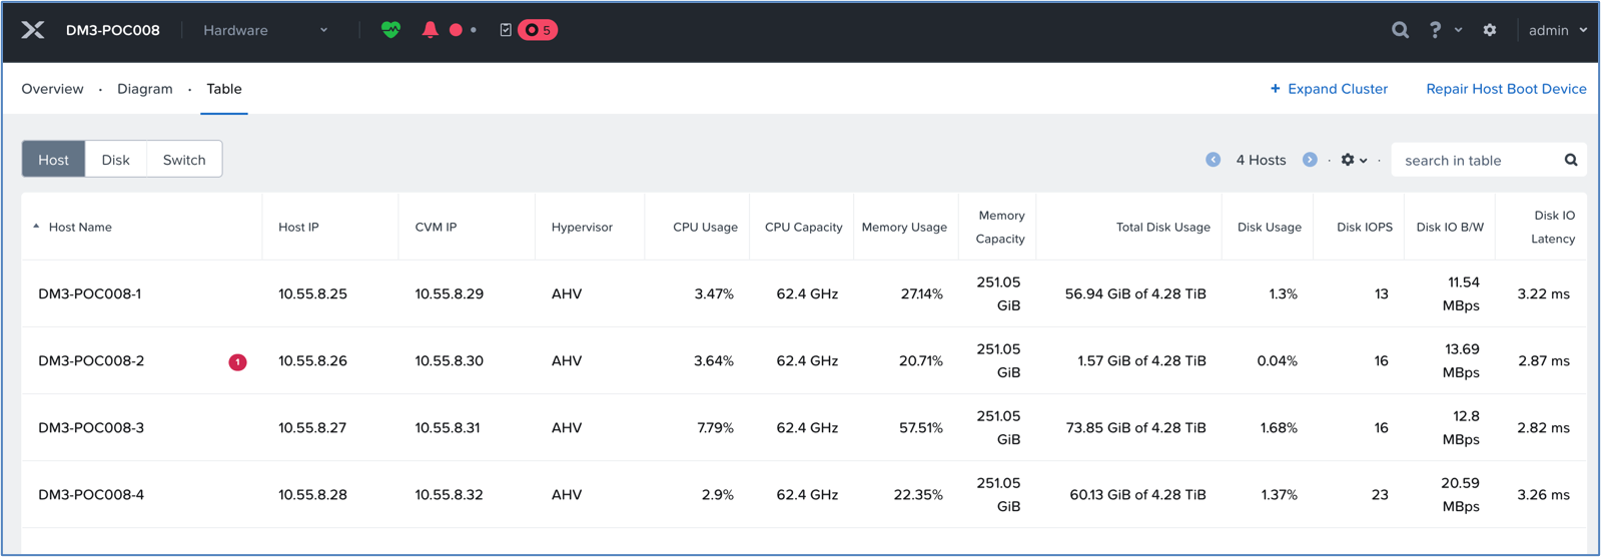
Expanded cluster