
-
Create a new folder named
certsunderC:\elasticsearch\configto store all certificates and key files. -
Open PowerShell as an administrator from
C:\elasticsearch\binand generate a root CA that will be used to sign all Elasticsearch TLS certificates. This command createselastic-stack-ca.p12under theC:\elasticsearchdirectory.
.\elasticsearch-certutil.bat ca
-
Convert the generated CA file to PEM format.
openssl pkcs12 -in elastic-stack-ca.p12 -nokeys -nodes -out ca.crt
-
Create an
instance.ymlfile in theC:\elasticsearchdirectory to define the node’s IP address and DNS entries (SAN values) used for the TLS certificate. This prevents hostname mismatch issues.
instances:
  - name: "node-1"
    ip:
      - "<host_ip>"
    dns:
      - "<host_name>"
      - "localhost"
Replace <host_ip> and <host_name> with the actual IP address and hostname of the Elasticsearch server.
-
Create a node certificate (node-1.crt and node-1.key) using the CA and the
instance.ymldefinitions. The following command produces a file namedcerts.zipcontaining the PEM certificates.& "C:\elasticsearch\bin\elasticsearch-certutil.bat" cert --ca "C:\elasticsearch\elastic-stack-ca.p12" --in "C:\elasticsearch\instance.yml" --out "C:\elasticsearch\certs.zip" --pem -
Unzip the generated
certs.zipand copy thenode-1.crtandnode-1.keytoC:\elasticsearch\config\certs. -
Verify that all three –
ca.cert,node-1.crtandnode-1.key– are present in the pathC:\elasticsearch\config\certs. -
Update the
elasticsearch.ymlfile located atC:\elasticsearch\configwith the following HTTPS and transport security settings:
# -------- Security & SSL (TLS) Configuration ----------
xpack.security.enabled: true

# -------- HTTPS (REST API) TLS --------
xpack.security.http.ssl.enabled: true
xpack.security.http.ssl.certificate: certs/node-1.crt
xpack.security.http.ssl.key: certs/node-1.key
xpack.security.http.ssl.certificate_authorities: ["certs/ca.crt"]

# -------- Transport TLS (cluster-to-cluster) --------
xpack.security.transport.ssl.enabled: true
xpack.security.transport.ssl.certificate: certs/node-1.crt
xpack.security.transport.ssl.key: certs/node-1.key
xpack.security.transport.ssl.certificate_authorities: ["certs/ca.crt"]

# Optional: Bind Elasticsearch to all IPs (needed if external tools connect)
network.host: 0.0.0.0
http.port: 9200

discovery.type: single-node
Ensure the certificate paths correctly match C:\elasticsearch\config\certs.
-
After updating the
elasticsearch.yml, run the following command to start Elasticsearch from pathC:/elasticsearch/bin:
.\elasticsearch.bat
-
Wait until the log displays
Cluster health status changed from [RED] → [GREEN], which indicates Elasticsearch is fully operational.

Verify Elasticsearch running
-
Reset the built-in kibana_system password, required for Kibana to authenticate with Elasticsearch, and save the generated password securely.
.\elasticsearch-reset-password.bat -u kibana_system
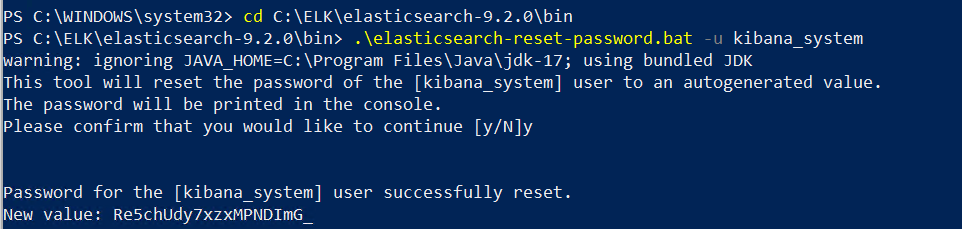
Reset Kibana user password
-
Create a superuser account that will be used to log in to the Elasticsearch API, the Kibana dashboard, and for Filebeat configuration.
.\elasticsearch-users.bat useradd <username> -p <password> -r superuser
Replace <username> and <password> with the actual username and password you require.
-
Open a browser and access https://localhost:9200 or https://<host_ip>:9200 to confirm successful TLS and authentication setup. Enter the configured superuser username and password on the prompt.
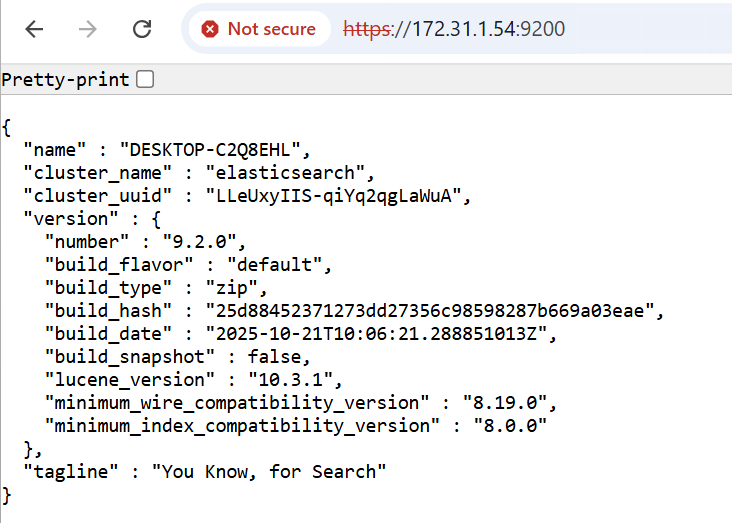
Verify Elasticsearch setup