
Utimaco ESKM integrates with HPE ProLiant Server to manage the encryption using a high-assurance, scalable key manager in a security-hardened appliance.
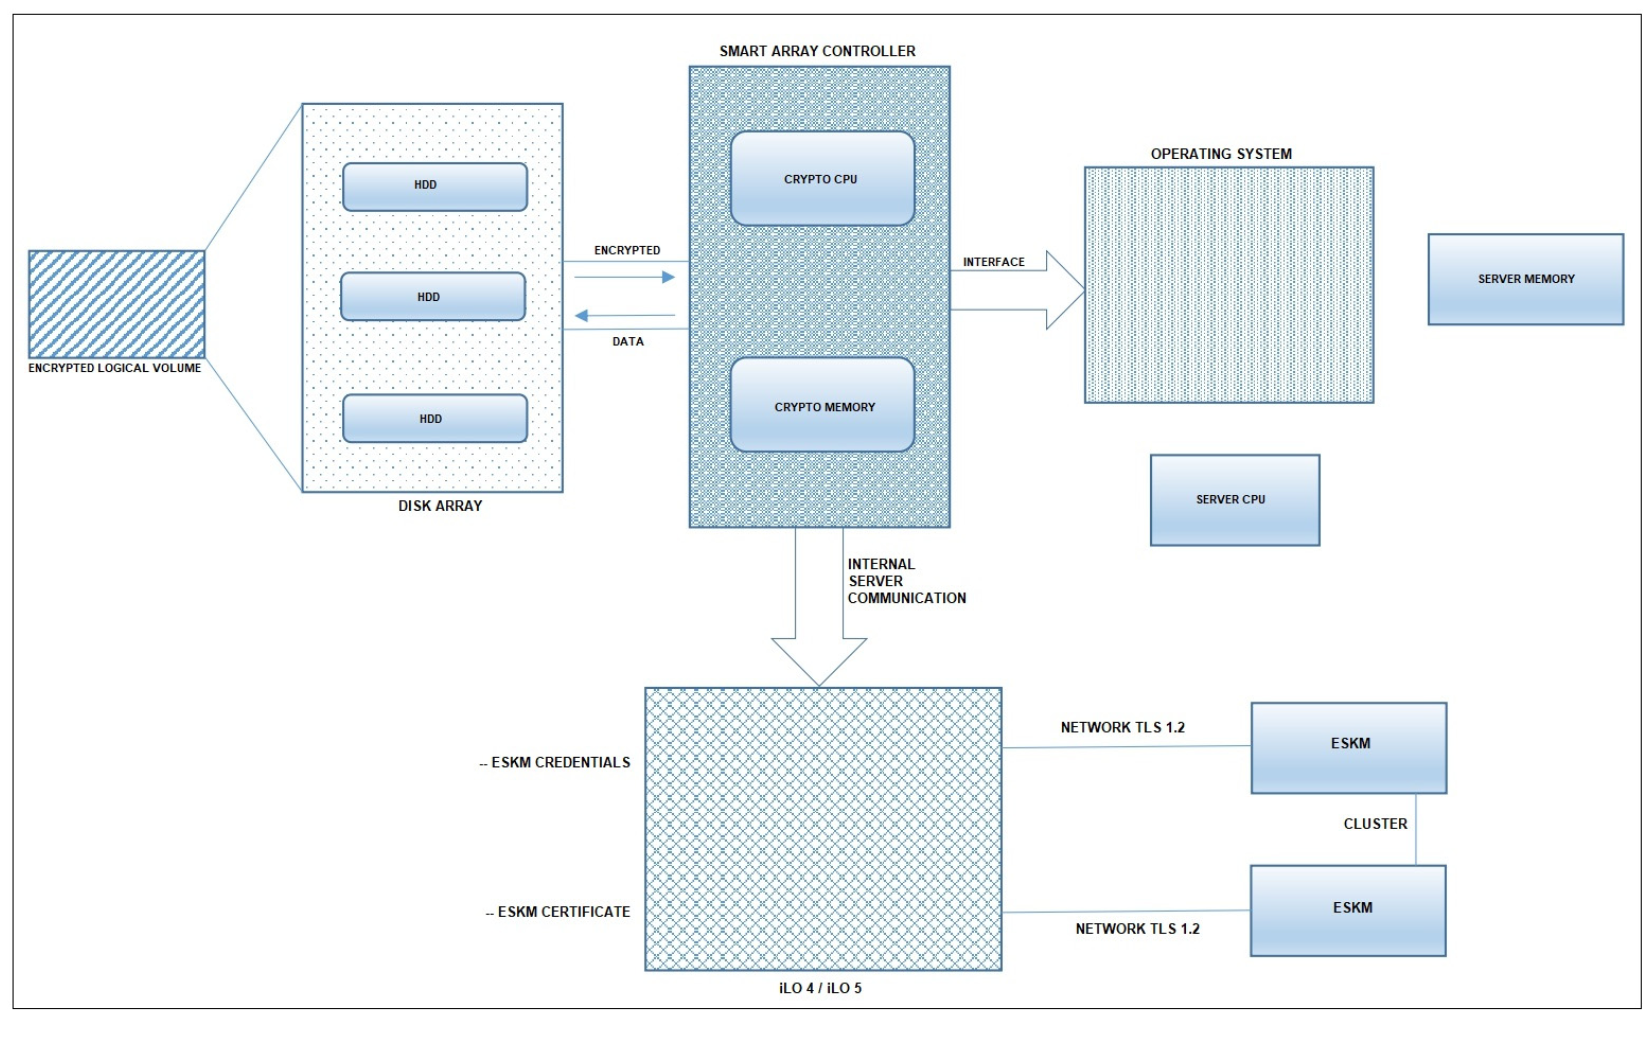
When integrating "HPE Secure Encryption" with "ESKM", we will be using the iLO port to set up the initial configuration and perform the enrollment with the ESKM. The iLO must be configured in such a way that it can access the ESKM over the network.
We must create “temporary credentials” on the ESKM for the iLO to authenticate and execute the enrollment steps:
-
Log in to the ESKM Management Console using the admin username and the password.
-
Go to Security > Users & Groups > Local Users.
-
Click on ADD.
-
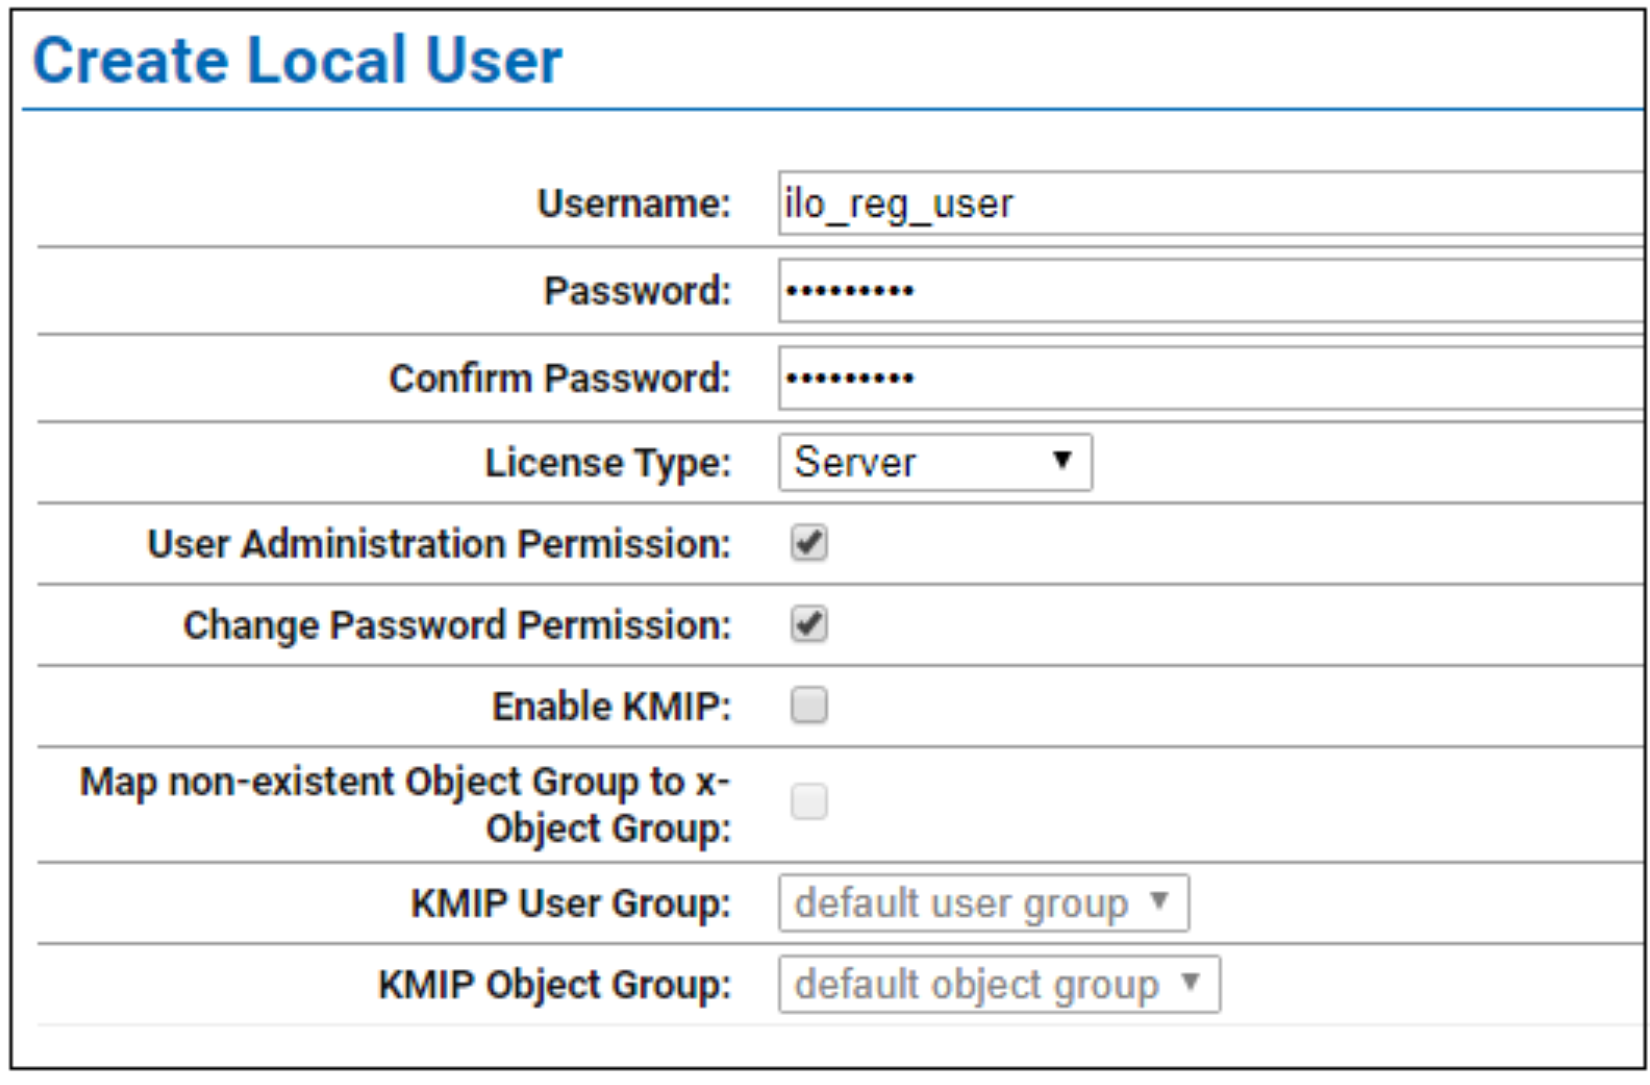
Create a local user with the username “ilo_reg_user”.
a. Enable “User Administration Permission” to allow this user to create other client users.
b. Enable “Change Password Permission” to allow this user to change client user passwords.
c. Uncheck “Enable KMIP” and leave this field blank.
Do not assign this user to any User group. It must remain stand-alone.
-
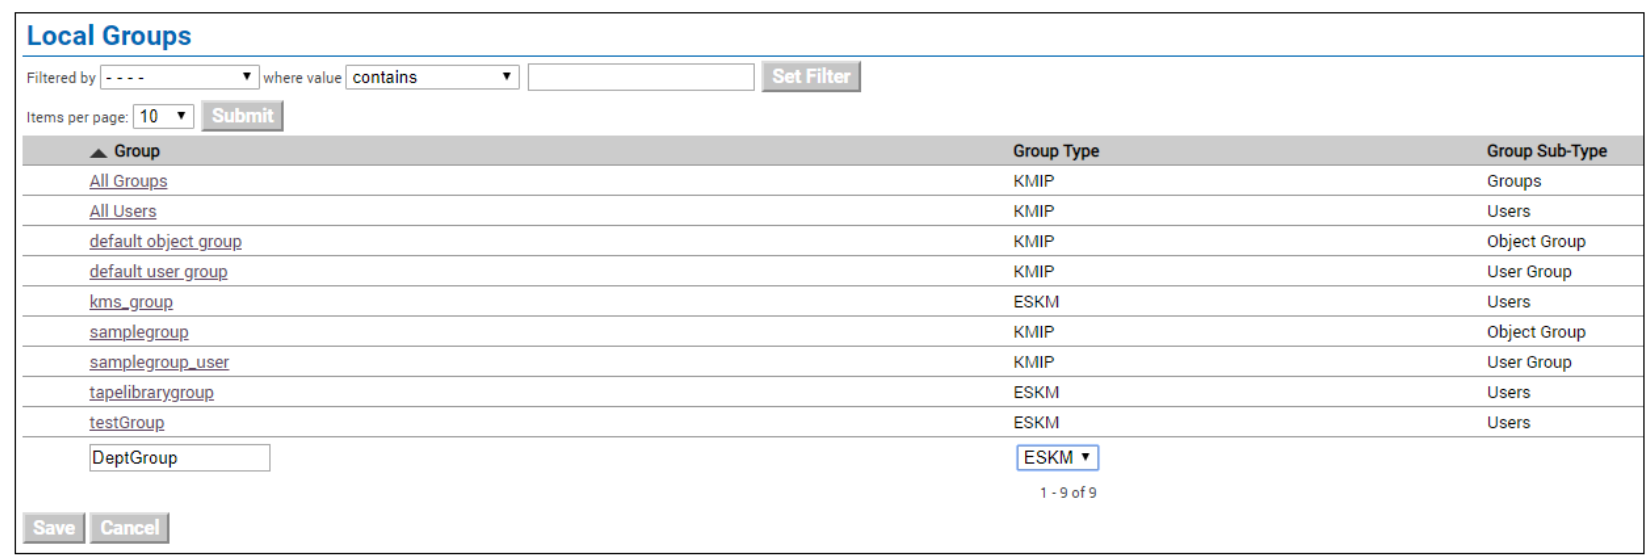
Go to Security > Users & Groups > Local Groups.
-
Click on ADD.
-
Create a user group which lists all servers under the “Group” that serves the same applications or functions.
a. Group: “FinanceGroup”, for the servers used by Finance applications, for example.
b. Group Type: ESKM.
Utimaco recommends grouping ProLiant Servers based on organizational unit/department.
-
Click on Save.
-
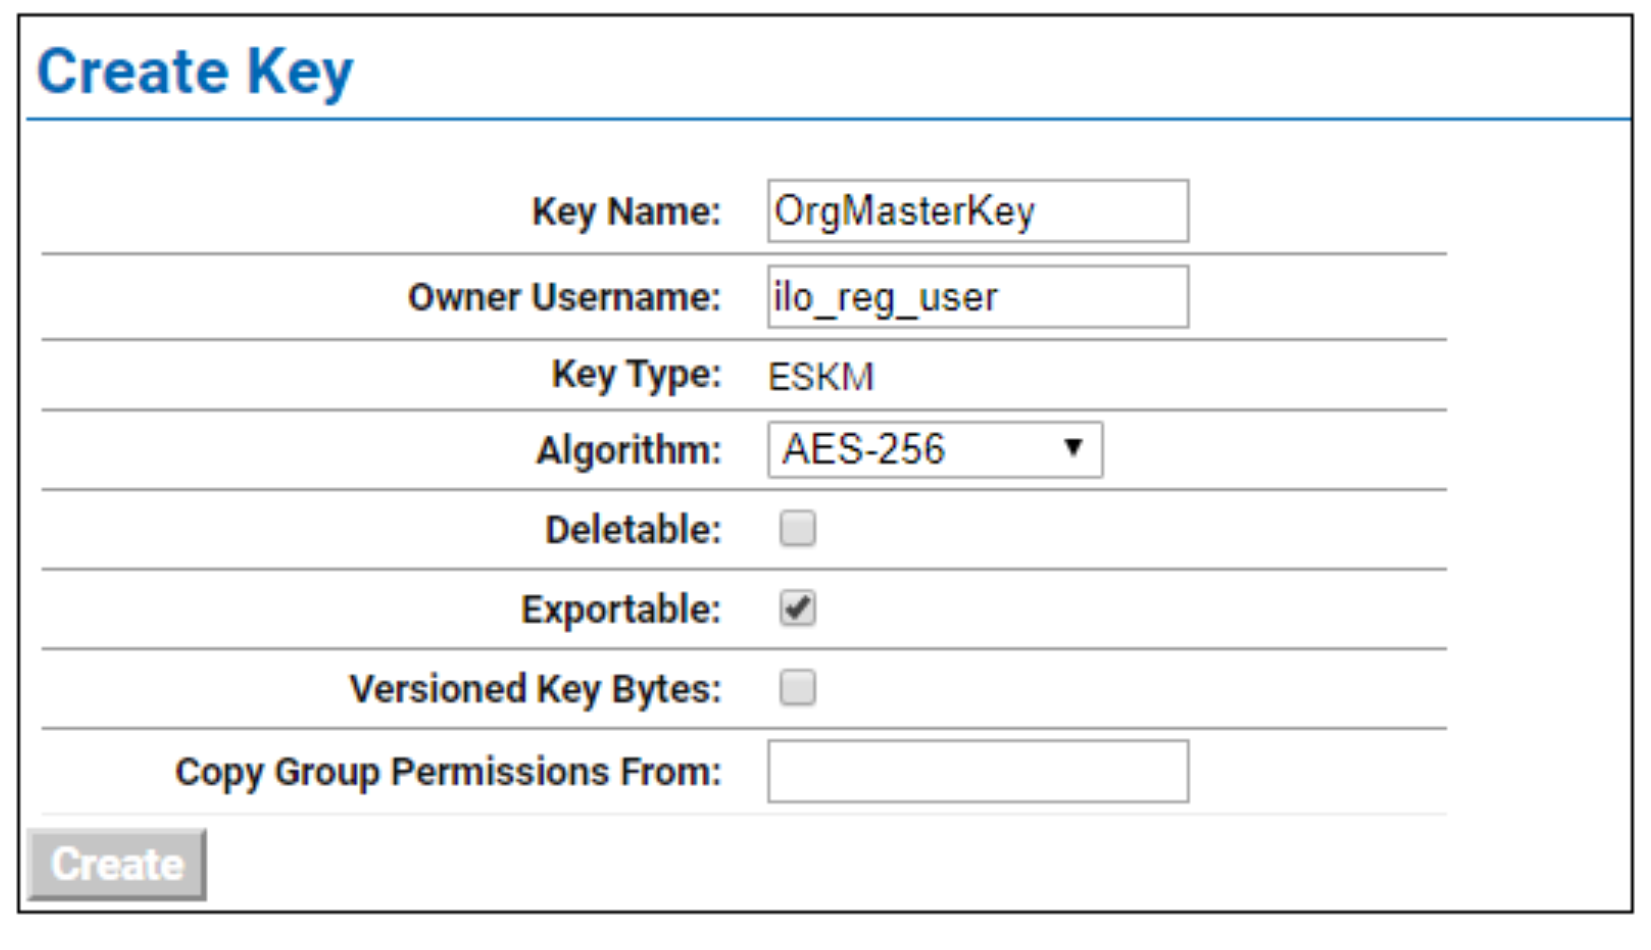
Go to Security > Keys & KMIP Objects > Create Keys.
10. Create a Key that will be used as a “master key” to encrypt “drive keys”.
a. Key Name: “FinanceMasterKey”, for example, or some preferred name.
b. Owner Username: ilo_reg_user.
The master user was created earlier.
c. Key Type: ESKM.
d. Algorithm: AES-256.
e. Exportable: Enable.
11. Click on Create.
12. Assign the master key to the group that was previously created.
13. Run a Key Query in the ESKM.
14. Find the key that you created in step 10.
15. Click on the key to view its properties.
16. Under “Group Permissions”, add the group to which this key is going to be a part of.
a. Export: select “Always”.
b. Full: select “Always”.
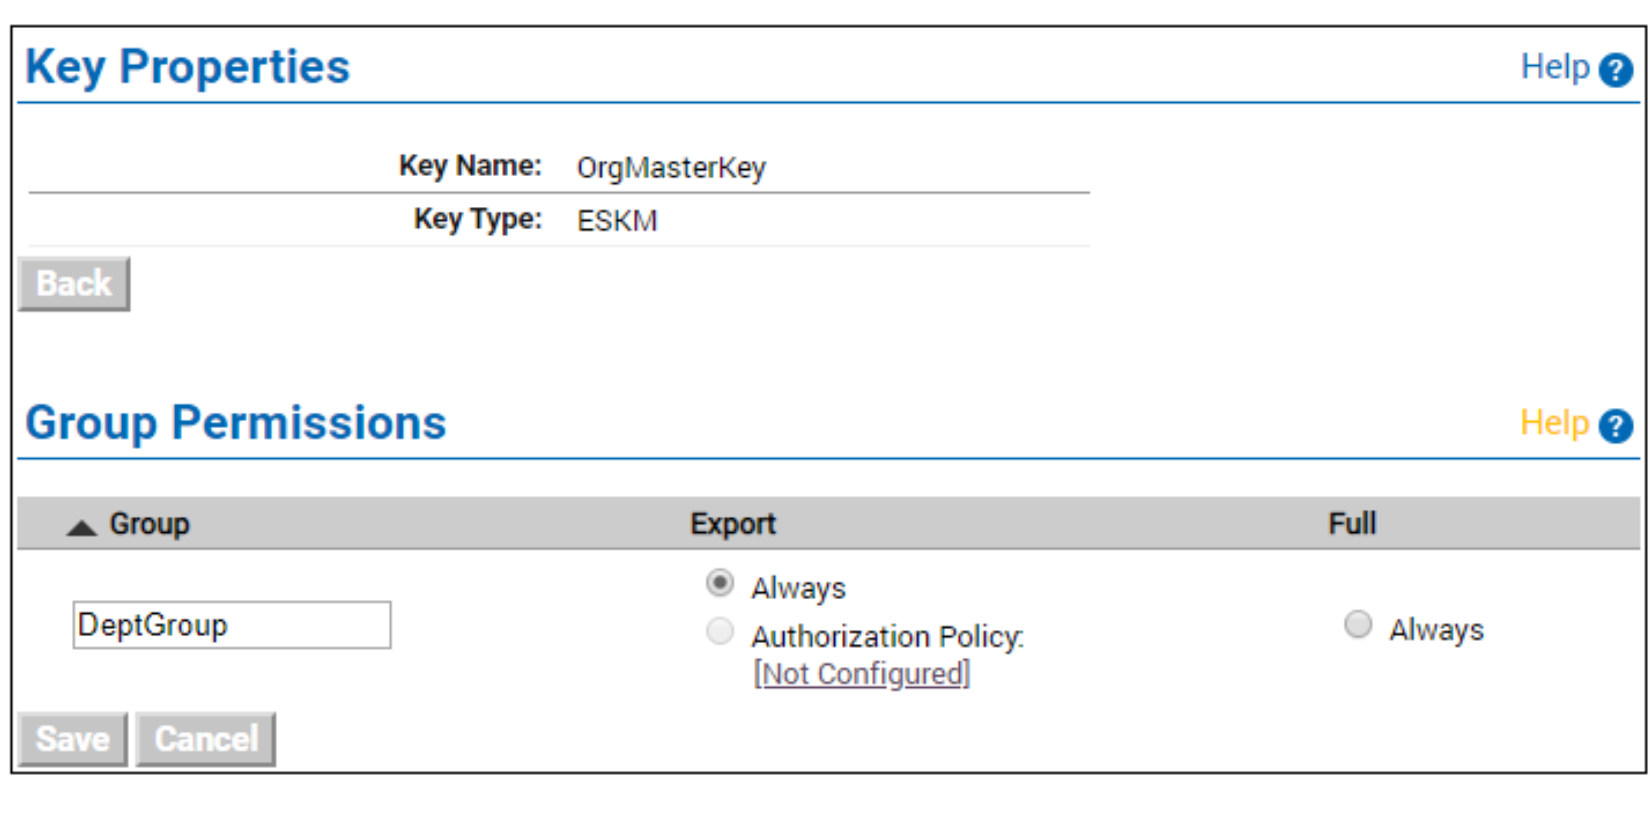
17. Click on Save.