
-
Log in to the Nutanix Prism Element web console.
-
Do one of the following:
-
Select Expand Cluster in the Settings page. (or)
-
Go to the Hardware dashboard and click the Expand Cluster button.
-
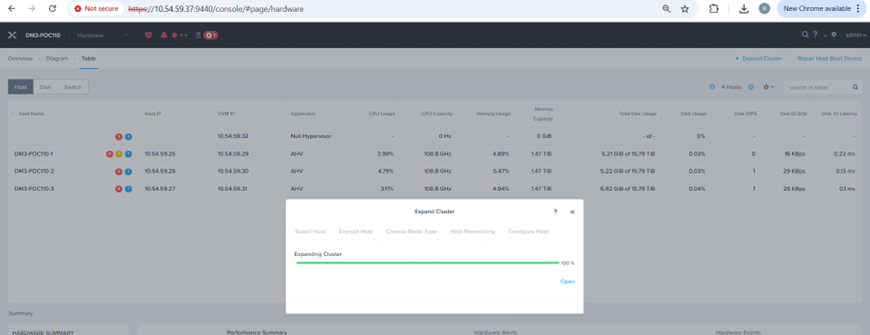
Expand Cluster
-
In the Expand Cluster window, select (click the radio button for) the desired option and then click the Next button:
-
Select Expand Cluster to begin the expansion immediately (after you complete the remaining configuration steps).
-
Expand Cluster - Success
Select Prepare Now and Expand Later to prepare the nodes now but delay adding them to the cluster until a later time. Preparing the nodes includes imaging the hypervisor (if needed), upgrading the AOS version (if needed), and preparing a new node network configuration (if needed). For more information on expanding the cluster, see https://portal.nutanix.com/page/documents/details?targetId=Web-Console-Guide-Prism-v6_7:wc-cluster-expand-wc-t.html.
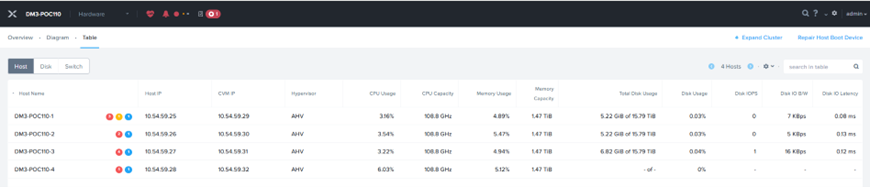
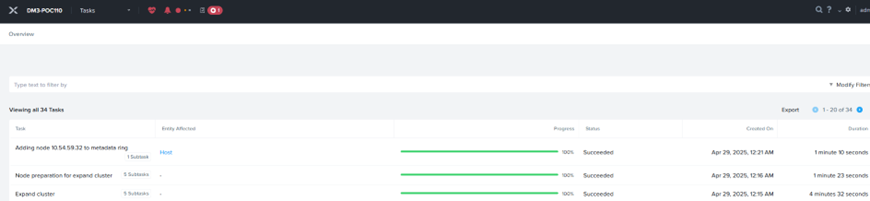
Expanded Cluster
Ensure that factory-prepared node(s) are imaged with the same AOS/AHV version of the cluster. Re-imaging is not possible during expansion.
-
In Nutanix Prism Settings, expand the cluster and check if the node(s) appear in the discovered list.
-
Select the node(s) and add them to the cluster.
-
Enter the details for the Host Name, Controller VM, Hypervisor, and IPMI IP.
-
In the Encrypt Host, click "Generate and download CSR".
-
Get the CSRs signed by a certificate authority (CA).
-
Upload a signed certificate in order for the nodes to connect to the KMS server.
-
Choose the Node type as "HCI Node".
-
Choose the uplink for Host Networking.
-
Click "Run Checks" to verify that the nodes are ready.
-
Complete the cluster expansion.
Verify that the node is successfully added to the cluster and test the connectivity to the KMS servers.