-
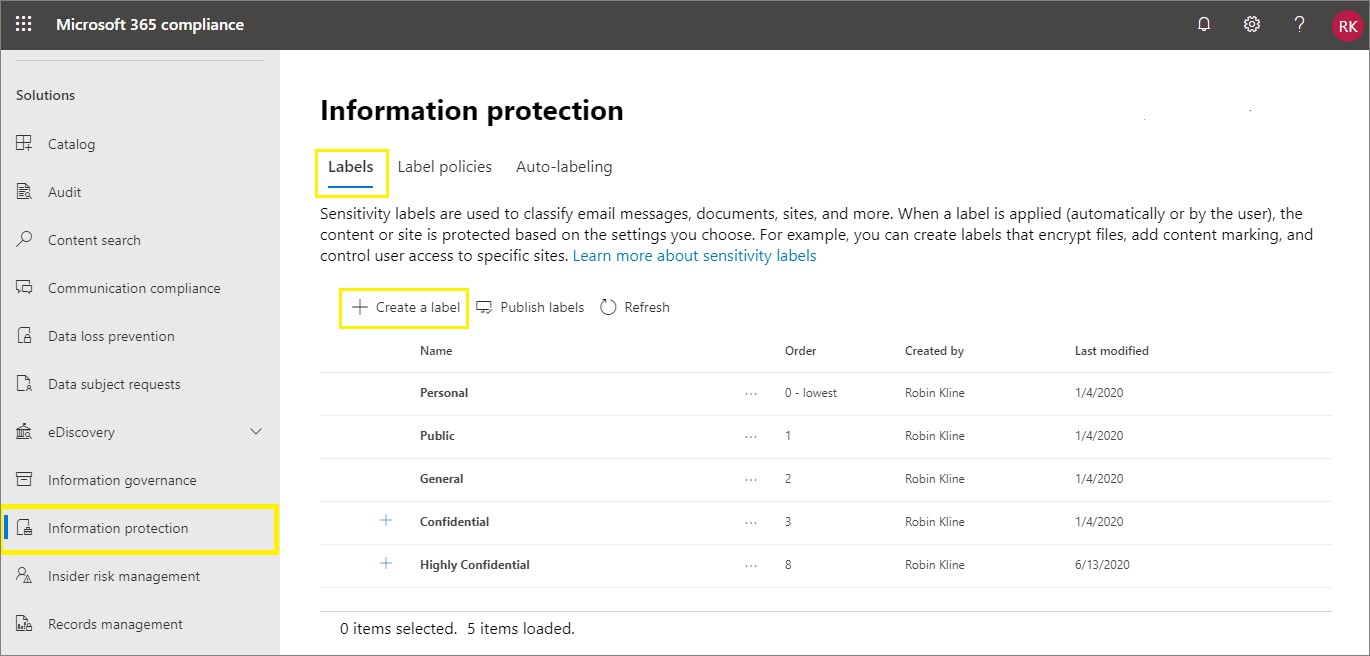
In the Microsoft 365 compliance center, Go to the Information Protection section.
-
On the Labels page, select + Create a label to start the new sensitivity label configuration.
-
For example, from the Microsoft 365 compliance center:
Create sensitivity label
-
To name and create a tooltip for your label, specify the following:
-
Label name - visible in Microsoft 365 compliance center
-
Display name - visible to users in e.g., Microsoft Word
-
Description for users - the tooltip that appears when users hover over the sensitivity label
-
Description for admins - the description available from the Microsoft 365 compliance center
-
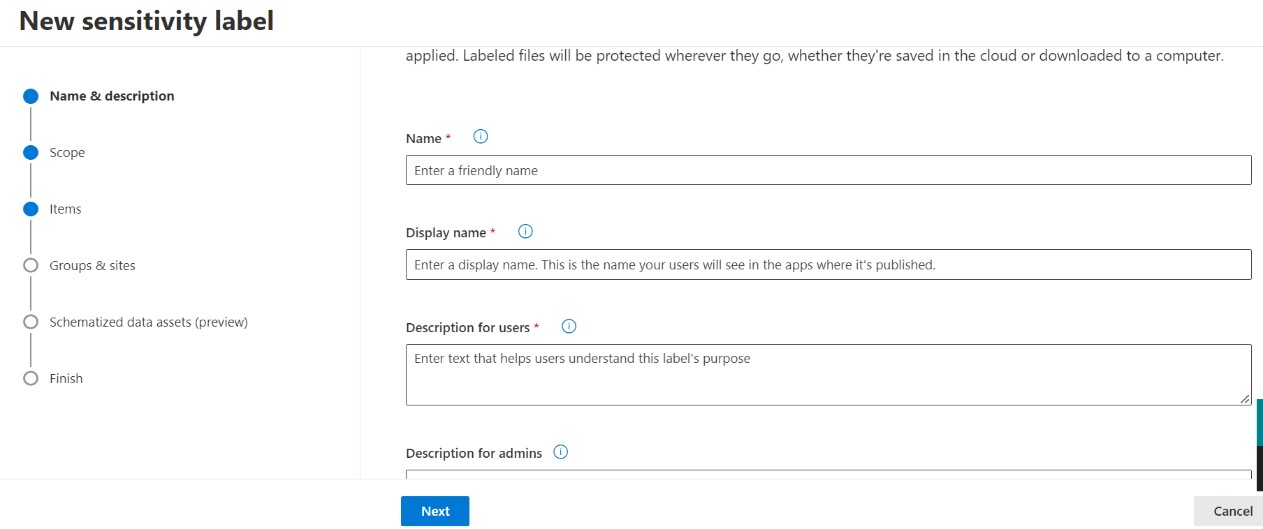
Name and create a tooltip for your label
5. Click on Next.
-
Define the scope of the label, e.g., apply the label to files & emails only.
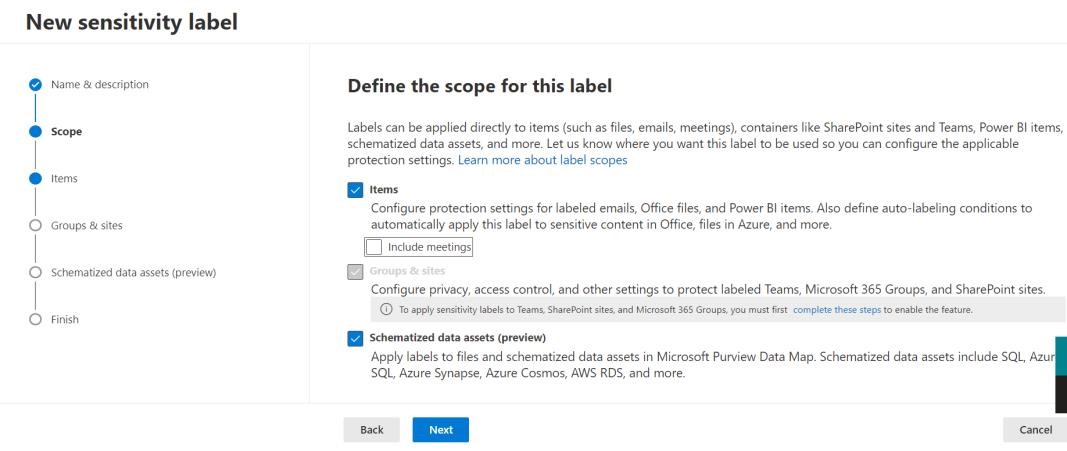
Define the scope for a label
-
Click on Next.
-
Select the protection settings for files and emails.
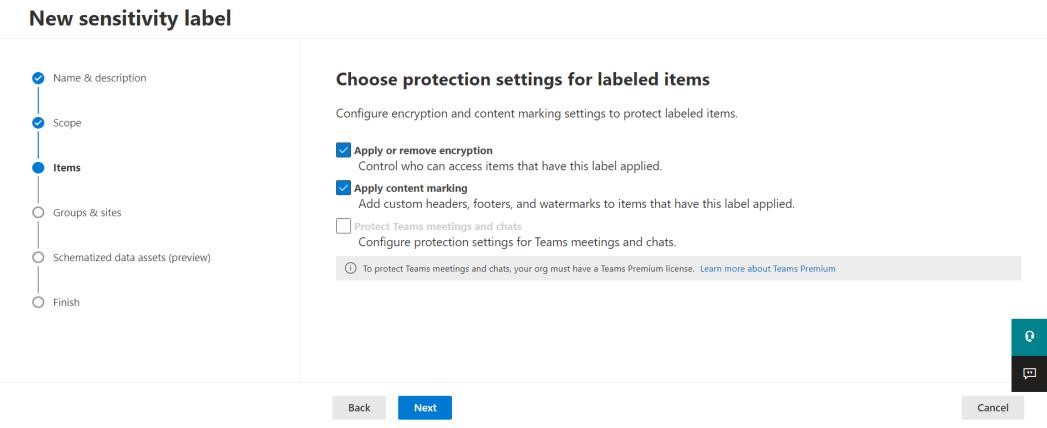
Select protection settings for files and emails
-
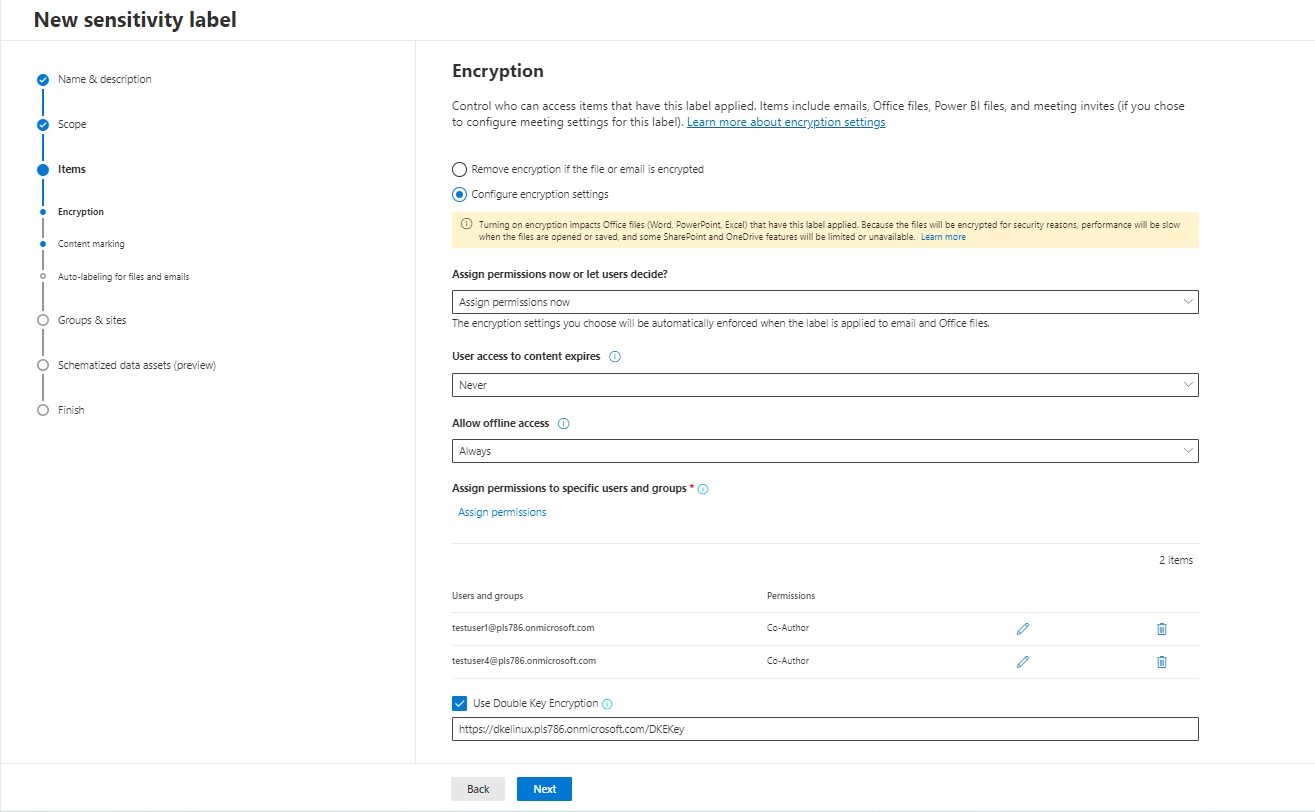
In the encryption step, you can set permissions to content with the label applied. Since the primary reason for this procedure is to secure the files, you’ll want to configure encryption settings.
-
In most cases, you will use the Never expires option, since it will let users access files without any time limit.
-
You can also allow or deny offline access to a file. Without the offline access, a user will need to be re-authenticated each time they want to open a document or email.
-
Choose which users or groups should be able to access documents with the label set.
Clicking Assign permissions opens a wizard on the right side. -
Finally, selectthe User Double Key Encryption checkbox and enter the correct DKE URL along with key.
Files and emails access
For example: https://dkeservice.utimaco.com/KEYNAME
Where KEYNAME is the label of the key which is generated using the DKE Anchor Manager.
The sensitivity label used for DKE protection needs to provide sufficient permissions for all intended recipients of the documents.
-
Content marking lets you add clear information about the applied labels directly to a document.
You can choose if you want to add a watermark, a header and a footer, and what it should display on Microsoft word document.
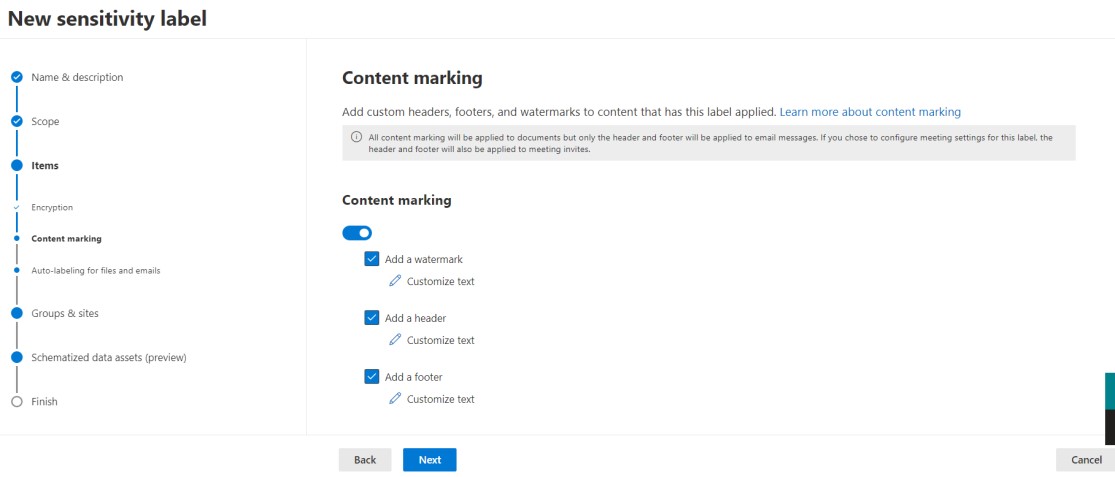
Content marking
-
In the next step, you can turn on auto-labeling. That way certain groups or documents created in certain sites can be automatically marked with your label. This may be useful if you want to make sure nobody forgets about securing documents. On the other hand, auto-labeling can create problems if you intend to share some documents outside your organization.
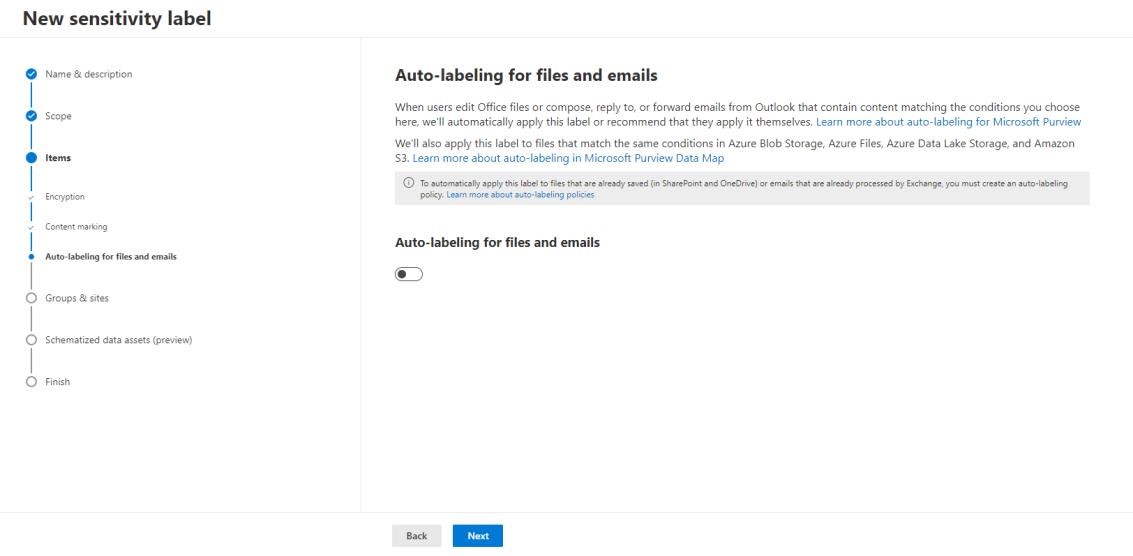
Auto-labelling for files and emails
-
Click Next.
You can define protection settings for groups and sites. Those settings, unlike the previous ones, apply to teams, groups or sites and not the documents stored in them
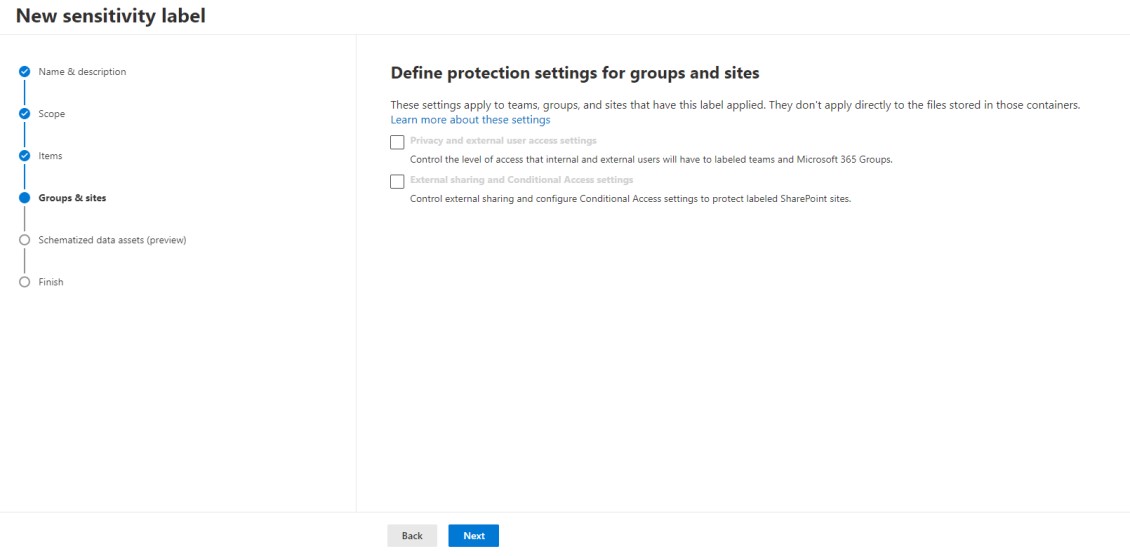
Define protection settings for groups and sites
-
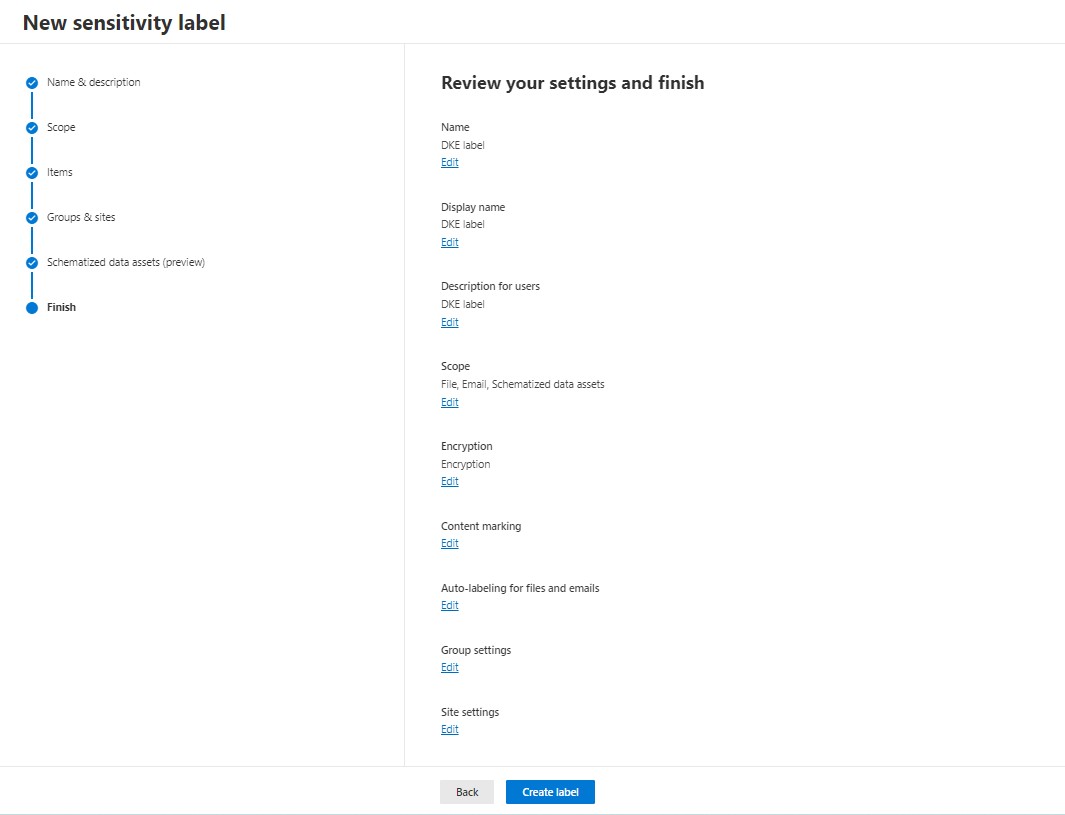
The last step is revising the configuration. Revise your settings, click Create label and then Done.