
The following steps enable you to register your DKE Anchor Service. Registering your DKE Anchor Service is the last step in deploying DKE before you can start creating labels.
To register the DKE Anchor Service:
-
In your browser, open the Microsoft Azure portal, and go to All Services > Identity > App registrations.
-
Select New registration and enter a meaningful name.
-
Select an account type. Either single or multi-tenant.
Example:
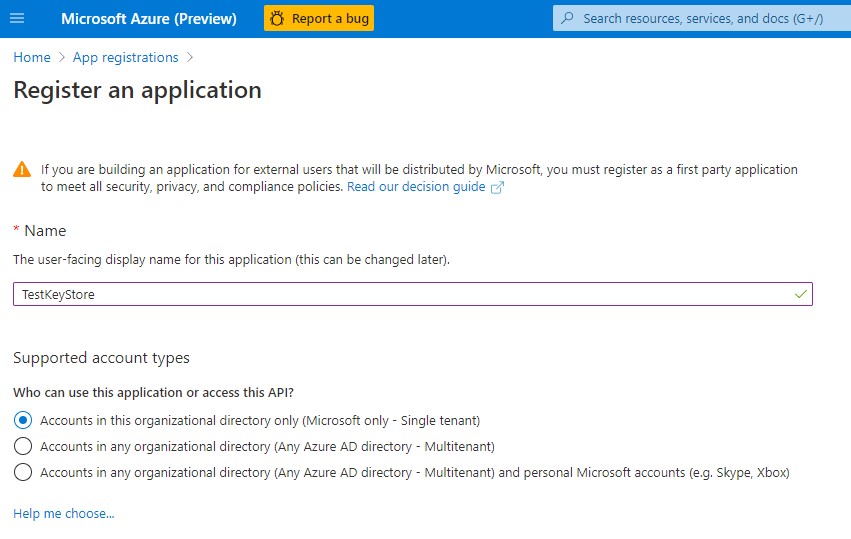
Register an application
-
At the bottom of the page, select Register to create the new App registration.
-
In your new App registration, in the left pane, under Manage, select Authentication.
-
Select Add a platform.
-
On the Configure platforms popup, select Web.
-
Under Redirect URIs, enter the URI of your double key encryption service. Enter the App Service URL, including both the hostname and domain and click on Configure button.
-
For example: https://dkeservice.utimaco.com.
The DKE Anchor Service URL needs to be based on the root level, i.e., not a sub directory. Working example: https://dkeservice.utimaco.com/mykey
This example does not work: https://webserver.utimaco.com/dkeservice/mykey
The DKE URL must not contain a trailing slash:
Working example: https://dkeservice.utimaco.com/mykey
This example does not work: https://dkeservice.utimaco.com/mykey/
-
Under Implicit grant, select the ID tokens checkbox.
-
Select Save to save your changes.
-
On the left pane, select Expose an API, next to Application ID URI, click on Set and enter your app service URL, including both hostname and domain and click on Save.
-
Still on the Expose an API page, in the Scopes defined by this API area, select Add a scope.
In the new scope:-
Define the scope name as user_impersonation
-
Select the administrators and users who can consent
-
Define any remaining values required
-
Select Select Save at the top to save your changes
-
-
Still on the Expose an API page, in the Authorized client applications area, select Add a client application.
In the new client application:-
Define the Client ID as d3590ed6-52b3-4102-aeff-aad2292ab01c.
This value is the Microsoft Office client ID and enables Office to obtain an access token for your key store. -
Under Authorized scopes, select the user_impersonation scope.
-
Select Save at the top to save your changes
-
Repeat these steps, but this time, define the client ID as c00e9d32-3c8d-4a7d-832b-029040e7db99.
This value is the Azure Information Protection unified labeling client ID
Alternatively, follow the link below from Microsoft to register your key store on Azure: https://docs.microsoft.com/en-us/microsoft-365/compliance/double-keyencryption?view=o365-worldwide#register-your-key-store.
-