

-
Click the Manager Keys to view keys list available in the AWS-BYOK cloud instance.
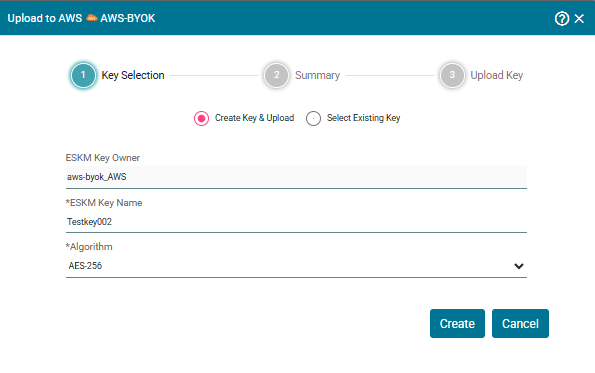
Key Selection
-
Specify the required information and click Create.
-
The Upload to Instance AWS-BYOK pop-up appears. Click Next.
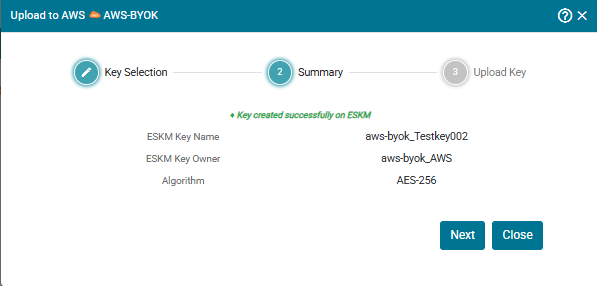
Summary
-
You will be navigated to the Upload Key page. Specify the required information and click Upload.
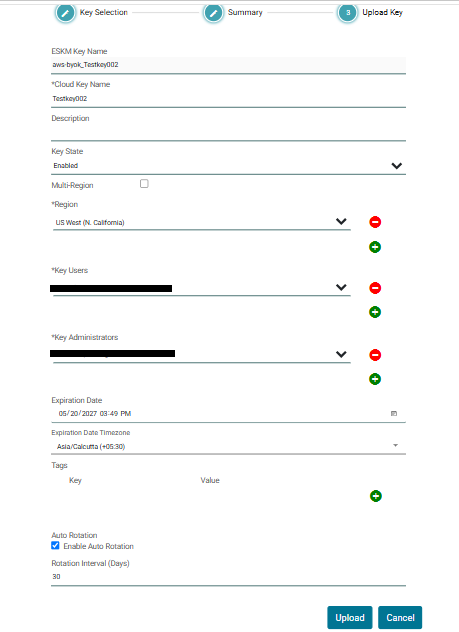
Upload Key
The key has been successfully uploaded to instance AWS-BYOK.
|
Parameter |
Description |
|---|---|
|
ESKM Key Name |
It is combination of Instance name and Key. |
|
Cloud Key Name |
Name of the key which you want to create in ESKM-BYOK. |
|
Description |
Specific reason for what the key is used for in AWS-BYOK. |
|
Region |
Select the regions to which the key needs to be imported. |
|
Key Users |
Users who creates key for the specific reason. |
|
Key Administrators |
admin user who is responsible for deleting the key if necessary. Only administrator has access to delete the key. |
|
Expiration Date |
Set the expiration date by which the key must be expired. |
|
Expiration Time Zone |
The expiration date time zone is activated based on the current time of the system. |
|
Multi Region |
Enable this for allowing the key to be replicated into other Regions. |
|
Tags |
Tag is to organize the keys in AWS-BYOK. Multiple Tags can be assigned for a specific key. |
|
Key State |
Specify the key status to be enabled or disabled. |
|
Enable Auto Rotation |
Enables automatic creation of new key versions. |
|
Rotation Interval (Days) |
Specifies the frequency at which a new key version is automatically generated. Supported values range from 30 to 365 days. |
Create AWS-BYOK key - parameters