

-
From Microsoft Windows, click Start.
-
In the Search programs and files field, type certmgr and select Manage computer certificates.
-
Right-click the Personal folder.
-
Select All Tasks > Advanced Operations > Create Custom Request.
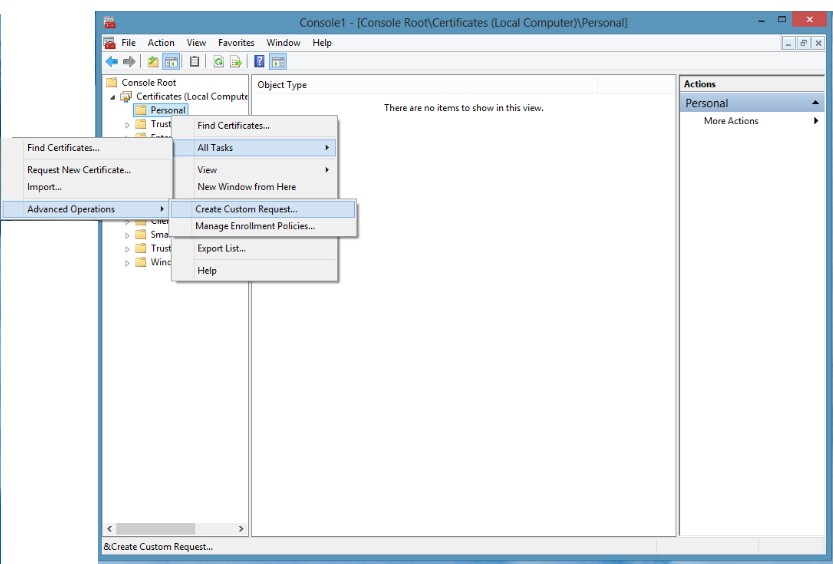
Creating CSR for Client
-
The Certificate Enrollment wizard will open > click Next.
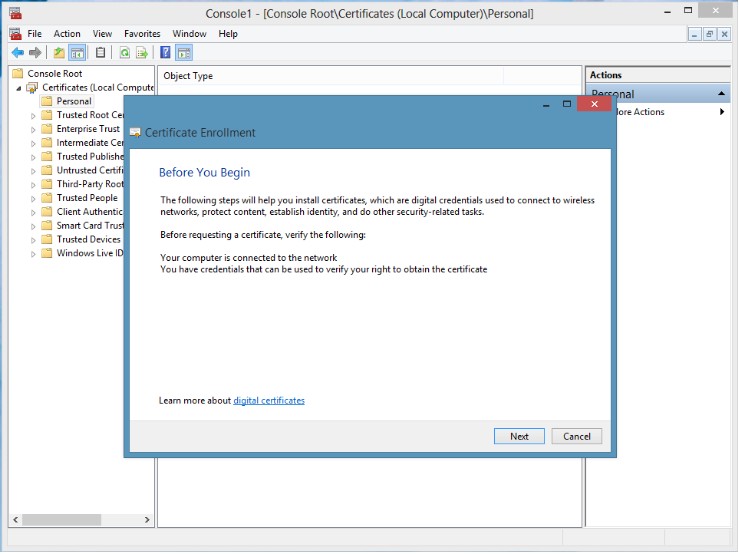
Certificate Enrollment Window
-
Select the option to Proceed without enrollment policy > click Next.
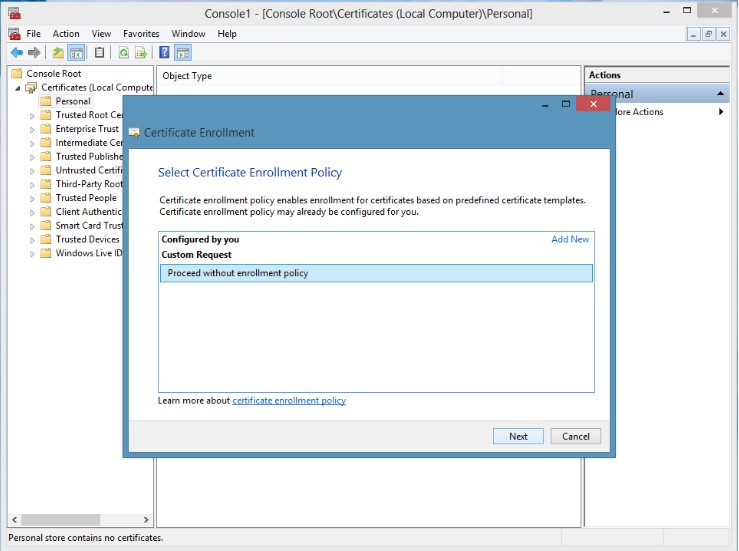
Selecting Certificate Enrollment Policy
-
Click Next at the Custom Request window.
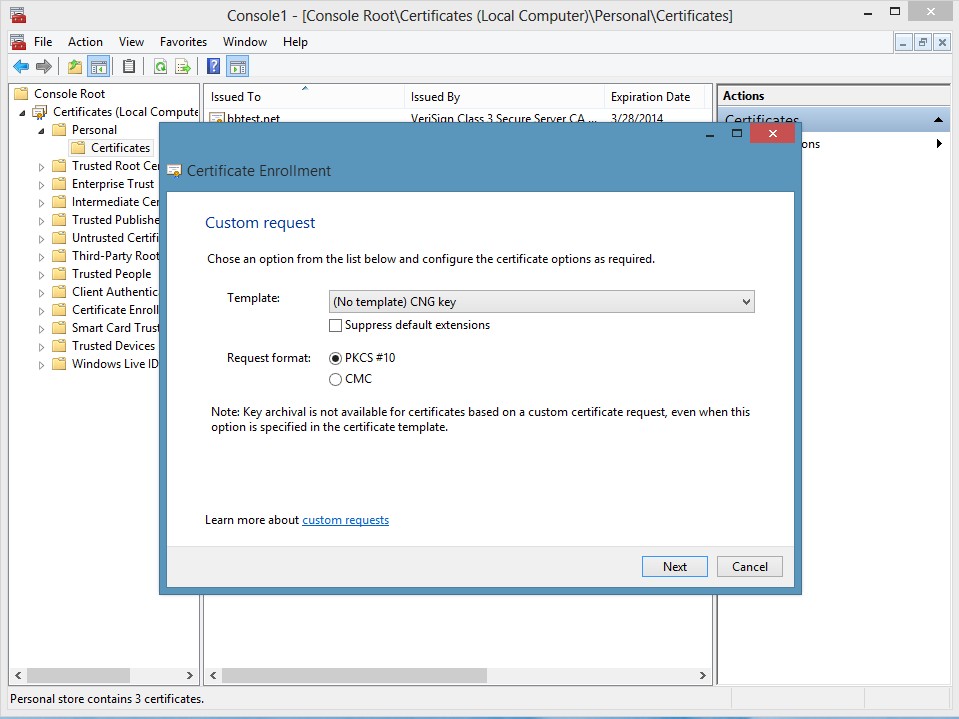
Custom Request window
-
From the Details drop down menu click Properties.
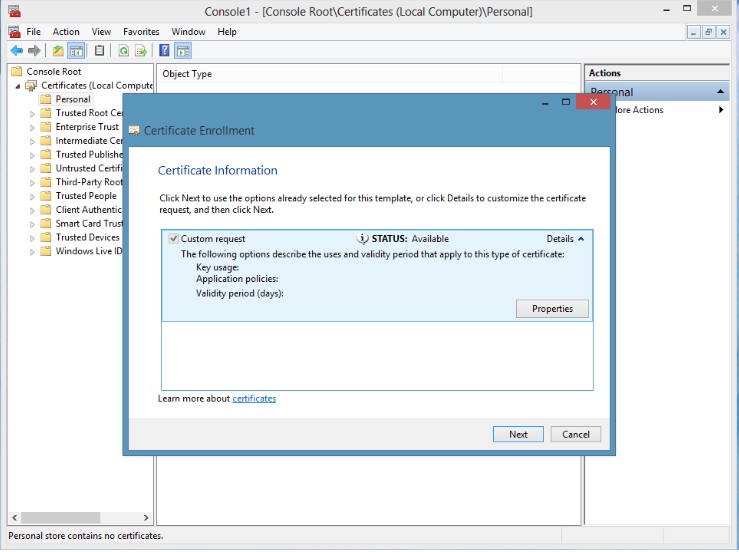
Certificate Information window
-
Enter a Friendly Name of your choice.
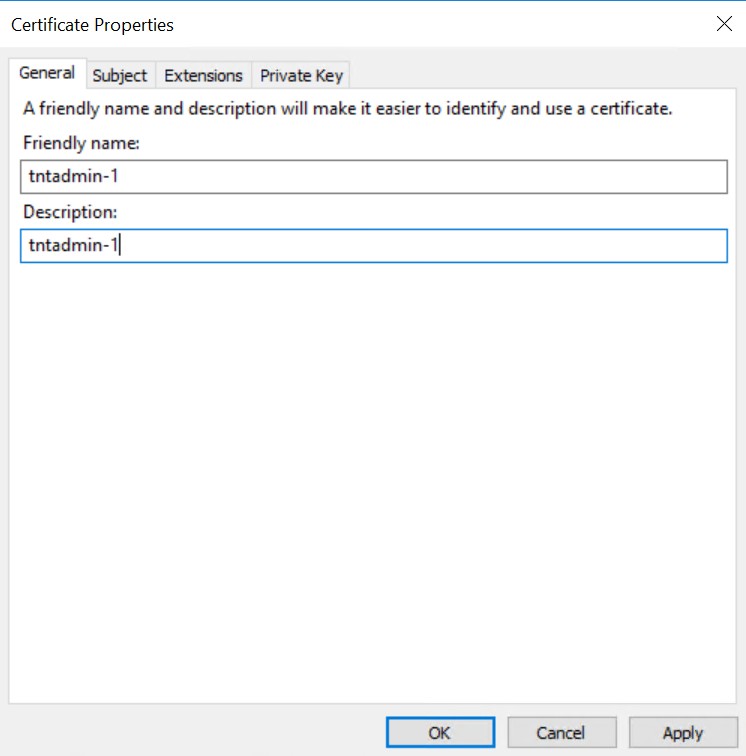
Certificate Properties window
-
Access the Subject tab > in the Subject name: Type: field add the following distinguish name values:
Example:
-
CN = <Username>: The technical user in the CMS group of the AD.
-
O = <Organization>: The registered organizational name the certificate belongs to.
-
C = <Country/region>: The two letter ISO country code.
-
DC = <Domain>: This is the domain name which has been assigned by the CMS Administrator and which is used in this system. Example: DC=demopkilocal.
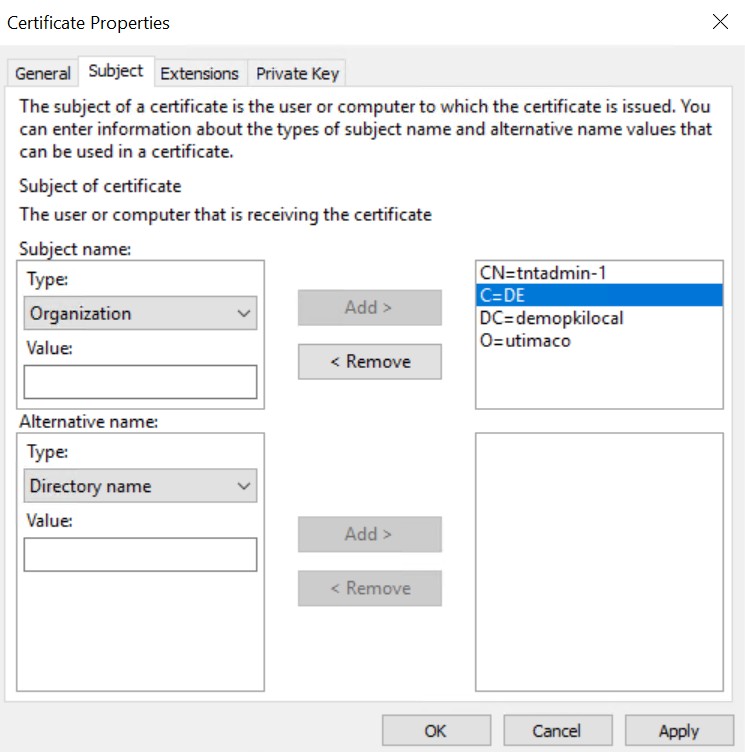
Certificate Properties Window
For a CMP Client Certificate, the content of the "Subject" field must be generated with the CN and DC.
-
Click on Extensions.
-
Add below Key usage extensions.
-
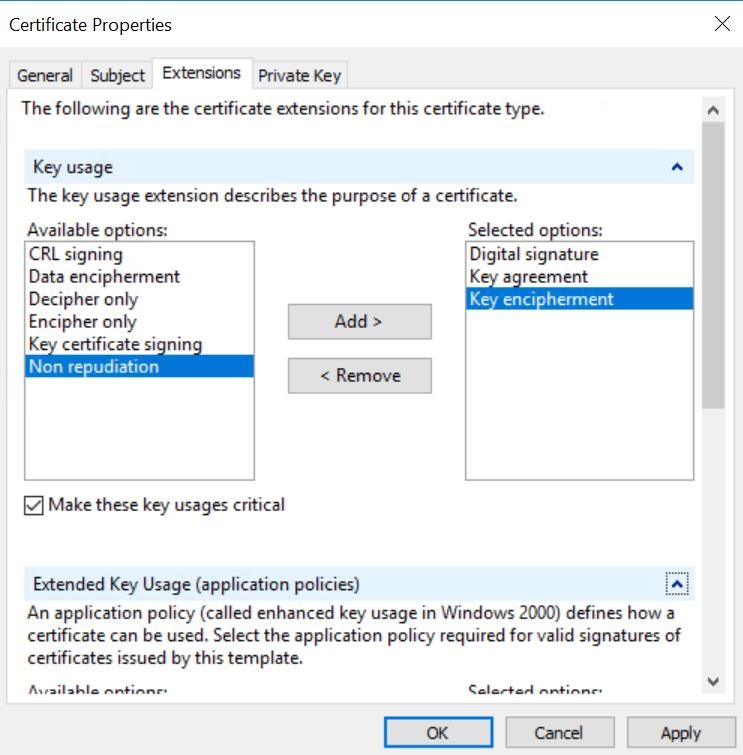
Certificate Properties window
b. From Extended Key usage select Server Authentication and Client Authentication.
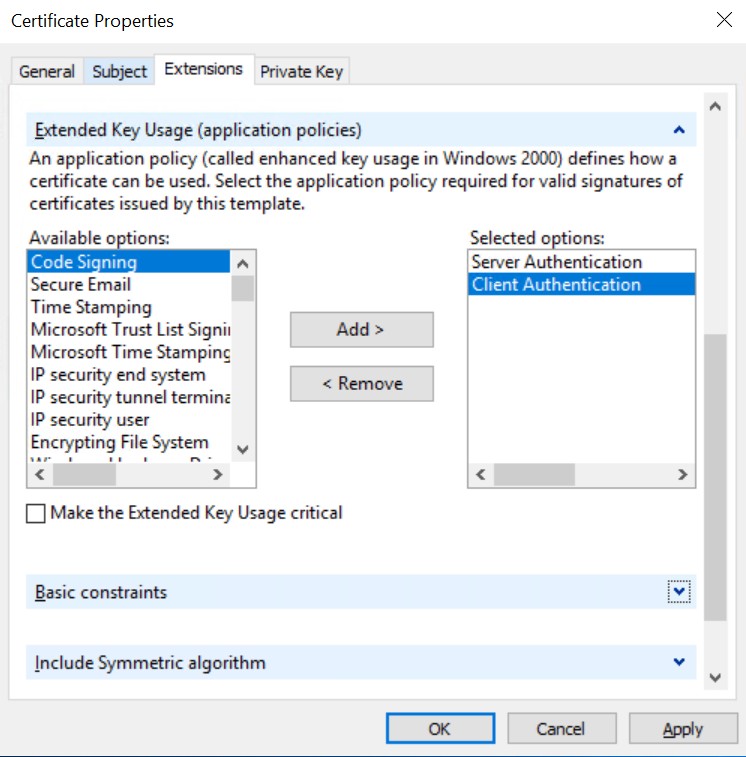
Certificate Properties window
c. Enable Basic constraints and set path length value as 0.
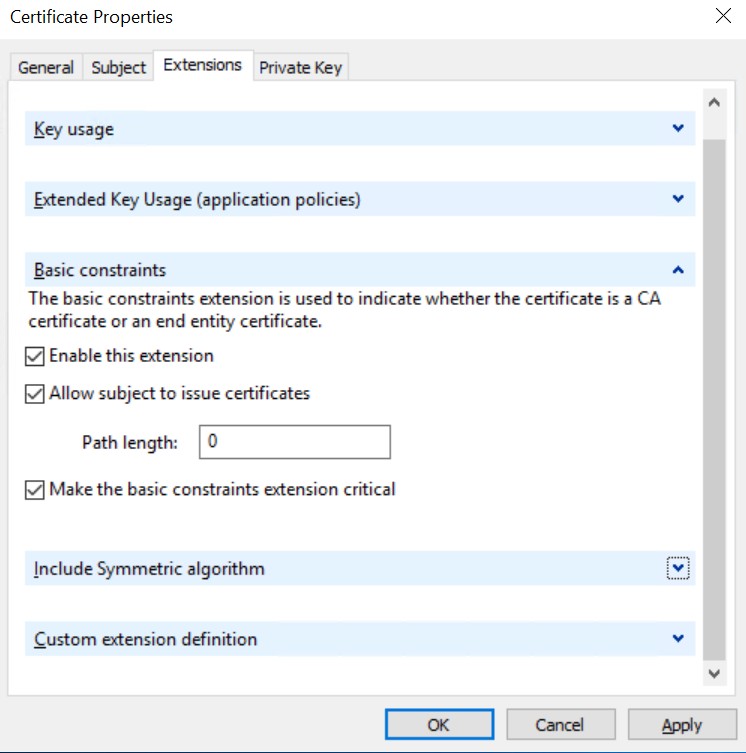
Certificate Properties window
-
Click the Private Key tab > click the drop down for Key options > select Key size: 2048 and check the option to Make private key exportable > Click OK.
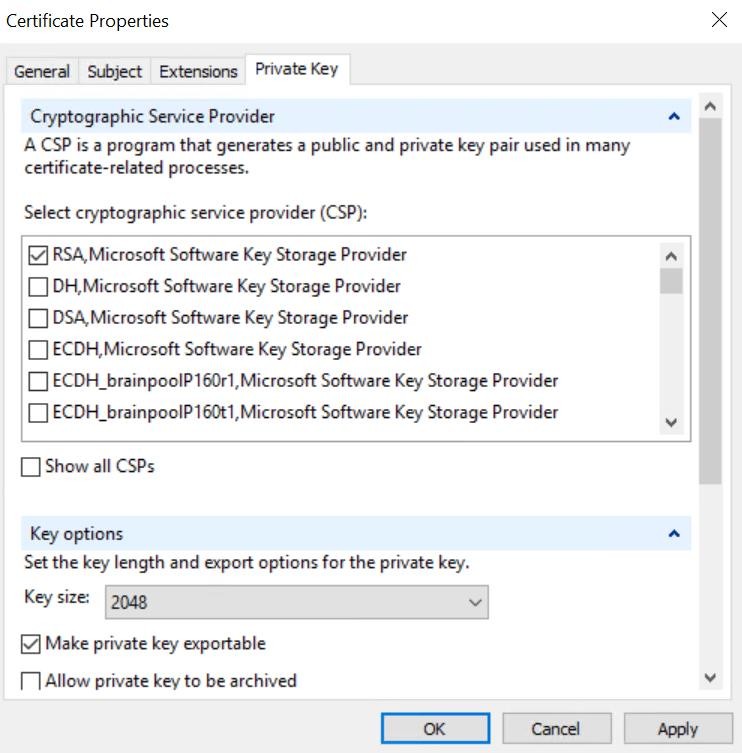
Certificate Properties window
-
Click Next > Click Browse.
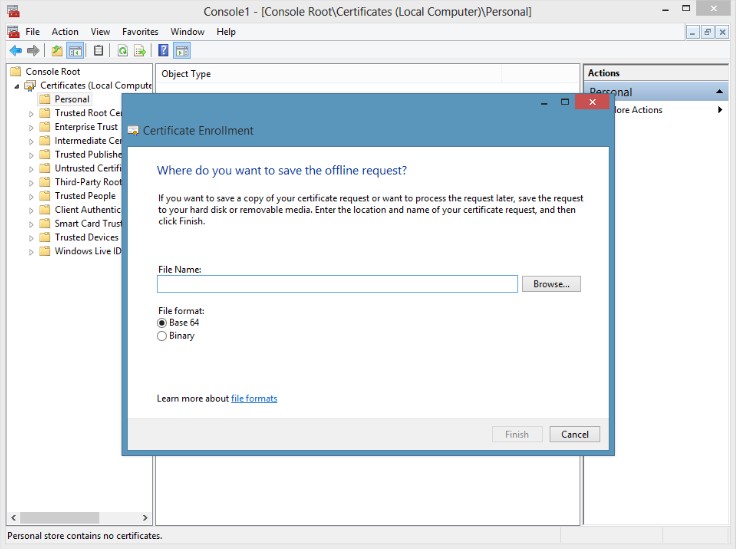
Saving Offline Request
-
Select a location to save the CSR file. Enter a name for the file and click Save.
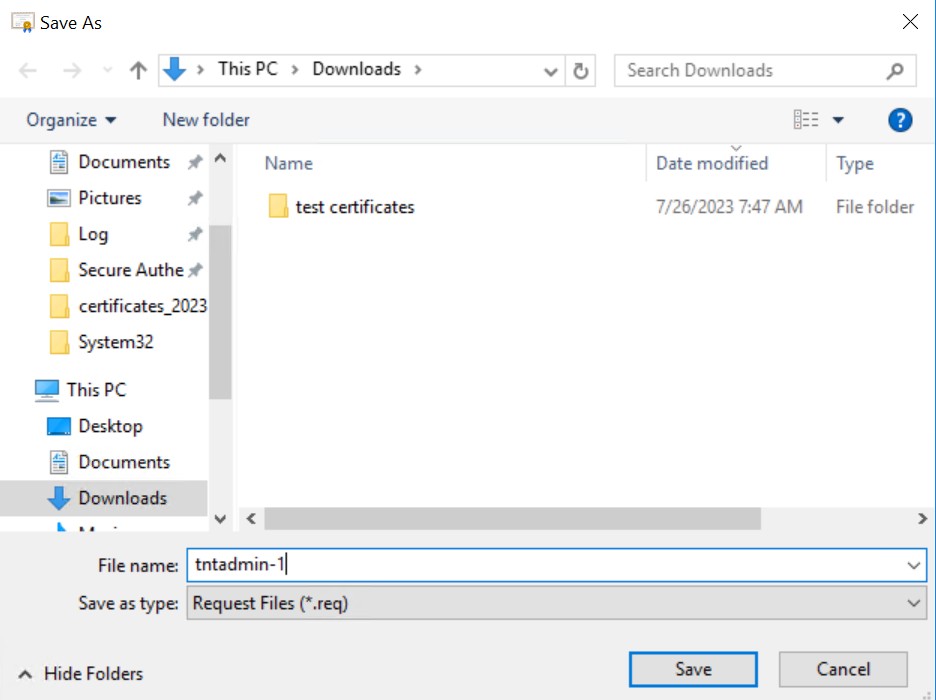
Save As window
-
Click Finish.
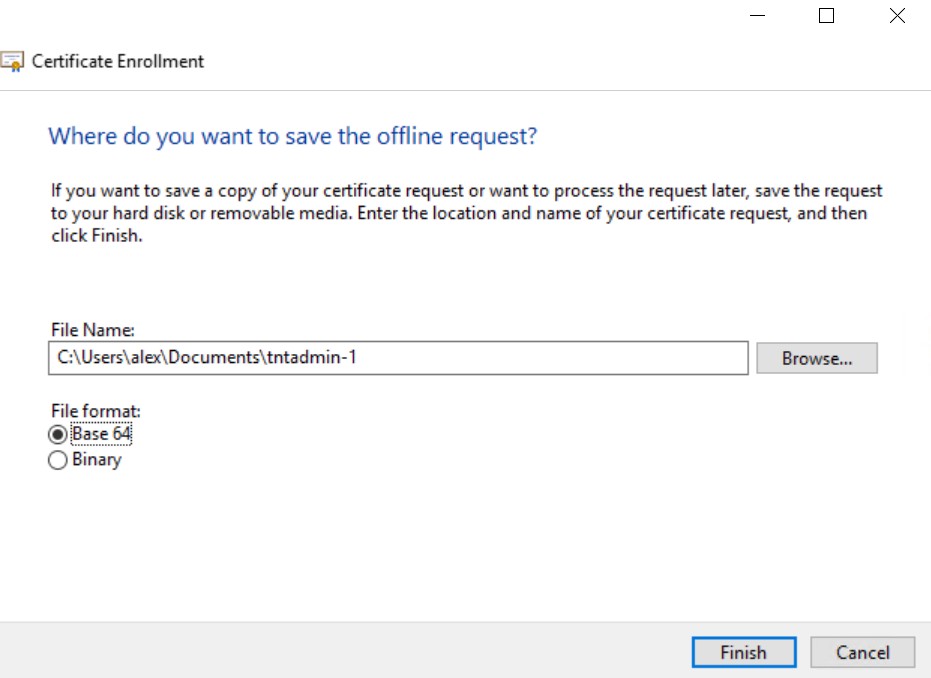
Finish CSR generation
-
The CSR file will be saved at the selected location.