
This section describes the procedure to create a new key to the ESKM Cloud.
To create a new Key
-
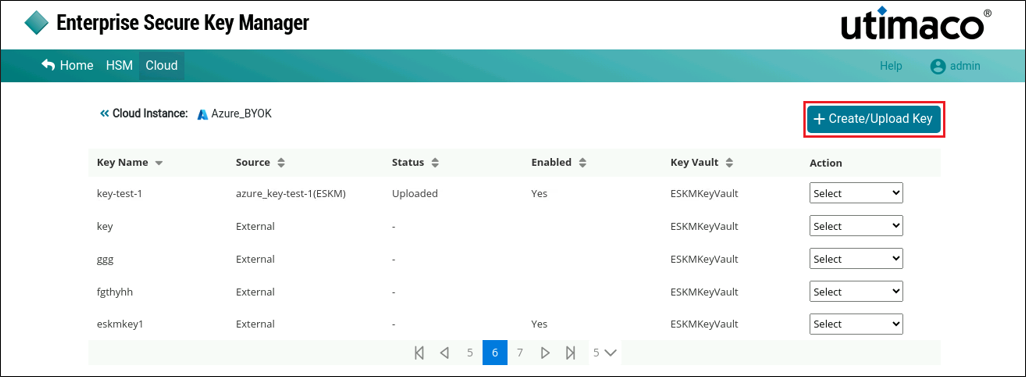
Click the Manage Keys icon to view keys list available in the cloud instance.
Create/Upload Key
-
Click +Create/Upload Key button at the top right corner of the page.
Key Selection
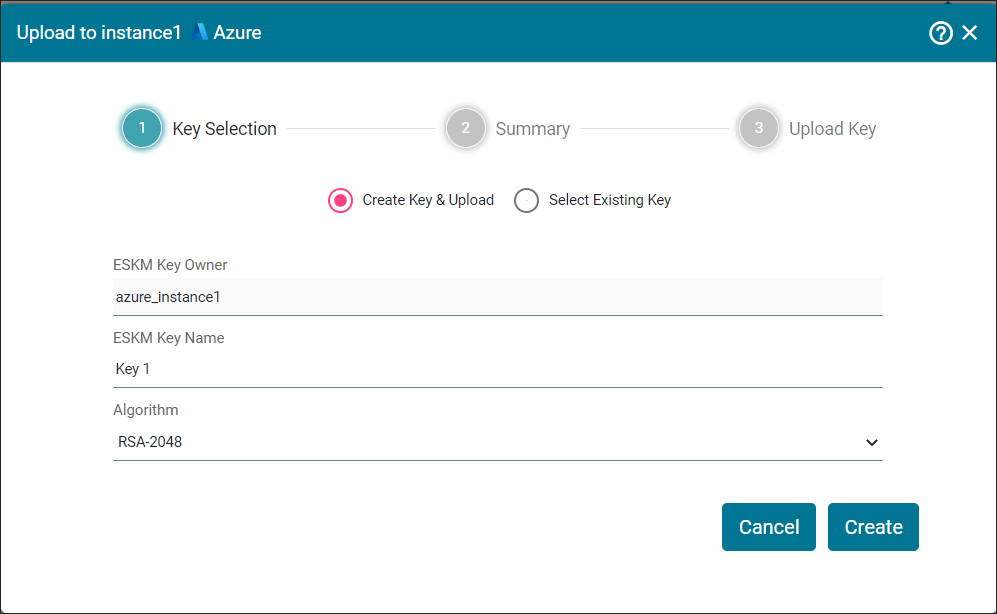
Provide a valid key name. Key names can only contain alphanumeric characters and dashes.
|
Parameters |
Description |
|---|---|
|
ESKM Key Owner |
It is a key vault identifier created in Microsoft Azure key Vault. |
|
ESKM Key Name |
Name of the key. |
|
Algorithm |
Algorithm used to generate the key in ESKM. |
Key selection - Parameters
-
Select Create New Key & Upload option (selected by default) to create/upload new key.
-
Enter ESKM Key Name and select Algorithm from the drop down. Click Create.

Review Summary
-
Review Summary and click Next. You will be navigated to Upload Key section.
Upload Key
-
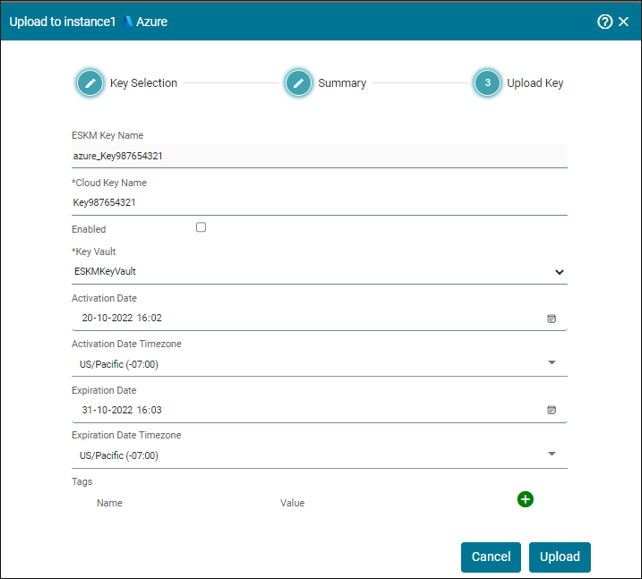
Select the Vault Key Name (by default, its value is “select”) and fill the details such as Key Vault, Enabled, Activation Date and Expiration Date. Click Upload.
|
Parameters |
Description |
|---|---|
|
ESKM key Name |
Name of the key. It combines cloud type with the ESKM key name. |
|
Cloud Key Name |
The name of the ESKM Key to be uploaded to the Microsoft Azure cloud. |
|
Enabled |
Check this box to activate the ESKM key in the Microsoft Azure key vault. |
|
Key Vault |
Name of the Key Vault created in Microsoft Azure. |
|
Activation Date |
Set the date on which the key must be activated. |
|
Activation Date Timezone |
The activation date timezone is activated based on the current time of the system. |
|
Expiration Date |
Set the expiration date by which the key must be expired. |
|
Expiration Date Timezone |
The expiration date timezone is activated based on the current time of the system. |
|
Tags |
Tag is to organize the keys in Microsoft Azure Key Vault. Multiple Tags can be assigned for a specific key. |
Parameters
Key [key_name] has been successfully uploaded to Inst1 [Azure].