
The local CA is used to sign and verify the server certificate and may also be used to sign client certificate requests. To create and install a local CA, perform the following steps:
-
Log in to the ESKM Management Console using the admin username and the password you supplied in First run, step 3a.
-
Select the Security tab.
-
In Certificates & CAs, click Local CAs.
-
Enter the information required by the Create Local Certificate Authority section of the window to create your local CA.
-
Enter a Certificate Authority Name and Common Name. These may have the same value, for example, ESKM Local CA.
-
Enter your organizational information.
-
Select the Algorithm.
-
Click Self-signed Root CA and enter the CA Certification Duration and Maximum User Certificate Duration. These values determine when the certificate must be renewed and should be set in accordance with your company’s security policies. The default value for both is 3650 days or 10 years.
-
Click Create.
-
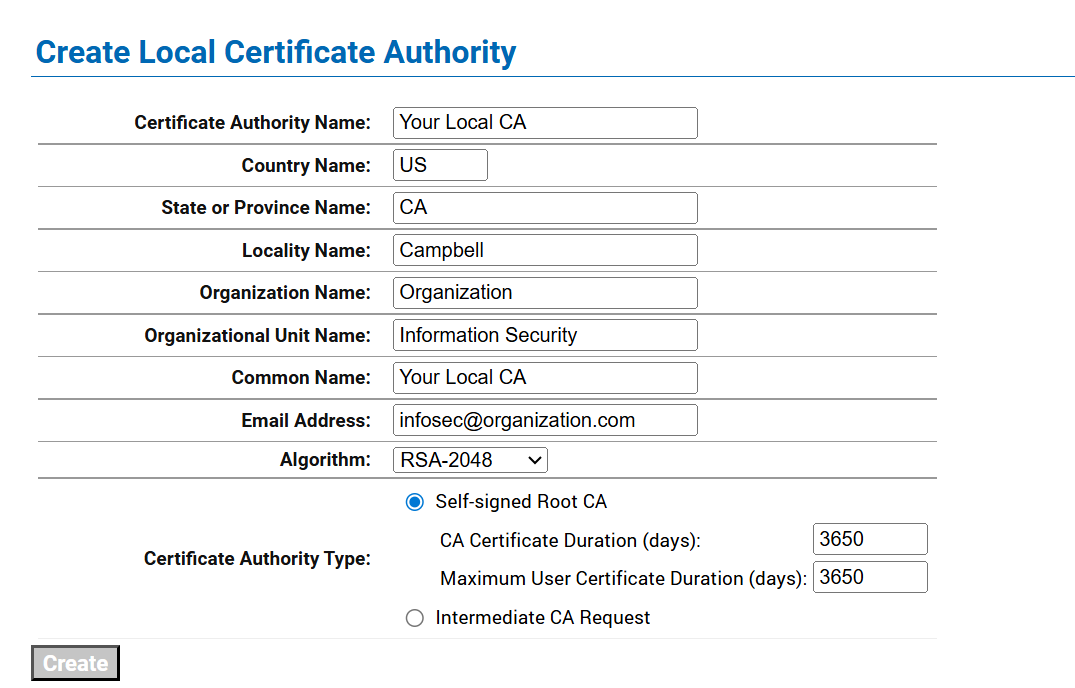
Create Local CA
-
If the local CA will be used to sign ESKM client certificate requests, add the CA to the Trusted CA list.
-
In Certificates & CAs, click Trusted CA Lists to display the Trusted Certificate Authority List Profiles.
-
Click on the Default Profile Name (not the radio button).
-
In the Trusted Certificate Authority List, click Edit.
-
From the list of Available CAs in the right panel, select the CA you created in step 4. For example, ESKM Local CA.
-
Click Add.
-
Click Save.
-
Repeat the steps above any time another local CA is needed. For example, you may want to create a KMIP Local CA to support the KMIP Certify/Re-certify operations.
If your client certificates were signed by a third-party CA, you must install the third-party CA certificate, and then add it to the Trusted CA list.
To install a third-party CA certificate, perform the following steps:
-
In Certificates & CAs, click Known CAs to display the Install CA Certificate section.
-
Enter a value for the Certificate Name and paste the CA certificate text in the Certificate field.
-
Click Install. The CA certificate will be added to the Known CAs list.
To add the third-party CA certificate to the Trusted CAs list, perform the following steps:
-
In Certificates & CAs, click Trusted CA Lists to display the Trusted Certificate Authority List Profiles.
-
Click on the Default Profile Name.
-
In the Trusted Certificate Authority List, click Edit.
-
From the list of Available CAs in the right panel, select the third-party CA you require.
-
Click Add.
-
Click Save.