
To install the CA on the second node, complete the following tasks
-
Log in as a user with Administrative privileges
-
Select Start then select Server Manager to open Server Manager
-
Select the File and Storage Services. Click Disks
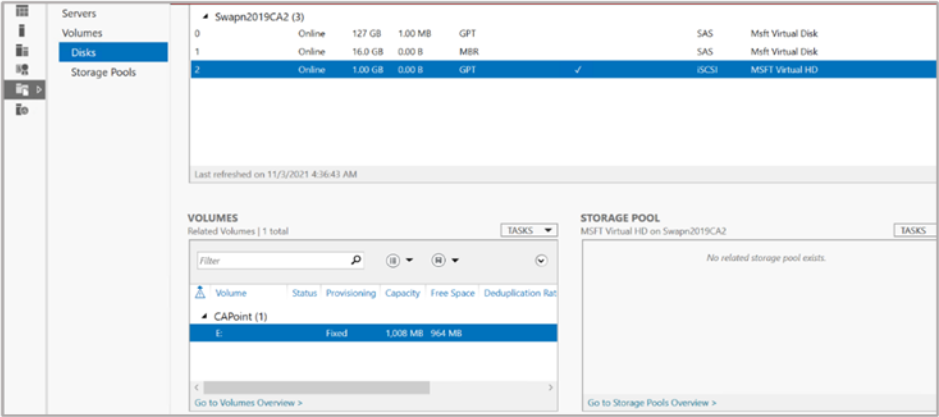
Figure 96: Server Manager window
-
Bring that the shared disk online on second cluster node
-
Copy the exported CA certificate on second cluster node
-
Import the CA certificate that was previously created on the first cluster node
|
›_ PowerShell |
|---|
|
If you are using Smartcard Authentication, the prompt will go on the PIN Pad device to insert Smartcard and enter the pin. Then press OK button on the PIN Pad.
-
To create a link between the certificate and the private key, first find the certificate serial number
|
›_ PowerShell |
|---|
|
-
And use the certutil command to repair the link
|
›_ PowerShell |
|---|
|
If you are using Smartcard Authentication, the prompt will go on the PIN Pad device to insert Smartcard and enter the pin. Then press OK button on the PIN Pad.
-
Open Server Manager under Configure this Local Sever and click Add Roles and Features
-
The Add Roles and Features Wizard displays
-
Click Next. Select radio for the Role-based or feature-based installation and click Next
-
Select radio button for a server from the server pool and select the second cluster node from the server pool and click Next
-
Select the Active Directory Certificate Services check box from the Server Roles
-
Add features that are required for Active Directory Certificate Services? window displays. To add a feature, click the Add Features button
-
Click Next
-
Click Next
-
Select the check box for Certification Authority from the Role services list and click Next
-
Click Install
-
Once installation is complete, select the link Configure Active Directory Certificate Services on the destination server the AD CS Configuration wizard displays
-
In the Credentials page of the AD CS Configuration wizard click Next
-
Select the check box for Certification Authority and click Next
-
Select Enterprise CA as Setup Type and click Next
-
Select Root CA as type of CA and click Next
-
Select the radio button for Use existing private key and choose the option Select a certificate and use its associated private key and click Next
-
Select the CA certificate that was generated on the first cluster node and click Next
-
Change the default paths for the database and log location to the share disk and Click Next
-
A dialog box displays stating that an existing database was found displays, click Yes to overwrite
-
In the Confirmation page click Configure
-
Verify that the CA service has successfully started by running the command
|
›_ PowerShell |
|---|
|